Breach input area (Water Overlay): Difference between revisions
Jump to navigation
Jump to search
No edit summary |
No edit summary |
||
| Line 1: | Line 1: | ||
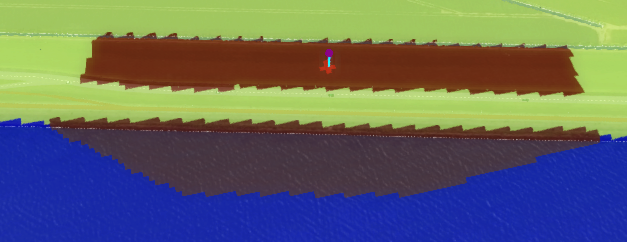
[[File:Breach_input_area.png|300px|thumb|right|Fig. 1. Breach with breach input area on the other side of the levee.]] | |||
{{Overlay keys|<onlyinclude> | {{Overlay keys|<onlyinclude> | ||
{{Overlay keys|type=row|group=Water Overlay | {{Overlay keys|type=row|group=Water Overlay | ||
| Line 8: | Line 9: | ||
}}</onlyinclude>}} | }}</onlyinclude>}} | ||
{{article end | {{article end | ||
|notes= | |notes= | ||
Revision as of 11:07, 11 February 2022
| Icon | Key | Unit | Range | Description | Default value |
|---|---|---|---|---|---|
| |
BREACH_INPUT_AREA | ID of an Area | The Area item representing the influx area for the breach. | none |
Notes
- To attach a breach input area to a breach using the configuration wizard, ensure that the desired input area does not have a BREACH_HEIGHT attribute but does have a BREACH_INPUT_AREA attribute (set to -1, for example). That area is then selectable as an input area in the configuration wizard, in the step for breaches areas.
- The breach references the breach input area by filling in the ID of the breach input area for the BREACH_INPUT_AREA attribute in the breach area.
- When a Breach input area is defined, an external water body will not be created. Subsequently, the EXTERNAL_SURFACE_LEVEL, EXTERNAL_WATER_LEVEL and EXTERNAL_AREA attributes will be ignored.


