Area Overlay: Difference between revisions
Jump to navigation
Jump to search
No edit summary |
No edit summary |
||
| (40 intermediate revisions by 7 users not shown) | |||
| Line 1: | Line 1: | ||
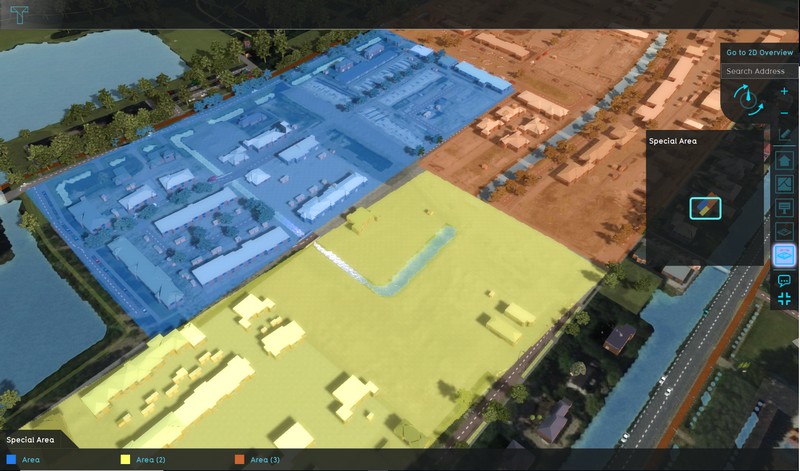
[[File:Editor_overlay_areas.jpg|thumb|300px|left|Active Area Overlay, named "Special area".]] | |||
The [[Area Overlay]] is an [[overlay]] which is used for displaying multiple [[area]]s in one overlay. By default, the overlay does not display anything. When this overlay is added to a project, it can be activated by selecting the corresponding icon on the [[navigation panel]]. When activated, it displays the active areas as selected in the areas list. The areas appear in the color as selected in the area properties. | |||
<br clear=all> | |||
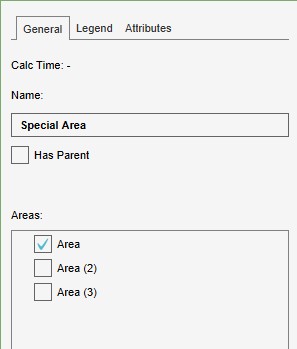
[[File:AreaOverlayGeneralTab1.jpg|thumb|right|Properties of the Area Overlay.]] | |||
An Area Overlay has 3 properties which can be adjusted on the General Tab: | |||
'''Name''' | |||
: ''The name of the overlay. This is the name that will appear as the title of the overlay, displayed when hovering over the related icon in the [[navigation panel]]. It is also the text in the [[Overlay legend panel]] of the overlay. You can change this by altering the text in the "Name" field.'' | |||
'''Has Parent''' | |||
: ''This check box indicates if the overlay has a [[Parent Overlay]] or not.'' | |||
'''Selecting areas''' | |||
: ''A list of available areas in the current project. Activating an Area for display on the Area Overlay is done by selecting the checkbox. Deactivating the area is done by deselecting the checkbox.'' | |||
[[ | ==How-to's== | ||
* [[How to add and remove an Overlay]] | |||
* [[How to edit an overlay legend|Edit an overlay legend]] | |||
* [[How to add and remove an Attribute|Add and remove an attribute]] | |||
* [[How to create an overlay for visualizing your own geographical vector information]] | |||
{{Overlay nav}} | |||
Latest revision as of 09:07, 28 September 2023
The Area Overlay is an overlay which is used for displaying multiple areas in one overlay. By default, the overlay does not display anything. When this overlay is added to a project, it can be activated by selecting the corresponding icon on the navigation panel. When activated, it displays the active areas as selected in the areas list. The areas appear in the color as selected in the area properties.
An Area Overlay has 3 properties which can be adjusted on the General Tab:
Name
- The name of the overlay. This is the name that will appear as the title of the overlay, displayed when hovering over the related icon in the navigation panel. It is also the text in the Overlay legend panel of the overlay. You can change this by altering the text in the "Name" field.
Has Parent
- This check box indicates if the overlay has a Parent Overlay or not.
Selecting areas
- A list of available areas in the current project. Activating an Area for display on the Area Overlay is done by selecting the checkbox. Deactivating the area is done by deselecting the checkbox.
How-to's
- How to add and remove an Overlay
- Edit an overlay legend
- Add and remove an attribute
- How to create an overlay for visualizing your own geographical vector information

