Editor: Difference between revisions
No edit summary |
|||
| (36 intermediate revisions by the same user not shown) | |||
| Line 1: | Line 1: | ||
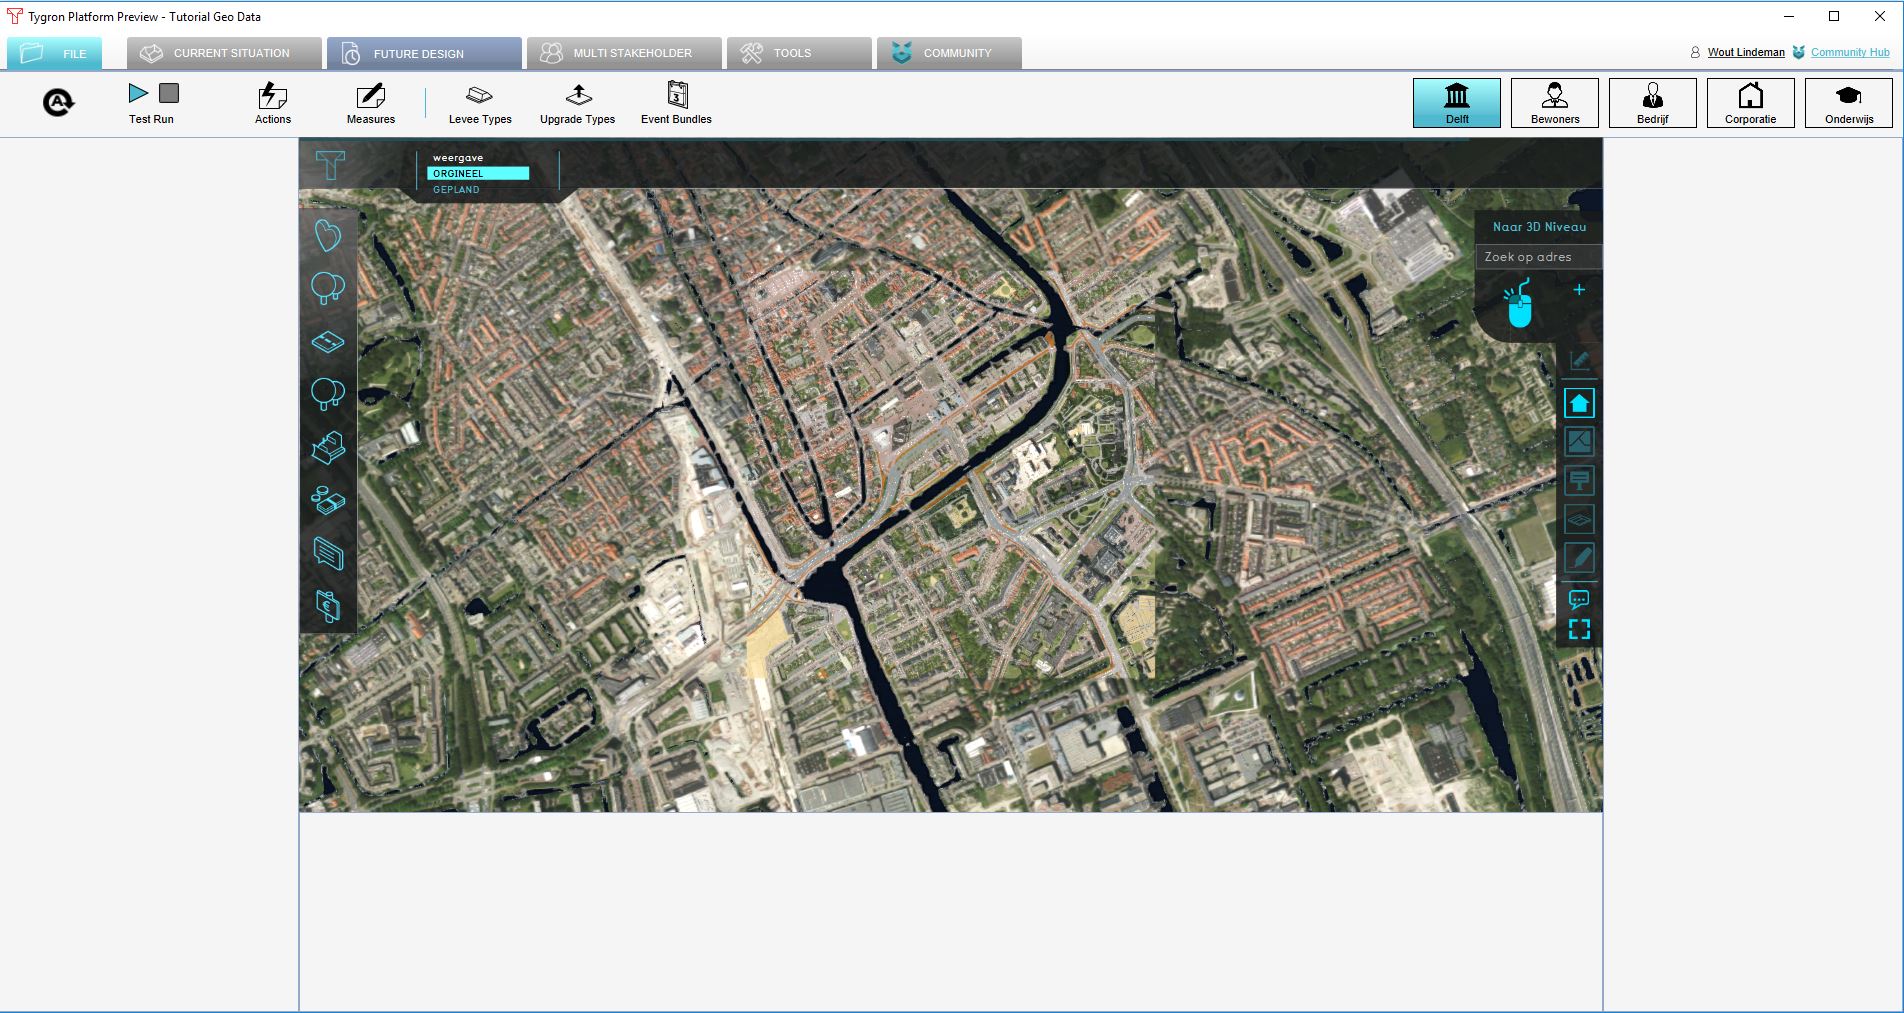
[[File:Q1-2016-EditorPanel.jpg|thumb|850px|left|The [[Editor ]]interface in the [[{{software|client}}]]. The Ribbon at the top of the screen, the Left Panel on the left side of the screen, the [[Viewer ]]interface in the center of the screen, the Right Panel on the right side of the screen, and the Bottom Panel at the bottom of the screen.]] | |||
<br clear=left> | |||
[[File:Q1-2016-EditorPanel.jpg|thumb|850px|left|The | |||
The Editor interface is subdivided in the following 5 sections: | The Editor interface is subdivided in the following 5 sections: | ||
* [[Ribbon]] | * [[Ribbon]]. This the generic header of the Editor. It is a tabbed header, which provides access to tools grouped by categories. Those categories are in organized in tabs. This makes tools accessible in a logical way. | ||
* [[Left Panel]]. This panel provides access to sub-items and functionality of the item currently selected on the ribbon bar. For example, if the Indicators button is currently selected on the ribbon bar, access to the current active indicators in the [[project]] is available. | |||
* [[Left Panel]] | * [[Right Panel]]. This panel allows you to change properties of selected items in the left panel. Often called the "Detail Panel". | ||
* [[Bottom Panel]]. This panel is used for detailed editing, and changing parameters for using the brush inside the [[3D Visualization]]. It is context-sensitive and used for example for changing indicator targets, pairing upgrades and changing environment settings. | |||
* [[Right Panel]] | * [[Viewer ]]interface. This interface allows end users to interact with a session from the perspective of a [[stakeholder]]. It is rendered on top of the [[3D Visualization]] and displays panels for various means of taking [[action]]s and inspecting the state of the project. | ||
==Maximizing viewer interface== | |||
==Maximizing | |||
<gallery widths=300px heights=200px> | <gallery widths=300px heights=200px> | ||
File:Editor_game_interface_standard.jpg|The default editor layout, with access to all available panels. | File:Editor_game_interface_standard.jpg|The default editor layout, with access to all available panels. | ||
File:Editor_game_interface_maximized.jpg|thumb|left|The editor with a maximized | File:Editor_game_interface_maximized.jpg|thumb|left|The editor with a maximized [[viewer ]]interface. This view hides the [[left panel]], the [[right panel]] and the [[Bottom_Panel|bottom panel]] of the Editor interface. | ||
</gallery> | </gallery> | ||
==Editing with multiple users== | ==Editing with multiple users== | ||
| Line 52: | Line 18: | ||
Just like the process in which a project is created, a project can be edited by multiple users at the same time. The number of users that can work simultaneously on the same project is equal to the number of [[playable stakeholder]]s in the project. Only one instance of the project can be edited at the same time. If a user is already editing a project, you can decide to [[main menu#Sub menus of the main menu|join their editing session]]. A project which is being edited cannot be opened again for editing, or opened for a session, until all users have closed their editing sessions of the project. | Just like the process in which a project is created, a project can be edited by multiple users at the same time. The number of users that can work simultaneously on the same project is equal to the number of [[playable stakeholder]]s in the project. Only one instance of the project can be edited at the same time. If a user is already editing a project, you can decide to [[main menu#Sub menus of the main menu|join their editing session]]. A project which is being edited cannot be opened again for editing, or opened for a session, until all users have closed their editing sessions of the project. | ||
{{article end | |||
|howtos= | |||
*[[How to start the Editor]] | |||
*[[List of Keyboard Shortcuts]] | |||
}} | |||
{{Editor ui nav}} | |||
[[Category:Interface]] | |||
Latest revision as of 11:12, 23 February 2023

The Editor interface is subdivided in the following 5 sections:
- Ribbon. This the generic header of the Editor. It is a tabbed header, which provides access to tools grouped by categories. Those categories are in organized in tabs. This makes tools accessible in a logical way.
- Left Panel. This panel provides access to sub-items and functionality of the item currently selected on the ribbon bar. For example, if the Indicators button is currently selected on the ribbon bar, access to the current active indicators in the project is available.
- Right Panel. This panel allows you to change properties of selected items in the left panel. Often called the "Detail Panel".
- Bottom Panel. This panel is used for detailed editing, and changing parameters for using the brush inside the 3D Visualization. It is context-sensitive and used for example for changing indicator targets, pairing upgrades and changing environment settings.
- Viewer interface. This interface allows end users to interact with a session from the perspective of a stakeholder. It is rendered on top of the 3D Visualization and displays panels for various means of taking actions and inspecting the state of the project.
Maximizing viewer interface
The default editor layout, with access to all available panels.
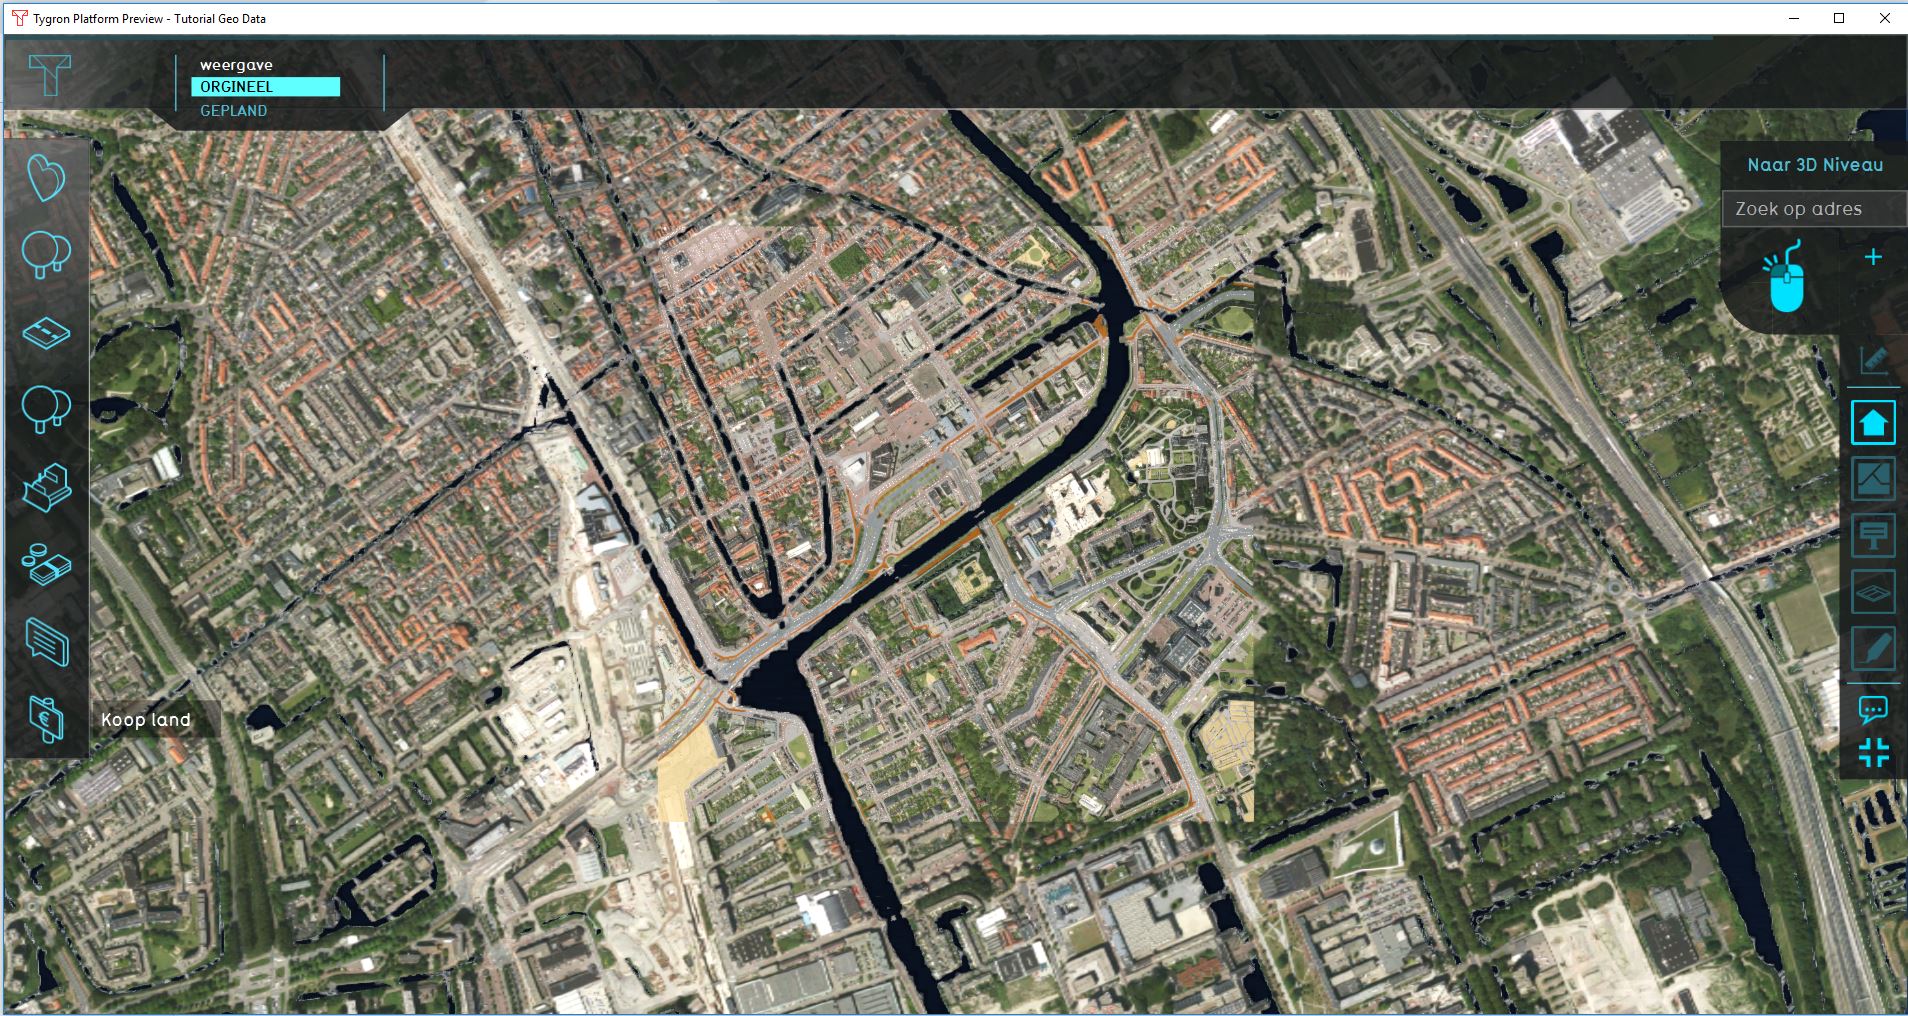
The editor with a maximized viewer interface. This view hides the left panel, the right panel and the bottom panel of the Editor interface.


Editing with multiple users
Just like the process in which a project is created, a project can be edited by multiple users at the same time. The number of users that can work simultaneously on the same project is equal to the number of playable stakeholders in the project. Only one instance of the project can be edited at the same time. If a user is already editing a project, you can decide to join their editing session. A project which is being edited cannot be opened again for editing, or opened for a session, until all users have closed their editing sessions of the project.