Vacancy Overlay: Difference between revisions
No edit summary |
No edit summary |
||
| Line 1: | Line 1: | ||
{{learned|what the Vacancy overlay is|what information the Vacancy overlay displays|how to configure the Vacancy overlay| how to add or remove the Vacancy overlay}} | {{learned|what the Vacancy overlay is|what information the Vacancy overlay displays|how to configure the Vacancy overlay| how to add or remove the Vacancy overlay}} | ||
====Vacancy==== | |||
[[File:Vacancy-Overlay.jpg|thumb|left|Optional Vacancy overlay]] | |||
: ''Main article: [[Vacancy (Overlay)]]. | |||
: ''This overlay shows all constructions in the project area which have been set as vacant in the Editor.'' | |||
<br clear=all> | |||
==What is the Vacancy overlay== | ==What is the Vacancy overlay== | ||
Revision as of 13:58, 2 April 2019
Vacancy
- Main article: Vacancy (Overlay).
- This overlay shows all constructions in the project area which have been set as vacant in the Editor.
What is the Vacancy overlay

The Vacancy overlay is an overlay that visualizes all constructions marked as vacant in the project area. This Vacancy overlay can be activated through a button under the mini map. Only one option can be set up as property for this overlay; the name of the overlay can be adjusted in the 'Name' field on the right panel when the added Vacancy overlay is selected on the left panel of the Editor.
Setting up and configuring the Vacancy overlay
The vacancy overlay reads the vacancy property of individual constructions. In other words, the Vacancy overlay does not show anything by default, unless the property 'Vacancy' has been set for the appropriate constructions first in the project area. Currently it is only possible to do this manually.
Setting up vacancy for individual constructions

Template:Editor ribbon When an individual construction is highlighted on the left panel with the list of constructions, on the right panel the construction properties become available. Directly under the 'Change Function' field (with image) marking a check box named 'Vacant' makes it possible to indicate if a construction is vacant or not. In the regular view of the Tygron Platform a large sign will now appear above the construction that was set as vacant. On the Vacancy overlay the same construction will then be marked in red on a white opaque background.
Configuring the Vacancy overlay name

The only property of this overlay that can be adjusted is the name of the overlay. Although the default name (Vacancy) already properly indicates the overlay, specific projects might require a different name for this overlay.
To change the name of the Vacancy overlay, highlight the overlay on the left menu and change the name property on the right panel.
Adding and removing the Vacancy overlay
- Select in the editor '3D World' from the ribbon
- Select 'Overlays' > 'Edit overlays' from the ribbon bar
- Select the Vacancy overlay from the drop down menu on the bottom of the left panel
- Select 'Add' from the bottom of the left panel
- Rename the overlay, if required, on the right panel
- The overlay icon will now appear under the mini map
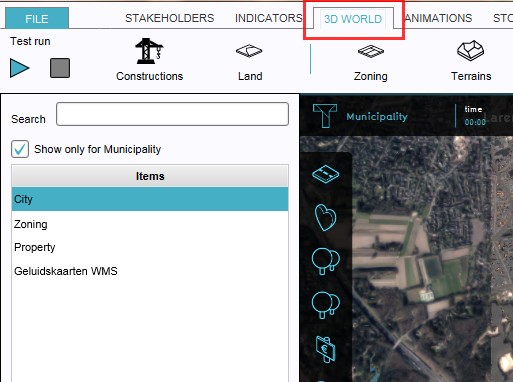
1. Select 3D World
- SelectEditOverlay.jpg
2. Select Overlays > Edit overlays
- SelectDropDown.jpg
3. Select desired overlay from drop down menu on the bottom of the left panel
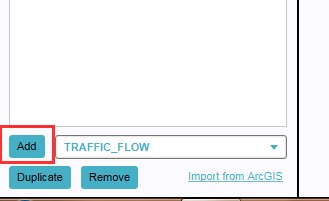
4. Select 'Add' from the bottom of the left panel
- OverlayParameters.jpg
5. Select and configure available properties on the right panel
- OverlayIconPresent.jpg
6. The overlay icon will now appear under the mini map


- Select in the editor '3D World' from the ribbon
- Select 'Overlays' > 'Edit overlays' from the ribbon bar
- Select the desired overlay from the list of active overlays on the left panel
- Select 'remove' from the bottom of the left panel
- Confirm the removal in the pop up confirmation message
1. Select 3D World
- SelectEditOverlay.jpg
2. Select Overlays > Edit overlays
- SelectOverlay.jpg
3. Select desired overlay from the list of active overlays on the left panel
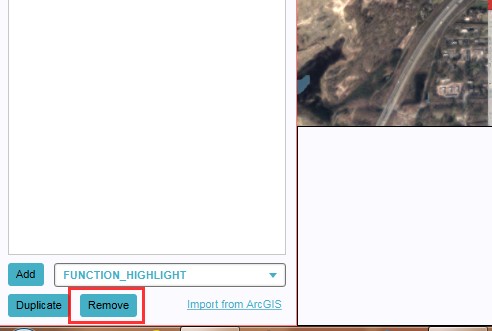
4. Select 'Remove' from the bottom of the left panel
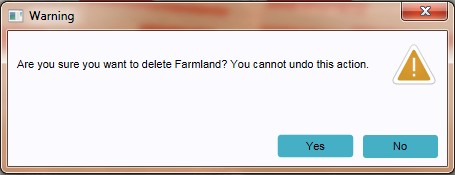
5. Confirm the removal in the pop up confirmation message

Sometimes it can be convenient to duplicate an already existing overlay. To do so, follow the steps for removal, but select 'Duplicate' in stead of 'Remove'.