Travel Distance Overlay: Difference between revisions
No edit summary |
|||
| Line 17: | Line 17: | ||
==How-to's== | ==How-to's== | ||
* [[How to add the Travel Distance Overlay]] | |||
* [[How to create a Routing area]] | |||
* [[Area#Adding, duplicating and removing areas|Adding, duplicating and removing areas]] | * [[Area#Adding, duplicating and removing areas|Adding, duplicating and removing areas]] | ||
* [[How to add and remove an Overlay]] | * [[How to add and remove an Overlay]] | ||
Revision as of 10:07, 15 January 2021
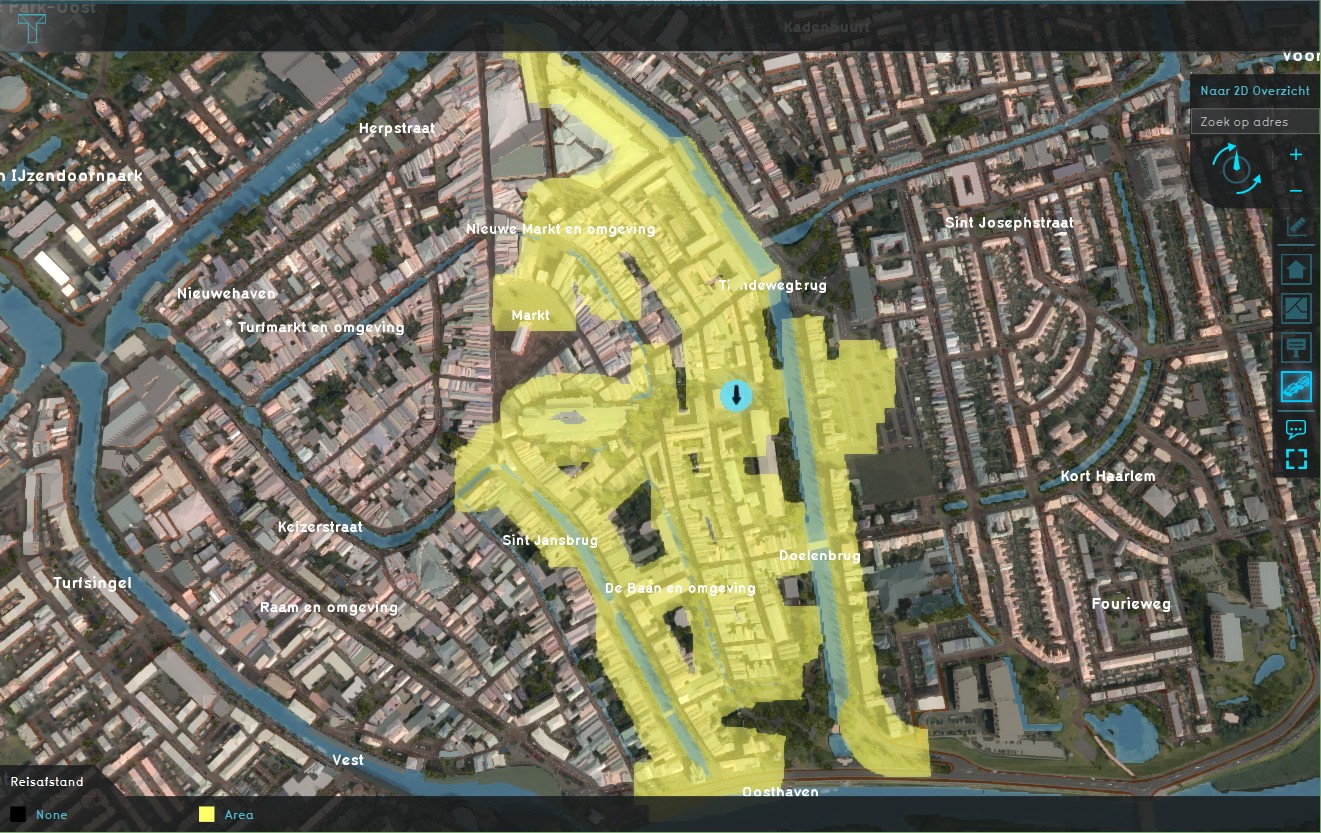
The Travel Distance Overlay is a grid overlay which shows a travel distance from a specific starting point (routing area). The traffic is split between motorized and pedestrian traffic, based on the road type (roads vs sidewalks). The overlay also uses a fill distance to fill up an area adjacent to the roadways, to connect constructions such as housing. The calculation model behind the overlay is based on the same algorithm as used in the Watershed Overlay.
The travel distance overlay can be used to visualise the travel distance from certain areas of interest (schools, shops, sports centers, etc), based on the road map in the project area. If we take a school as example, we can visualise which houses (and other buildings), within a range of 20m to a connecting sidewalk, are within a walking distance of 500m from the school of the example.
Keys
Attributes
How-to's
- How to add the Travel Distance Overlay
- How to create a Routing area
- Adding, duplicating and removing areas
- How to add and remove an Overlay
- Edit an overlay legend
