|
|
| (113 intermediate revisions by 6 users not shown) |
| Line 1: |
Line 1: |
| {{stub}} | | [[File:San_francisco.png|thumb|300px|right|Custom geometries of San Francisco from an I3S Service, visualized in the {{software}}]] |
| | Indexed 3D Scene Layer Specification (I3S){{ref|i3s}} is a format for large 3D Geo datasets. The specification was mainly designed for streaming large 3D visualization data over the web. The specification was originally designed by Esri and was adopted as a Community Standard by the OGC (Open Geospatial Consortium) in 2017. In ArcGIS software, an I3S dataset can be visualized using a Scene Layer. |
|
| |
|
| {{learned|what a SLPK is|how to create a SLPK file|how to upload SLPK data into the {{software}}}} | | In the {{software}} it is possible to add your own 3D models as [[Custom Geometries]]. A format for these models which the {{software}} supports is I3S, along with the other format [[CityGML]]. |
| [[Category:Files]] | |
|
| |
|
| ==What is SLPK?==
| | Different other formats, such as BIM data or a SketchUp model, can be converted to the I3S format with a SLPK file. Read on to learn more about this. |
| A Scene Layer Package (SLPK) file is an openly published file format for 3D geospatial data, designed as a package for storage or exchange that captures all resources for a "scene layer" structured according to the Indexed 3D Scene Layer (I3S) specification. The I3S/SLPK specification originates from Esri. A scene layer displays one of four data types: points, point cloud, 3D objects, or an integrated mesh.
| |
|
| |
|
| ==How to create a SLPK?== | | {{clear}} |
| In this documentation we will look on how to export a SLPK with ArcGIS Pro. To learn more about ArcGIS Pro visit ESRI's [https://pro.arcgis.com/en/pro-app/help/main/welcome-to-the-arcgis-pro-app-help.htm ArcGis Pro Documentation].
| | ==I3S and SLPK == |
| In order to export a 3d model as a SLPK it first must be imported into ArcGIS Pro and Georeferenced if it has no world coördinates. ArcGIS Pro allows for the following file formats to be imported:
| | A Scene Layer Package (SLPK) is a file format for the storage/exchange of one or more I3S layers. SLPK's can be used to import both into your [[project]] once it has been created. |
|
| |
|
| *DWG (Drawing) Used in CAD packages. Can be exported from most 3d animation packages.
| | === 2D versus 3D === |
| *OBJ (Wavefront object) Used in most 3d animation packages like Autodesk 3dsmax and Maya.
| | Generally, I3S Services and SLPK files are used to import [[Custom Geometries]], that provide an alternative 3D visualization, for existing or new [[Building]]s. |
| *DAE (Collada) Used in most 3d animation packages like Autodesk 3dsmax and Maya.
| | I3S services and SLPK files can also be used to import 2D spatial data for items such as [[Area]]s and [[Terrain]]s. However, the support for additional attributes is currently limited. |
| *3DS (3d studio) Used as an exported file from Autodesk 3dsmax.
| |
| *FLT (OpenFlight) Used in MultiGen Creator.
| |
| *WRL (Virtual Reality Modeling Language File)A VRML file format for representing 3D vector graphics.
| |
|
| |
|
| There are differences in how a DWG file is added to your project from other 3d file formats. We will explain both methods below.
| | {{article end |
| | |howtos= |
| | * [[How to import i3s scene layer in new project]] |
| | * [[How to create an SLPK file]] |
| | * [[How to import an SLPK file]] |
| | * [[How to import an SLPK file for 2D Spatial data]] |
| | * [[How to import 3D Models from ArcGIS Online]] |
| | * [[How to convert a Revit model to a SLPK file using ArcGIS Pro]] |
| | |seealso= |
| | * [[Custom Geometries]] |
| | |references= |
| | <references> |
| | {{ref|i3s |
| | |name=Indexed 3D Scene Layers (I3S) |
| | |author= |
| | |page= |
| | |source=Open Geospatial Consortium |
| | |link=https://www.ogc.org/standard/i3s/ |
| | |lastvisit=5-10-2023 |
| | }} |
| | </references> |
| | }} |
|
| |
|
| ===Creating a new ArcGis project===
| | {{GeoDataOverview}} |
| To add a 3d model like CAD or OBJ you should first create a new project in ArcGis Pro. When starting a new project make sure that you select a local Scene from the Blank Templates section. You can convert a local scene to a global scene after you have imported your model(s).
| |
| | |
| ===Adding a DWG file to ArcGIS Pro===
| |
| If you are working with CAD data follow this procedure to import a DWG file:
| |
| | |
| {{editor steps|title=import a DWG file into ArcGis|In ArcGis go to the "Map" tab and select "Add Data"|Choose the DWG file|Select Multipatch}} | |
| | |
| ===Importing other 3d files to ArcGis Pro===
| |
| To import other 3d files like OBJ, DAE, 3DS, FLT or WRL follow this procedure:
| |
| | |
| {{editor steps|title=import 3d files|In ArcGis go to the "Analysis" Tab and select "Tools".|On the right pane select the "Import 3D Files" tool or type it in the search bar to find it.|In the "Input files" field click on the folder icon next to the field and browse to the 3d file you want to import|A name will be automatically generated in the "Output Multipatch Feature Class" field.|Select a Coordinate system from the dropdown menu or select an other system by clicking on the grid sphere icon next to the field.|Select "Y is Up" only if your 3d model was exported from a package wich uses Z is up.|Click on "Run" at the lower right of the pane.|After it is finished ArcGis will have created a Multipatch feature which can be located on the Contents Pane on the left. Note that your original 3d imported file is also present, but we will be using the multipatch for further conversion to SLPK.}}
| |
| | |
| ===Georeferencing your imported model in ArcGis===
| |
| Imported models, if they are created in a package wich does not have global coordinates, are imported without a global reference for the location on the map.
| |
| To move your imported model to the right location on the map follow this procedure:
| |
| | |
| {{editor steps|title=Georeference 3d models|In ArcGis, select your 3d object from the Contents pane or the Viewport.|Go to the "Edit" tab. The tools section will appear|Select the "Move" tool and drag the 3d model along one of the axes to translate it on the map to the desired location.|If desired, the object can be rotated and/or scaled with the "Rotate" and "Scale" tools|Make sure that the object is at the proper height relative to the ground|}}
| |
| | |
| ===Exporting 3d files to SLPK in ArcGis===
| |
| After importing and Georeferencing your model(s) you can export them to a SLPK file by following this procedure:
| |
| | |
| {{editor steps|title=Export to SLPK|In ArcGis go to the "Analysis" Tab and select "Tools".|On the right pane navigate to the "Feature Class to Feature Class" tool or type it in the search bar to find it.|In the "Input Features" field select the Multipatch feature of the imported object by clicking on the dropdown in the field to select it. Make sure it is the Multipatch version and not the original object|The Output location will be a .gdb (database file) with the project as a name. Leave the default name as is or rename it if you prefer.|In the "Output Feature Class" field type in a name.|This will save the Multipatch to the database.|Click on "Run" at the bottom right of the pane.|Go to the go to the "Analysis" Tab and select "Tools" again.|On the right pane navigate to the "Layer 3D to Feature Class" tool or type it in the search bar to find it.|In the "Input Feature Layer" field select the multipatch feature like before.|An automatic name will be generated in the "Output Feature Class" field. Usually it will append a "_Layer3DToF1" tag after the Multipatch name. Leave as default or rename it if you want. Make sure that you can identify the name because we will be needing it in the final step.|Check "Disable Color and Texture" only if you do not want these features to be converted.|Click on "Run" at the bottom right of the pane.|Finally go to the "Analysis" Tab and select "Tools" again.|On the right pane navigate to the "Create 3D Object Scene Layer Package" tool or type it in the search bar to find it.|In the "Imput Dataset" field select the created Layer3d file form the previous steps.|In the "Output Scene Layer Package" field type in the name for the SLPK file wich will be created and choose the location for the file to be saved.|In the "Output Coordinate System" dropdown field select this projects system or select a new one by clicking on the grid sphere icon on the right of the field.|Optimize the textures for various platform by choosing an option from the "Texture Optimization" dropdown field or leave at the default setting.|Click on "Run" at the bottom right of the pane.|This will create a SLPK file.}}
| |
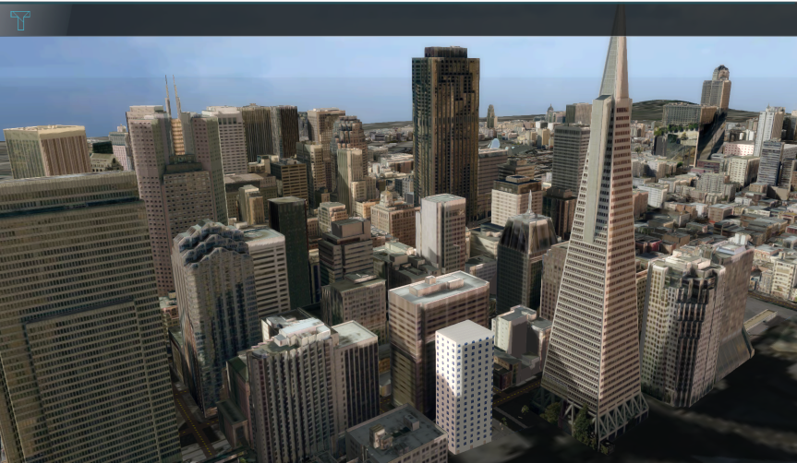
Custom geometries of San Francisco from an I3S Service, visualized in the Tygron Platform
Indexed 3D Scene Layer Specification (I3S)[1] is a format for large 3D Geo datasets. The specification was mainly designed for streaming large 3D visualization data over the web. The specification was originally designed by Esri and was adopted as a Community Standard by the OGC (Open Geospatial Consortium) in 2017. In ArcGIS software, an I3S dataset can be visualized using a Scene Layer.
In the Tygron Platform it is possible to add your own 3D models as Custom Geometries. A format for these models which the Tygron Platform supports is I3S, along with the other format CityGML.
Different other formats, such as BIM data or a SketchUp model, can be converted to the I3S format with a SLPK file. Read on to learn more about this.
I3S and SLPK
A Scene Layer Package (SLPK) is a file format for the storage/exchange of one or more I3S layers. SLPK's can be used to import both into your project once it has been created.
2D versus 3D
Generally, I3S Services and SLPK files are used to import Custom Geometries, that provide an alternative 3D visualization, for existing or new Buildings.
I3S services and SLPK files can also be used to import 2D spatial data for items such as Areas and Terrains. However, the support for additional attributes is currently limited.
How-to's
See also
References
