Cinematic: Difference between revisions
No edit summary |
No edit summary |
||
| (34 intermediate revisions by 3 users not shown) | |||
| Line 1: | Line 1: | ||
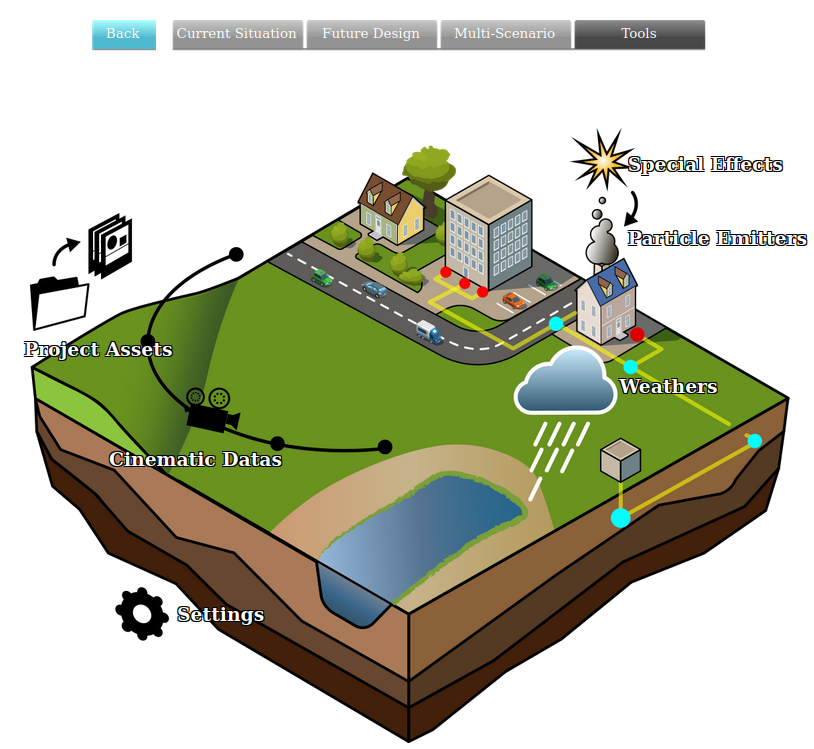
[[File:Api_tools_visual.png|thumb|right|400px|[[Cinematic Data]]s in relation to [[Special Effect]]s and [[Environment]]al effects]] | |||
In the {{software}}, a cinematic is an automated movement of the viewport-camera in the [[3D Visualization]] along predefined [[Key Point]]s. While watching a cinematic, a [[Stakeholder]] is unable to take any [[actions]]. When the cinematic ends, the [[Cinematic camera]] switches to the [[Camera|last selected camera mode]], directing its view based on the last [[Key Point]]. | |||
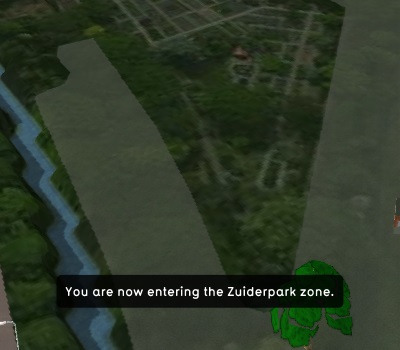
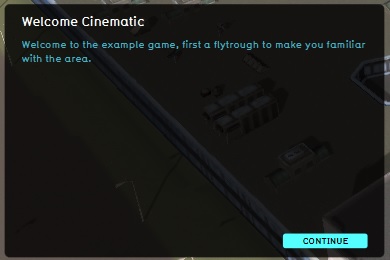
A Cinematic can display text to a [[Stakeholder]] when necessary. This can happen in two ways. The text can be displayed as a subtitle, while the camera continues to move in the cinematic. Alternatively, displaying the text can pause the cinematic, until the user confirms they wish to continue. | |||
Finally, [[Event Bundle]]s can also be fired at [[Key Point]] which can affect the [[3D Visualization]], such as: | |||
* Activate an [[Overlay]] | |||
* Start [[Weather]] effects | |||
* Activate [[Special Effect]]s | |||
* Plan a [[Measure]] | |||
<gallery | <gallery heights=200px widths=300px> | ||
Image:cinematics-subtitle.jpg|Text without pausing the cinematic | Image:cinematics-subtitle.jpg|Text without pausing the cinematic | ||
Image:cinematics-text.jpg|Text during a pause in the cinematic | Image:cinematics-text.jpg|Text during a pause in the cinematic | ||
| Line 14: | Line 16: | ||
==When to use cinematics== | ==When to use cinematics== | ||
Cinematics are generally used for exposition to the user. When it is necessary to provide information to a user, or to direct their attention to a specific predefined location in the 3D | Cinematics are generally used for exposition to the user. When it is necessary to provide information to a user, or to direct their attention to a specific predefined location in the 3D Visualization, this can be done using a cinematic. Because a cinematic takes away the user's ability to move the camera themselves, and to take actions, a cinematic is best used for vital information which only has to be provided once. An example of this is an introduction to the area at the start of a [[Planning Session]]. | ||
By default, a welcome cinematic is present in each project, automatically generated when the project is created. This cinematic is displayed to all stakeholders at the start of the | By default, a welcome cinematic is present in each project, automatically generated when the project is created. This cinematic is displayed to all stakeholders at the start of the planning session, and is a brief introduction of the zones present in the 3D Visualization. | ||
==Creating and editing cinematics== | ==Creating and editing cinematics== | ||
{{editor location|Cinematics}} | {{editor location|Cinematics}} | ||
In the [[editor]], it is possible to create, duplicate, edit and delete cinematics in a project. It is also possible to create | In the [[editor]], it is possible to create, duplicate, edit and delete cinematics in a project. It is also possible to create Key Points, or remove Key Points from a cinematic. | ||
In the following how to's these functions are explained. | |||
{{article end | |||
|howtos= | |||
{{ | |||
* [[How to create a Cinematic]] | * [[How to create a Cinematic]] | ||
* [[How to create or remove Cinematics]] | * [[How to create or remove Cinematics]] | ||
* [[How to edit Cinematics]] | * [[How to edit Cinematics]] | ||
* [[How to edit | * [[How to edit Key Points]] | ||
* [[How to edit the Camera Position]] | * [[How to edit the Camera Position]] | ||
* [[How to couple Cinematics to Stakeholders]] | |||
* [[How to create an HD Movie or Video Recording from the cinematic]] | * [[How to create an HD Movie or Video Recording from the cinematic]] | ||
* [[How to set a Cinematic to play when a Measure is enacted]] | |||
* [[How to create an Action to show a Cinematic]] | |||
* [[How to set a Cinematic to play at the start of a Level]] | |||
|seealso= | |||
* [[Cinematic camera]] | |||
* [[Cinematic edit camera]] | |||
}} | |||
{{Editor tools nav}} | |||
Latest revision as of 12:16, 8 November 2023
In the Tygron Platform, a cinematic is an automated movement of the viewport-camera in the 3D Visualization along predefined Key Points. While watching a cinematic, a Stakeholder is unable to take any actions. When the cinematic ends, the Cinematic camera switches to the last selected camera mode, directing its view based on the last Key Point.
A Cinematic can display text to a Stakeholder when necessary. This can happen in two ways. The text can be displayed as a subtitle, while the camera continues to move in the cinematic. Alternatively, displaying the text can pause the cinematic, until the user confirms they wish to continue.
Finally, Event Bundles can also be fired at Key Point which can affect the 3D Visualization, such as:
- Activate an Overlay
- Start Weather effects
- Activate Special Effects
- Plan a Measure
When to use cinematics
Cinematics are generally used for exposition to the user. When it is necessary to provide information to a user, or to direct their attention to a specific predefined location in the 3D Visualization, this can be done using a cinematic. Because a cinematic takes away the user's ability to move the camera themselves, and to take actions, a cinematic is best used for vital information which only has to be provided once. An example of this is an introduction to the area at the start of a Planning Session.
By default, a welcome cinematic is present in each project, automatically generated when the project is created. This cinematic is displayed to all stakeholders at the start of the planning session, and is a brief introduction of the zones present in the 3D Visualization.
Creating and editing cinematics
In the editor, it is possible to create, duplicate, edit and delete cinematics in a project. It is also possible to create Key Points, or remove Key Points from a cinematic. In the following how to's these functions are explained.
How-to's
- How to create a Cinematic
- How to create or remove Cinematics
- How to edit Cinematics
- How to edit Key Points
- How to edit the Camera Position
- How to couple Cinematics to Stakeholders
- How to create an HD Movie or Video Recording from the cinematic
- How to set a Cinematic to play when a Measure is enacted
- How to create an Action to show a Cinematic
- How to set a Cinematic to play at the start of a Level
See also


