GIF animation: Difference between revisions
Jump to navigation
Jump to search
 Tools
Tools
No edit summary |
No edit summary |
||
| Line 6: | Line 6: | ||
|Select the [[Overlay]] from which you want to create a GIF | |Select the [[Overlay]] from which you want to create a GIF | ||
|Select in the editor ''Tools'' from the ribbon | |Select in the editor ''Tools'' from the ribbon | ||
| | |Click on the ''Screenshot'' button to open the Screenshot panel. | ||
| | |Select the option ''Overlay Animation (GIF)'' for the type option. | ||
| | |Select HD Overlay when taking a screenshot of an overlay and you want a higher resolution (less gritty). | ||
|Optionally | |Optionally adjust the duration of the animations with the GIF (sec) option. | ||
| | |Make the animation file smaller by adjusting the Scale option. | ||
|Make the animation faster by adjusting the frame step size. This causes frames to skip. | |||
|Adjust the starting or ending frame to zoom in on a part of the overlay's animation. | |||
|Finally, select the loop options to continuously repeat the resulting animation. | |||
}} | |||
<gallery> | <gallery> | ||
Revision as of 16:16, 6 November 2023
The Tygron Client offers an option to create a GIF Animation from Overlays with timeframes. This option offers an alternative to recording a Video or taking a Screenshot from a simulation.
How to create a GIF
GIF animation:
- Select the Overlay from which you want to create a GIF
- Select in the editor Tools from the ribbon
- Click on the Screenshot button to open the Screenshot panel.
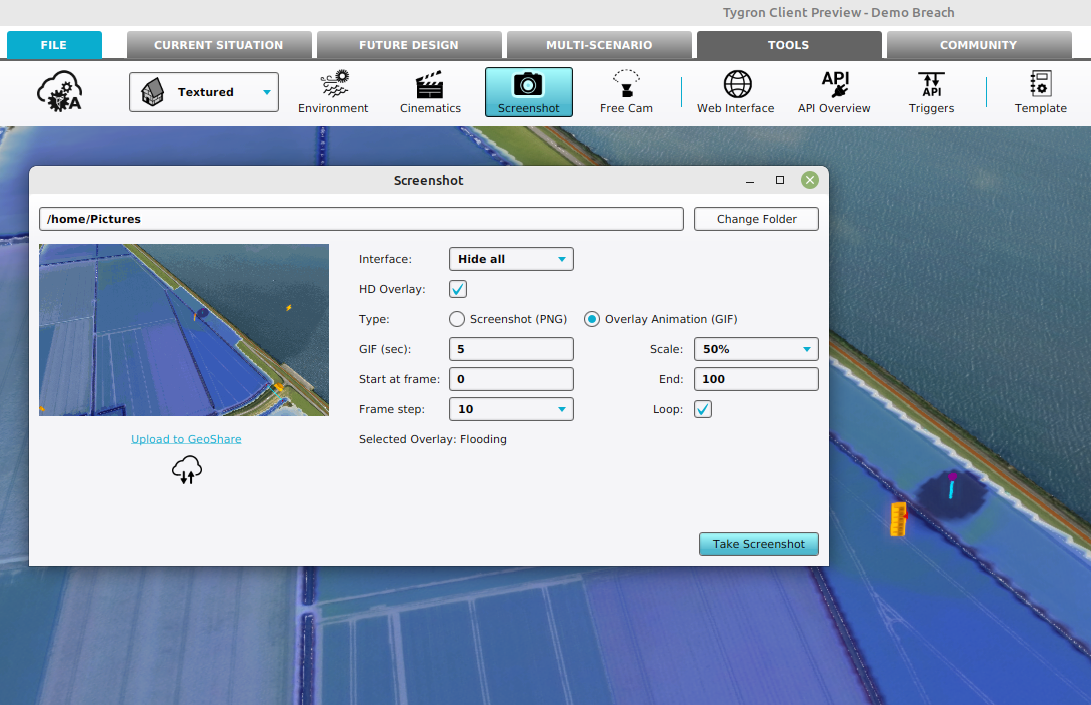
- Select the option Overlay Animation (GIF) for the type option.
- Select HD Overlay when taking a screenshot of an overlay and you want a higher resolution (less gritty).
- Optionally adjust the duration of the animations with the GIF (sec) option.
- Make the animation file smaller by adjusting the Scale option.
- Make the animation faster by adjusting the frame step size. This causes frames to skip.
- Adjust the starting or ending frame to zoom in on a part of the overlay's animation.
- Finally, select the loop options to continuously repeat the resulting animation.
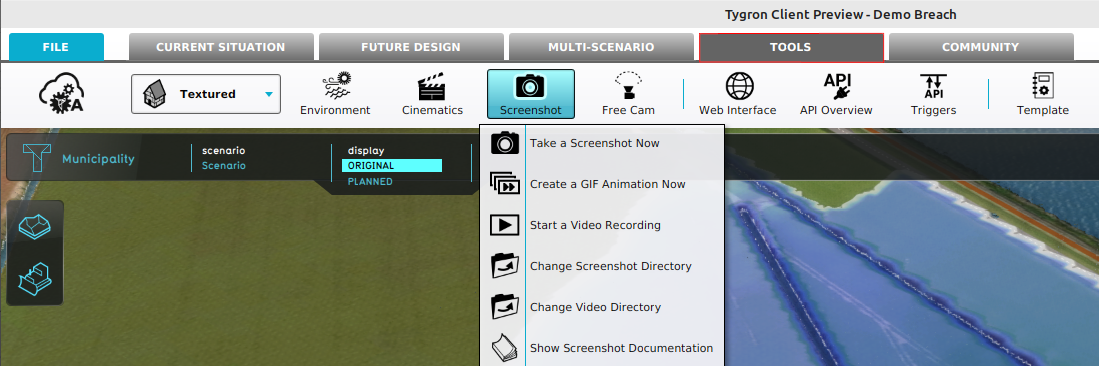
Select the Tools header in the Editor

Select the Screenshot ribbon bar
Select the 'Take a Screenshot Now' option

Notes
- After taking a screenshot or recording a GIF animation, it can be saved directly to the Geo Share.