How to setup a flooding overlay with iterations

This section describes a technical aspect, and is mainly for advanced users.
This how-to explains setting up a project such that it is iterated, with each iteration performing a part of the total simulation time of a Flooding Overlay. An indicator excel is used to progress the partial start and end time of the simulation. Combo Overlays of Flooding Overlay results, configured with the previous option, serve as in and output for the Flooding Overlay. Relevant results are captured using an Iteration Overlay.
How to setup a flooding overlay with iterations:
- Open a project in the editor
- Hover over the Calculation Cloud in the ribbon.
- Click on the link named '1 Iteration'
- Provide a new amount of iterations. For example 4.
- Press OK to confirm.
- Click on Overlays in the ribbon.
- Add or select an existing Flooding Overlay.
- In the Water Overlay detail panel, click on Configuration Wizard
- With the Water Overlay Wizard opened, continue to the Output Overlays step.
- Click on the link named 'Iteration Loop', found on the right next to Extra Attributes.
- Read the Warning Dialog window, and confirm with Create Loop.
- Read the changes made to the project in the Message Dialog window, and confirm with OK.
- Close the wizard.
- Click on the Calculation Cloud in the ribbon to recalculate the project.
-
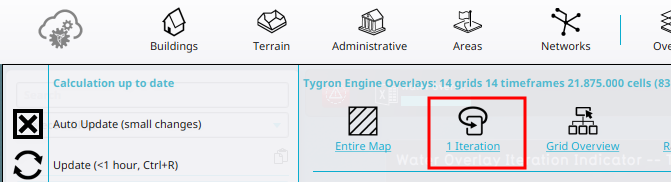 The Iterations link found in the Calculation panel.
 -
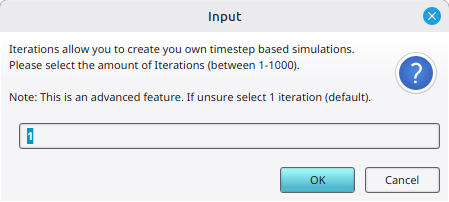 Input dialog for setting the amount of iterations.
 -
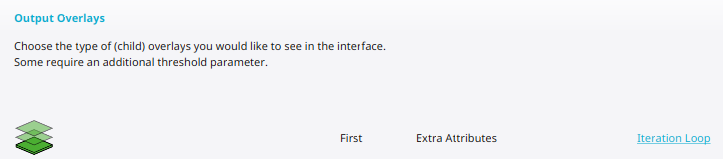 The Iteration Loop link found in the Output Overlays step.


Notes
- Effects of clicking on the iteration loop link:
- The amount of timeframes is set to 1
- Which Prequels are added or removed depend on Surface model (Water Overlay) and Ground water (Water Overlay)
- An Iteration Overlay is added for the Water Overlay of which the wizard is opened.
- Add and configure additional Iterator Overlays to collect other result types of the Flooding Overlay