Levee Type: Difference between revisions
No edit summary |
|||
| (122 intermediate revisions by 7 users not shown) | |||
| Line 1: | Line 1: | ||
[[File:Api_future_design.png|thumb|right|400px|[[Levee Type]]s in relation to other [[Action]]s]] | |||
In spatial planning '''Levee''' refers to a natural or artificial slope or wall to regulate water levels, called '''levee''' in US English. | |||
In the {{software}} these levees play a special part. As dedicated [[Buildings]] they can affect [[Areas#Safe zone|safe zones and floods]]. By constructing a levee as an independent [[Actions|action]] or as part of a [[Predefined Measures|measure]], the safe zone terrain will be expanded, protecting more houses and industry when a flood occurs. This can all be visualized in the {{software}} and a dedicated [[Indicators|indicator]] can be set up to have the implementation of levees score on the [[stakeholder]] progression. | |||
In the | |||
<gallery> | <gallery> | ||
File:DikesLMBefore-Q3-2015.jpg|High water in Lower Manhattan, before flood protection | File:DikesLMBefore-Q3-2015.jpg|High water in Lower Manhattan, before flood protection | ||
| Line 34: | Line 10: | ||
</gallery> | </gallery> | ||
=Different ways of | =Different ways of deploying levees in the {{software}}= | ||
In the | In the {{software}} are two ways present to implement levees in a project; drawn in manually during the session as action, or deployed as part of a [[measure]] using [[LeveeSpatial]]s. | ||
Implementation as action allows for trying out new plans and ideas. This can for instance be convenient when the project is part of an outreach to non-planners, | Implementation as action allows for trying out new plans and ideas. This can for instance be convenient when the project is part of an outreach to non-planners, for example residents or business owners, to let them try their own plans and ideas without an engineer pre-planning the flood protection for them. This can give session participants a stronger sentiment of involvement with the project. | ||
On the other hand, deploying the | On the other hand, deploying the levees as part of a predefined measure enables a project to quickly switch between different pre-planned alignments, in order to visualize the impact of each alignment on the indicators. | ||
=How to | {{article end | ||
|howtos= | |||
* [[How to add a Levee Type to an Action Menu]] | |||
* [[How to edit properties of a Levee Type]] | |||
* [[How to add a Levee Spatial to a Measure]] | |||
* [[How to edit properties of a Levee Spatial]] | |||
|seealso= | |||
* [[LeveeSpatial]] | |||
* [[Measure]] | |||
* [[Action Menu]] | |||
}} | |||
{{Template:Editor_future_design_nav}} | |||
[[Category:Levee Type]][[Category:Items]] | |||
Latest revision as of 10:57, 21 February 2023

In spatial planning Levee refers to a natural or artificial slope or wall to regulate water levels, called levee in US English.
In the Tygron Platform these levees play a special part. As dedicated Buildings they can affect safe zones and floods. By constructing a levee as an independent action or as part of a measure, the safe zone terrain will be expanded, protecting more houses and industry when a flood occurs. This can all be visualized in the Tygron Platform and a dedicated indicator can be set up to have the implementation of levees score on the stakeholder progression.
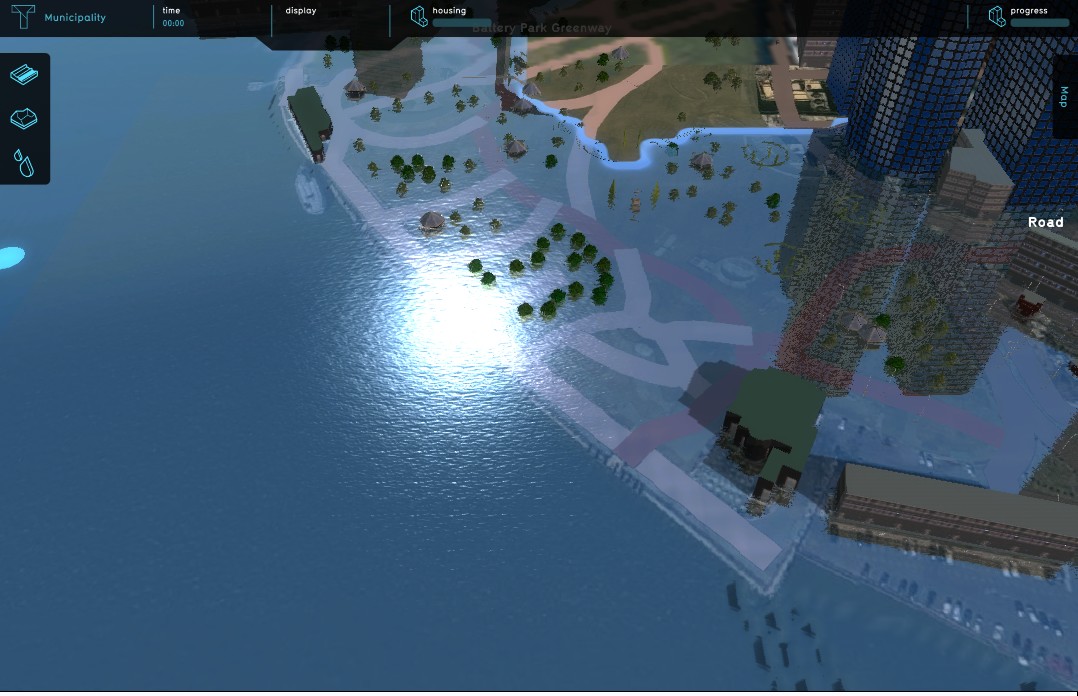
High water in Lower Manhattan, before flood protection
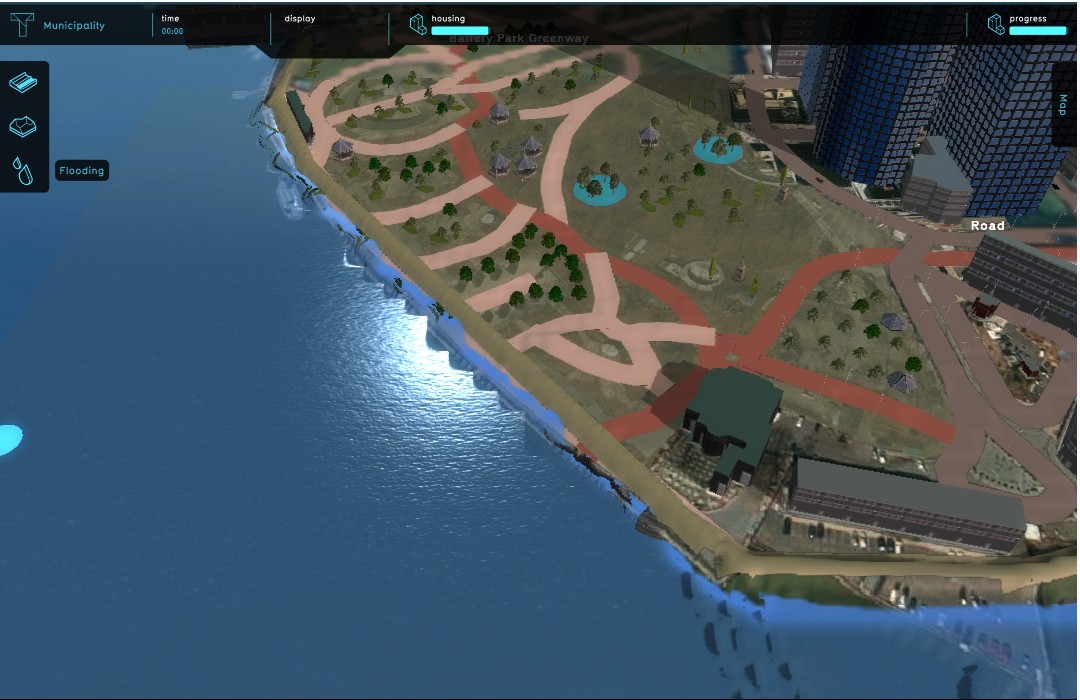
High water in Lower Manhattan, after flood protection
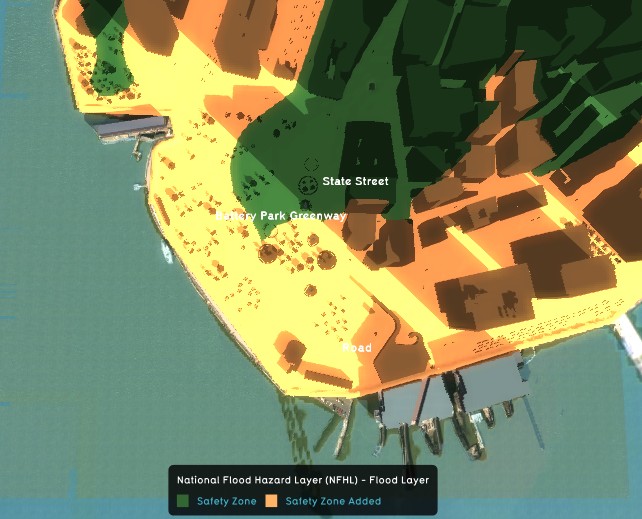
Expanded safe zone in Lower Manhattan, after flood protection
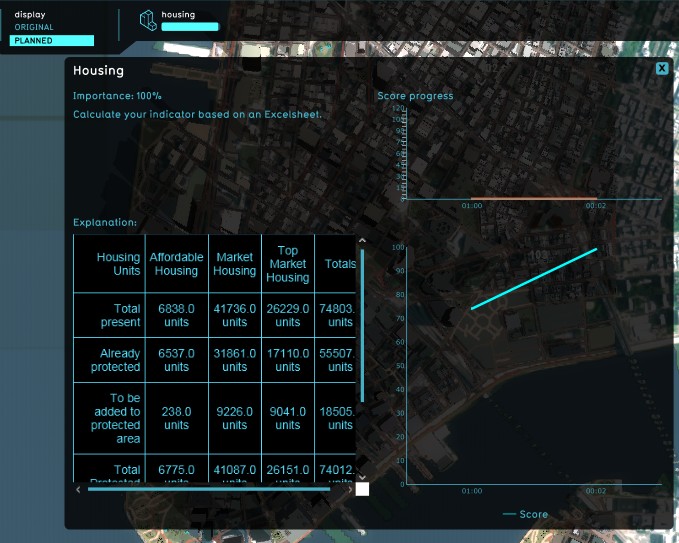
Lower Manhattan Housing units protected (Excel) indicator


Different ways of deploying levees in the Tygron Platform
In the Tygron Platform are two ways present to implement levees in a project; drawn in manually during the session as action, or deployed as part of a measure using LeveeSpatials.
Implementation as action allows for trying out new plans and ideas. This can for instance be convenient when the project is part of an outreach to non-planners, for example residents or business owners, to let them try their own plans and ideas without an engineer pre-planning the flood protection for them. This can give session participants a stronger sentiment of involvement with the project.
On the other hand, deploying the levees as part of a predefined measure enables a project to quickly switch between different pre-planned alignments, in order to visualize the impact of each alignment on the indicators.
How-to's
- How to add a Levee Type to an Action Menu
- How to edit properties of a Levee Type
- How to add a Levee Spatial to a Measure
- How to edit properties of a Levee Spatial