How to add a breach with external area manually: Difference between revisions
Jump to navigation
Jump to search
No edit summary |
No edit summary |
||
| Line 19: | Line 19: | ||
|seealso= | |seealso= | ||
*For an example of the external breach area, take a look at the [[Testbed_water_module#1._Flooding_related_components|Testbed Water Module project]] available in all domains. | *For an example of the external breach area, take a look at the [[Testbed_water_module#1._Flooding_related_components|Testbed Water Module project]] available in all domains. | ||
}} | }} | ||
{{Water Module buttons}} | {{Water Module buttons}} | ||
Revision as of 17:13, 18 January 2023
How to add a breach with an external area to a Flooding Overlay manually:
- Add a new Area to the project. This will be the breach area.
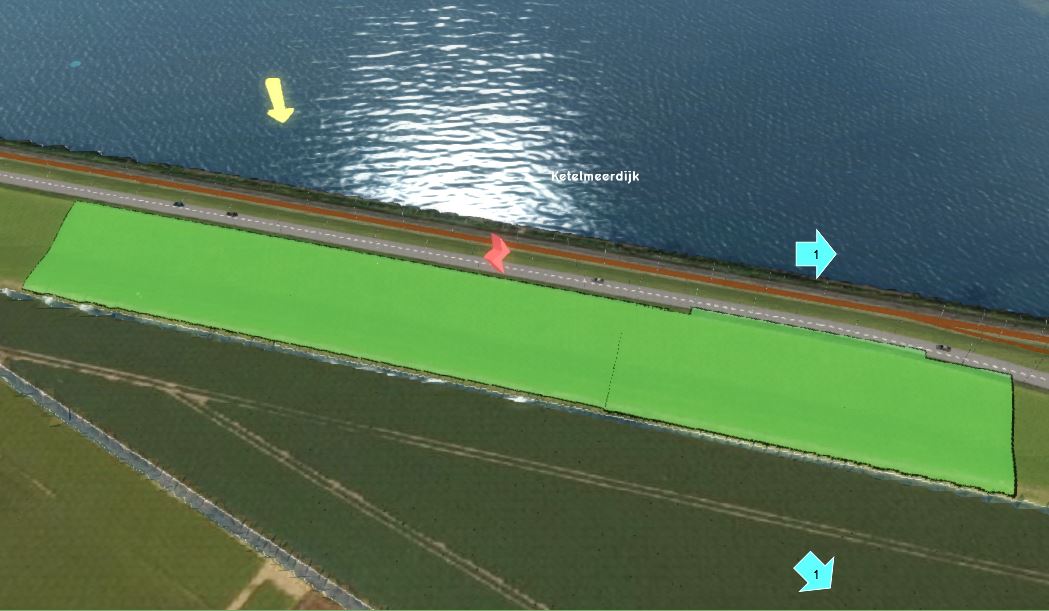
- Draw the breach area in the 3D world, in the location where the water from the breach should emerge (see tips below in gallery).
- Add an Attribute to the created Area, with the breach height attribute name and a height value.
- Open the Flooding Overlay wizard.
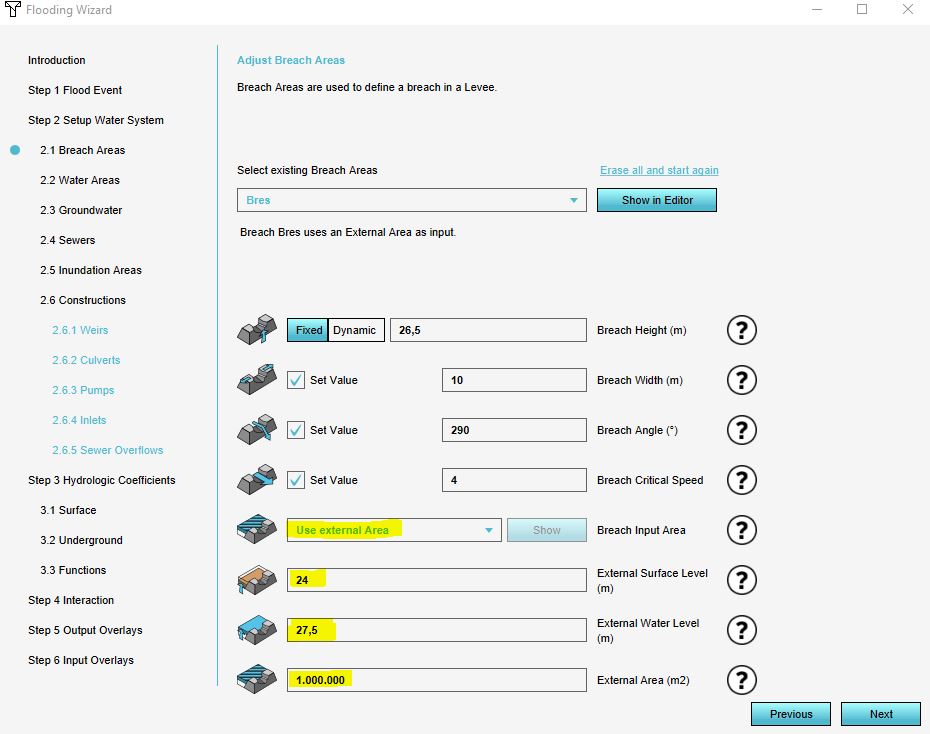
- Continue to the step concerning breaches.
- Set the values of external area, external water level, and external surface level.
- The configuration wizard of the Flooding Overlay can now be closed.


