How to add a limitation area: Difference between revisions
Jump to navigation
Jump to search
No edit summary |
mNo edit summary |
||
| Line 1: | Line 1: | ||
{{Editor steps|title=add a [[ | {{Editor steps|title=add a [[Limit area (Water_Overlay)|limit area]] to a [[Water_Overlay|water overlay]] manually | ||
|[[How to add and remove an Area|Add an Area]] to the project. This will be the limit area. | |[[How to add and remove an Area|Add an Area]] to the project. This will be the limit area. | ||
|[[How to draw a feature|Draw]] the limit area of the part of the [[3D world]] you want to calculate with a [[Water_Overlay|water overlay]]. | |[[How to draw a feature|Draw]] the limit area of the part of the [[3D world]] you want to calculate with a [[Water_Overlay|water overlay]]. | ||
| Line 19: | Line 19: | ||
==See also== | ==See also== | ||
* [[ | * [[Limit_rain_(Water_Overlay)|Limit rain]] | ||
{{Water Module buttons}} | {{Water Module buttons}} | ||
Revision as of 13:35, 14 February 2020
How to add a limit area to a water overlay manually:
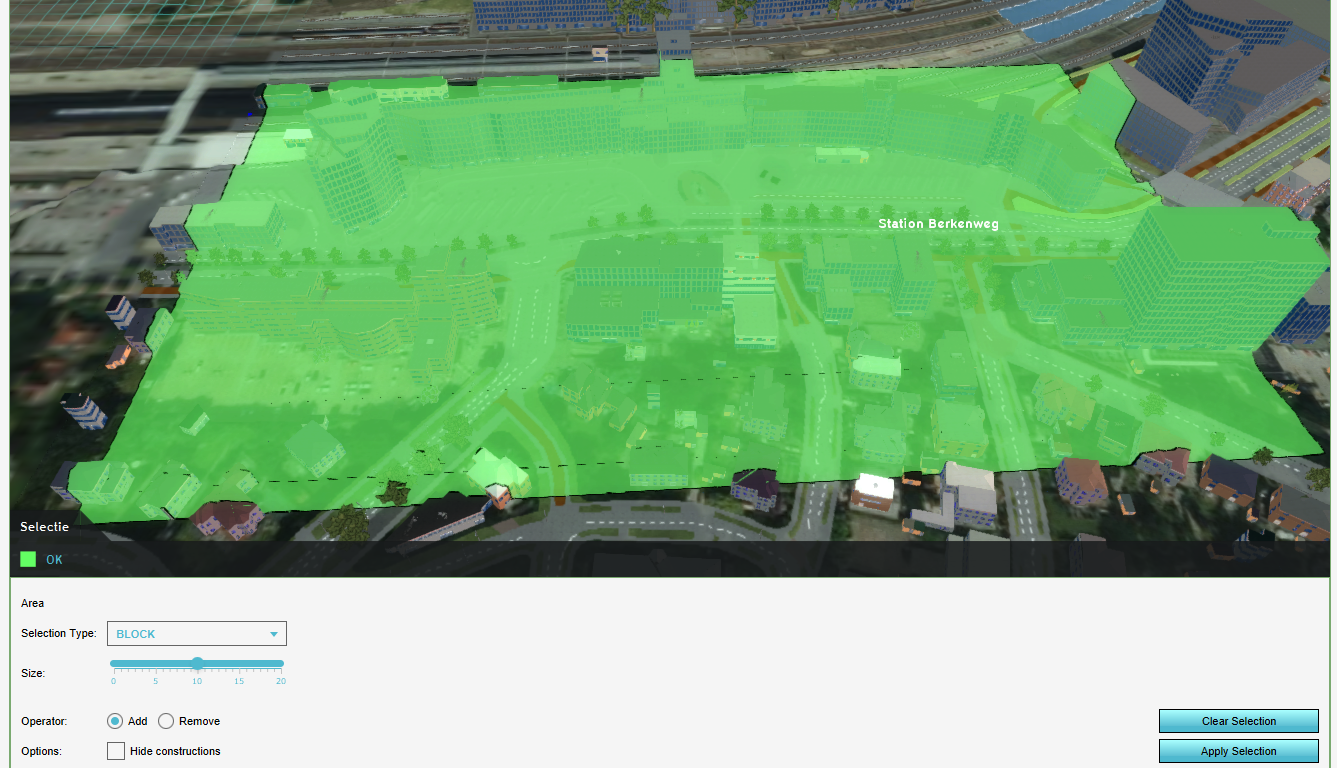
- Add an Area to the project. This will be the limit area.
- Draw the limit area of the part of the 3D world you want to calculate with a water overlay.
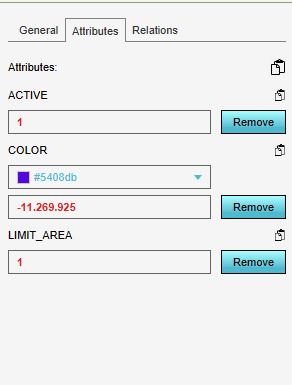
- Add an Attribute to the created Area, with the attribute name LIMIT_AREA and a value above 0.
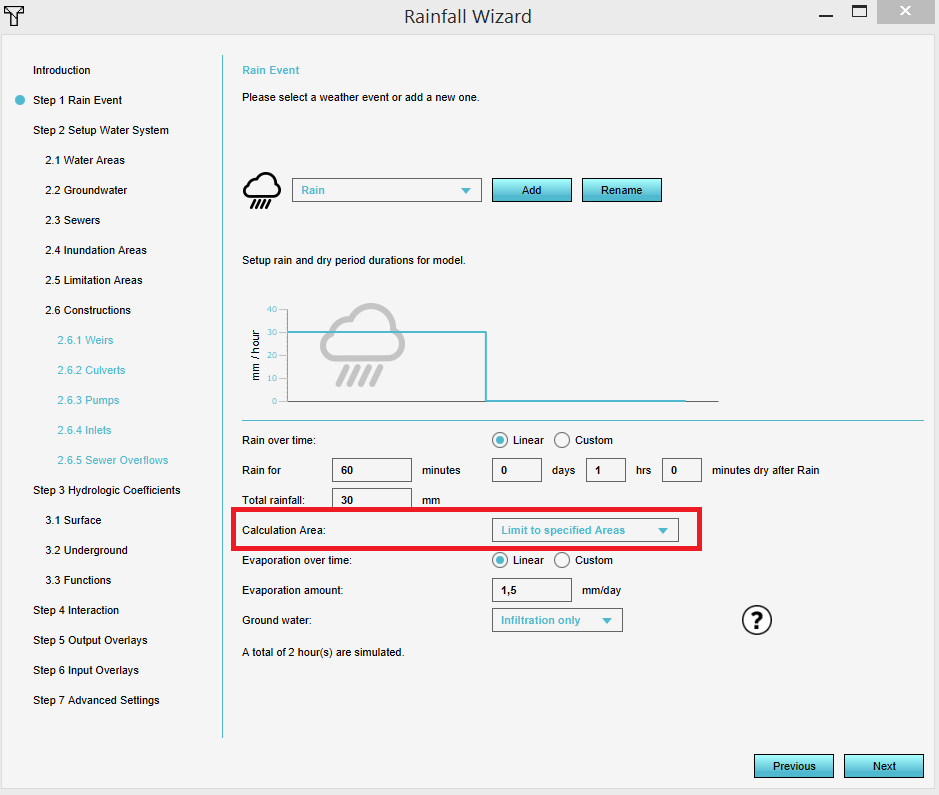
- Open the Water overlay wizard and in step 1, choose for Calculation area the option Limit to specified areas.
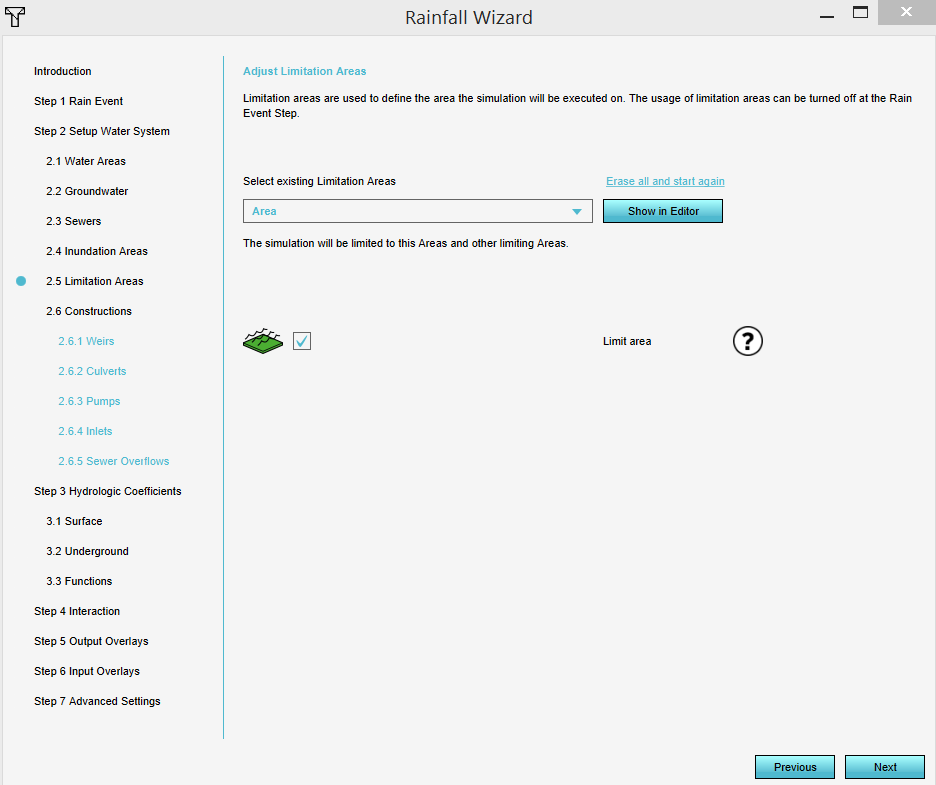
- In the wizard an extra step will be added in where you will see that your created area is selected.
- Continue with the wizard.
Notes
- It is also possible to add a different attribute name for the limitation area, but with a value above 0. In that case, in the extra step in the wizard, choose for the option Select existing limitation areas based on attribute and select the custom attribute name of your limitation area.
- It is also possible to import a limitation area. In that case, select in the extra step in the wizard the option Import limitation areas (start Geo data wizard) and proceed with the Geo data wizard.
See also


