Client Event
Client events are not communicated to the Tygron Engine and are usually a graphical effect for the stakeholder who triggered the event. Examples of this include the flashing of an action menu or an indicator to draw the user's attention, or the visualization of a weather effect, such as a rain storm.
How do Client Events relate to the Tygron Platform
Client Events can be used on multiple locations in the Tygron Platform; as part of a measure, as part of a larger Event Bundles in an Action Menu, or during a cinematic sequence. Client Events do not communicate with the server, but trigger a reaction locally on the user's system.
- See also: Measures, Actions & Cinematics
List of Client Event types
Below is a list describing the available Client Event Types:
| ACTIVATE_WEATHER | Activate the selected weather type on the client system |
| ACTIVATE_VIDEO | Activate video on the client system with selected video loaded |
| BLINK_INDICATOR | Make the selected indicator icon on the client system blink, to attract the user's attention |
| BLINK_OVERLAY | Make the selected overlay icon on the client system blink, to attract the user's attention |
| BLINK_CATEGORY | Make the selected action menu category icon on the client system blink, to attract the user's attention |
| BLINK_STOP_ALL | Cancel all the blinking of icons |
| CHANGE_ZONE_PERMIT | Change the zoning permit for the selected zone ID |
| FEEDBACK_PANEL_SHOW_TEXT | Display the entered text on a small panel on the bottom of the main project view |
| FEEDBACK_PANEL_HIDE_TEXT | Remove the feedback panel from the main project view |
| FORCE_ACTIVATE_VIDEO | Force a selected video to play on the client system |
| RANDOM_ACTIVATE_POPUP_PERCENTAGE | Respond to a popup with a given change with the first answer of that popup |
| SELECT_HOTSPOT | Activate the selected popup panel |
| SET_VISUALIZATION_SPEED | Adjust the visualization speed of environmental animations (e.g., movement of clouds) with a factor larger than 0 |
| SHOW_BROWSER_MAP | Open a new window containing the ArcGIS Online map of the project area |
| SHOW_OVERLAY | Activate the selected overlay |
| SHOW_PANEL | Activate the selected panel |
| STOP_WEATHER | Halt any previously activated weather |
| TILE_ATTENTION | Gives visual attention for a given point and amount of seconds |
Adding Client Events to a project
-
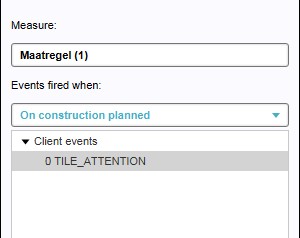 Add events to a level (right panel)
 -
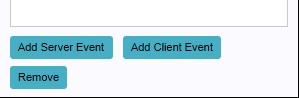 Add & Remove Event buttons (right panel)


As mentioned above, events can be added to a project element on multiple occasions and locations. Please refer to the main articles relating to these elements for more information about the specific steps to take.
Generally, select the element (e.g., measures, levels) in the left panel, then add events via the right panel. Click the Add Event button at the bottom of the right panel to create a default NO_DEF event. Selecting an Event on the list and using the 'Remove Event' button deletes the event from the list.
Selecting an event opens the bottom panel to choose the event type. Confirm with Commit or clear with Cancel.
- Select Project Element to have events added to
- Select the Event option on the left panel
- Select 'Add event' on the bottom of the right panel
- Select the newly added event on the right panel
- Select the desired client event from the bottom panel
- Confirm the selection with the 'Commit' button (or use the 'Cancel' button to clear the selection

Changing the properties of a Client Event in a project
The properties of events can be edited on the bottom panel (see image above). On this panel a linked ID of a measure or cinematic can be linked to an event for instance. Any changes made need to be confirmed first with the 'Commit' button, or canceled with the 'Cancel' button.