How to change multiple Attributes at once for Water Overlays: Difference between revisions
Jump to navigation
Jump to search
(Created page with "{{Editor steps|title=|In the Water Overlay Wizard, go to the step where you want to change multiple Keys for.|Check the ''Multi'' checkbox and click on the ''Set Value...") |
(→Notes) |
||
| Line 9: | Line 9: | ||
===Notes=== | ===Notes=== | ||
* The [[CSV]] file to | * The [[CSV]] file to change for example [[Water_level_(Water_Overlay)|Water levels]] of [[Water_level_area_(Water_Overlay)|Water level areas]], should look as follows: | ||
{{code|1= | {{code|1= | ||
Water Area, Water Area 2 | |||
-1,-2 | |||
}} | }} | ||
The first row should contain the | The first row should contain the exact name of the [[Hydrological_features_(Water_Overlay)|hydrological features]] or [[Hydraulic_structures_(Water_Overlay)|hydraulic structures]] you wish to change the values of the attribute for. The second row contains the new values for this attribute. | ||
* For the [[CSV]], it is possible to choose a comma or semicolon as delimiter. | * For the [[CSV]], it is possible to choose a comma or semicolon as delimiter. | ||
Revision as of 09:55, 10 May 2021
How to change multiple Attributes at once for Water Overlays:
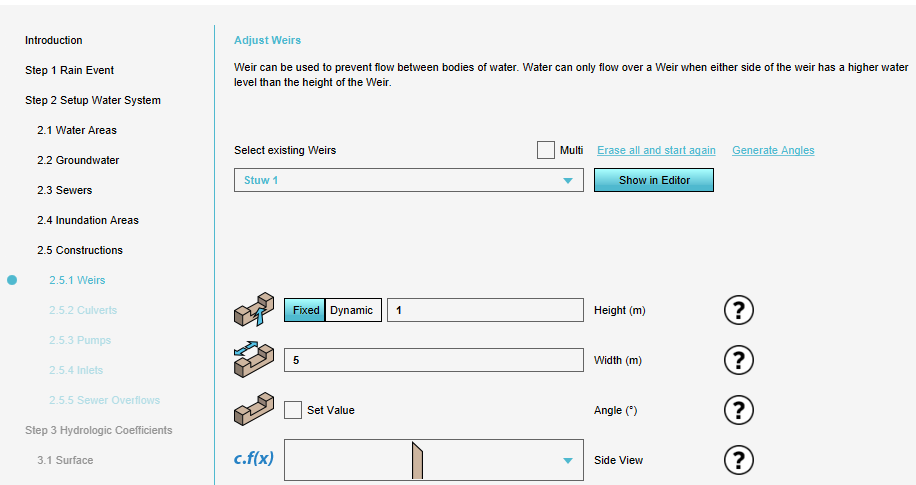
- In the Water Overlay Wizard, go to the step where you want to change multiple Keys for.
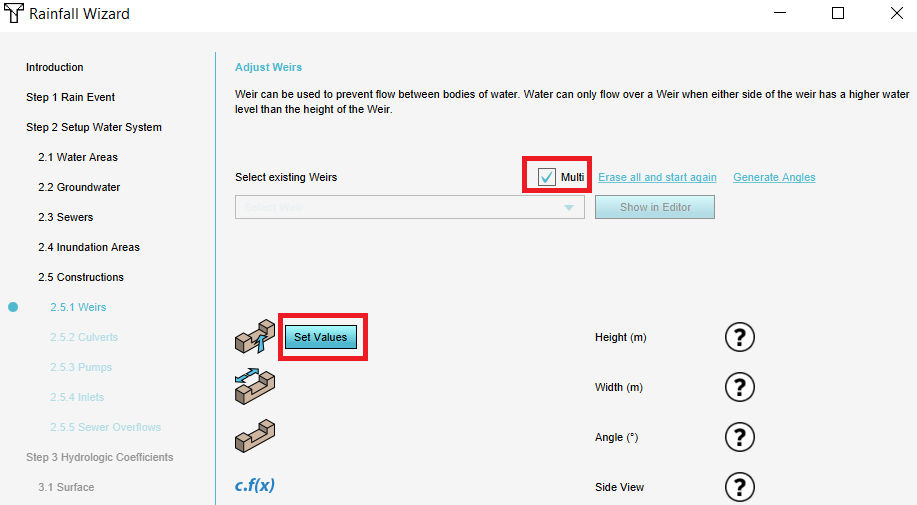
- Check the Multi checkbox and click on the Set Values button for the desired attribute.
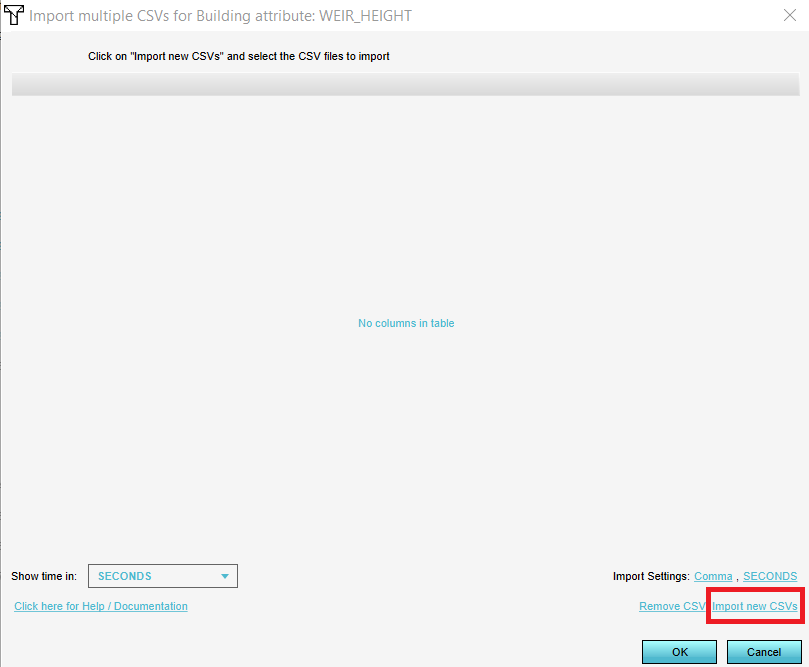
- In the new panel that pops up, click on Import new CSVs in the bottom right corner and select the CSV file(s).
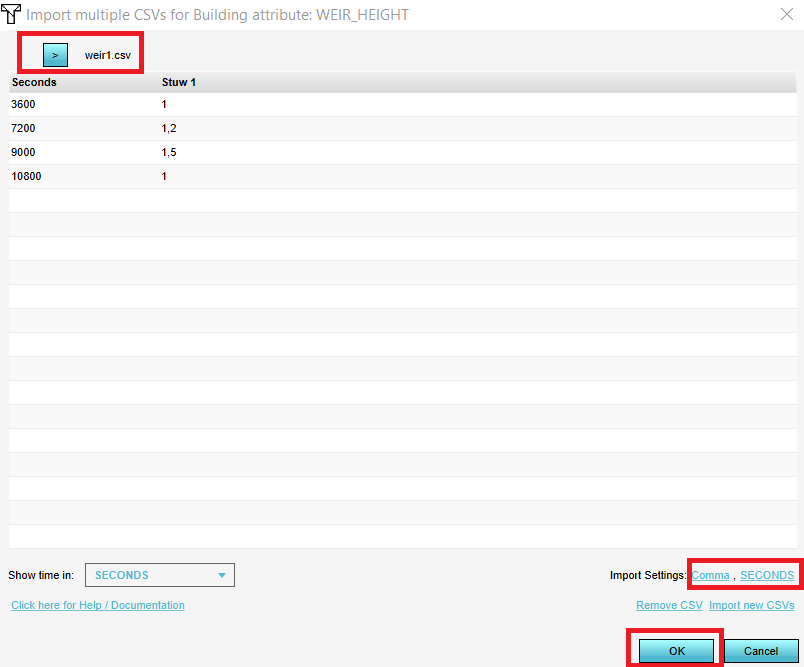
- Browse with the button at the top through the CSV files to see if they are imported correctly.
- Optionally, change the delimiter and time units and click on Ok. The data in the CSV files is now used to set the attribute for the structures dynamically.
Notes
- The CSV file to change for example Water levels of Water level areas, should look as follows:
Water Area, Water Area 2
-1,-2
The first row should contain the exact name of the hydrological features or hydraulic structures you wish to change the values of the attribute for. The second row contains the new values for this attribute.
- For the CSV, it is possible to choose a comma or semicolon as delimiter.


