How to adjust the height map with a Combo Overlay: Difference between revisions
m (Rudolf@tygron.nl moved page How to adjust the height map with a combo overlay. to How to adjust the height map with a combo overlay without leaving a redirect: No full-stop after titles) |
No edit summary |
||
| Line 1: | Line 1: | ||
For some use-cases, especially related to [[Water Overlay|hydrological calculations]], it can be important to have a well-defined height map. When a grid-dataset exists which defines exact heights on the desired reoslution, it is trivial to load in that data. However, sometimes some additional calculations are desired to create or refine the required adjustments. | |||
For these situations, it is possible to use a [[Grid Overlay]] to redefine the [[elevation model]] in a [[Project]]. This is an operation which effects a one-time change of the elevation model, by taking the data of the indicated Overlay and adjusting the elevation model accordingly. | |||
{{editor location|terrain height}} | |||
{{Editor steps|title=adjust the height map with a combo overlay | The modification described here will simulate kerbs of 20cm high, by lowering all roads by that amount. | ||
{{Editor steps|title=adjust the height map with a combo overlay | |||
| Add a [[Digital Terrain Model Overlay]] to your project. | |||
| Add an [[Average Overlay]] that selects a specified attibute. This can be a custom attribute or a more general one, such as NWB_ID. | |||
| Add a [[Combo Overlay]] with the Height Map Overlay as input A, the Avg Overlay as input B, and with the formula: IF(GT(B, 0), SUB(A, 0.2), A). | |||
| This Combo Overlay displays a height map with all roads 20 cm lower, and all other areas as they were. | |||
| Go to Current Situation → Terrain → Select Elevation Grid Overlay | |||
| Select the [[Combo Overlay]] and confirm the operation. | |||
}} | |||
{{gallery | |||
|Add_DTM_Overlay1.jpg|Add a DTM Height Map Overlay to your project. | |||
|Add_AVG_Overlay1.jpg|dd an Average Overlay that selects a specified attibute - NWB_ID. | |||
|Add_Combo_Overlay1.jpg|Add a Combo Overlay with the Height Map Overlay as input A, and the Avg Overlay as input B. | |||
|Combo_Overlay2.jpg|This Combo Overlay displays a height map with all roads (with NWB_ID as attribute) 20 cm lower, and all other areas as they were. | |||
|Add_Overlay_As_Terrain1.jpg|Now use the Combo overlay in Current Situation → Terrain → Select Elevation Grid Overlay | |||
}} | |||
{{article end | |||
|notes= | |||
* This operation is considered irreversible. Changes to the [[elevation model]] overwrite the [[Height sector|terrain heights data]] directly, and are not stored as seperate pieces of data which can be removed later on to restore the original elevation model. | |||
* The effected change is a single operation, not a permanent connection. After performing this operation, if the results of the used [[Grid Overlay]] change, the [[Project]]'s [[elevation model]] is not modified automatically. | |||
}} | |||
Revision as of 07:46, 20 October 2023
For some use-cases, especially related to hydrological calculations, it can be important to have a well-defined height map. When a grid-dataset exists which defines exact heights on the desired reoslution, it is trivial to load in that data. However, sometimes some additional calculations are desired to create or refine the required adjustments.
For these situations, it is possible to use a Grid Overlay to redefine the elevation model in a Project. This is an operation which effects a one-time change of the elevation model, by taking the data of the indicated Overlay and adjusting the elevation model accordingly.
The modification described here will simulate kerbs of 20cm high, by lowering all roads by that amount.
- Add a Digital Terrain Model Overlay to your project.
- Add an Average Overlay that selects a specified attibute. This can be a custom attribute or a more general one, such as NWB_ID.
- Add a Combo Overlay with the Height Map Overlay as input A, the Avg Overlay as input B, and with the formula: IF(GT(B, 0), SUB(A, 0.2), A).
- This Combo Overlay displays a height map with all roads 20 cm lower, and all other areas as they were.
- Go to Current Situation → Terrain → Select Elevation Grid Overlay
- Select the Combo Overlay and confirm the operation.
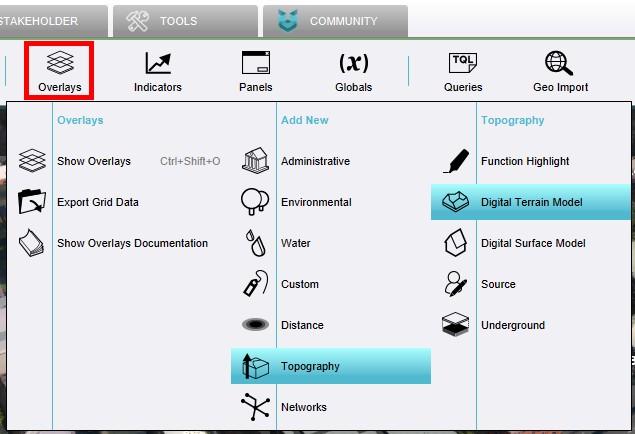
Add a DTM Height Map Overlay to your project.
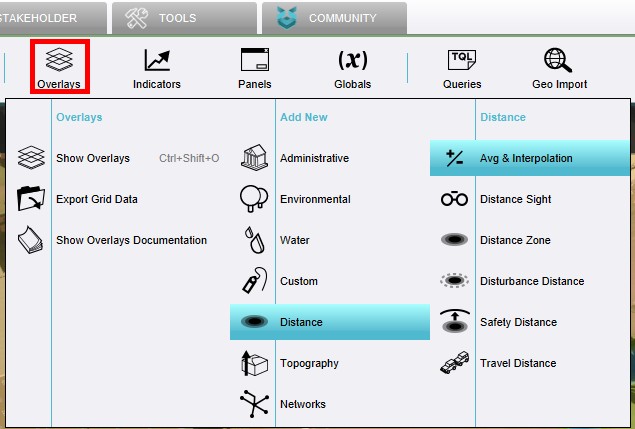
dd an Average Overlay that selects a specified attibute - NWB_ID.
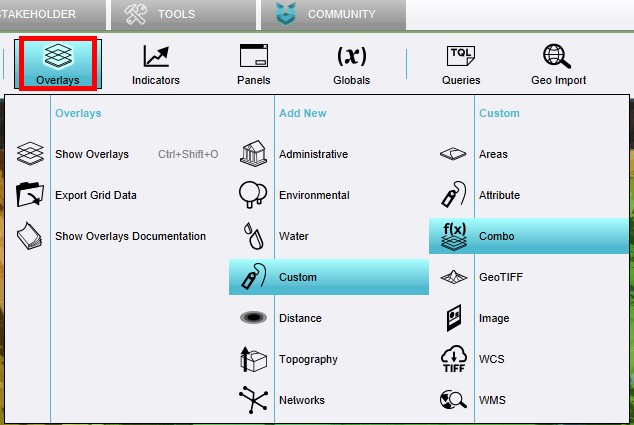
Add a Combo Overlay with the Height Map Overlay as input A, and the Avg Overlay as input B.

This Combo Overlay displays a height map with all roads (with NWB_ID as attribute) 20 cm lower, and all other areas as they were.
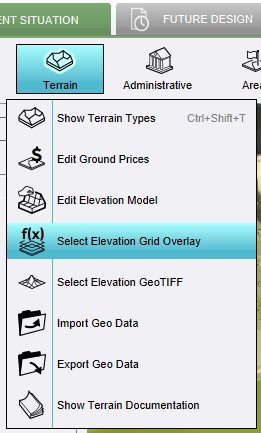
Now use the Combo overlay in Current Situation → Terrain → Select Elevation Grid Overlay


Notes
- This operation is considered irreversible. Changes to the elevation model overwrite the terrain heights data directly, and are not stored as seperate pieces of data which can be removed later on to restore the original elevation model.
- The effected change is a single operation, not a permanent connection. After performing this operation, if the results of the used Grid Overlay change, the Project's elevation model is not modified automatically.