How to create a Destination area: Difference between revisions
Jump to navigation
Jump to search
No edit summary |
No edit summary |
||
| (12 intermediate revisions by the same user not shown) | |||
| Line 1: | Line 1: | ||
Below an example with the [[Travel_Distance_Overlay|Travel distance overlay]] based on a school and pedestrian traffic. | Below an example with the [[Travel_Distance_Overlay|Travel distance overlay]] based on a school and pedestrian traffic. | ||
{{Howto|title= | |||
{| | |Have a project loaded in the editor and decide the area of interest of the Travel Distance overlay, a school in our case. | ||
|Add an area and select to Adjust the area. | |||
|Draw in the area around the school. '''Important''': Ensure that the area overlaps the adjacent roads. In our example the area overlaps with roads east, west and south of the school. | |||
|Apply the selection. | |||
|Select its attribute tab on the [[Detail Panel]]. | |||
|Under Add New Attribute, write the name of the Destination area attribute; for example ROUTING_AREA, and set its value to 1. | |||
|Save the new attribute. | |||
|Optionally adjust the area color; it will be used for the resulting overlay | |||
|Open the Travel Distance Overlay and select the keys tab. Under the key [[Destination area (Travel Distance Overlay)|Destination Area]], select the attribute chosen attribute in step 3, in the example ROUTING_AREA. This ensures that the destination areas are identified using this attribute. | |||
}} | |||
<gallery> | |||
File:Select_School1.jpg|School selected as example, the blue arrow is added for clarity | |||
File:Routing_Area1.jpg|Please note that the area overlaps all adjacent roads east, west and south of the school | |||
File:Routing_Area_Attr1.jpg|Added the attribute ''ROUTING_AREA'' to the Area. | |||
| | File:Destination_area_key.jpg|Setting the [[key]] for [[Destination area (Travel Distance Overlay)|Destination Area]] to ''ROUTING_AREA''. | ||
</gallery> | |||
{{article end | {{article end | ||
| Line 24: | Line 24: | ||
* In case a grid is used to identify traversable cells, make sure that the destination areas overlap a traversable cell. | * In case a grid is used to identify traversable cells, make sure that the destination areas overlap a traversable cell. | ||
|seealso= | |seealso= | ||
* [[ | * [[Destination area (Travel Distance Overlay)]] | ||
* [[ | * [[Travel Distance Overlay]] | ||
|api=*[[Api session event editor area add]] | |||
*[[Api session event editor area add polygons]] | |||
*[[Api session event editor area set attribute]] | |||
*[[Api session event editor overlay set key value]] | |||
}} | }} | ||
[[Category:How-to's]] | [[Category:How-to's]] | ||
Latest revision as of 14:21, 29 May 2026
Below an example with the Travel distance overlay based on a school and pedestrian traffic.
How to create a Destination area:
- Have a project loaded in the editor and decide the area of interest of the Travel Distance overlay, a school in our case.
- Add an area and select to Adjust the area.
- Draw in the area around the school. Important: Ensure that the area overlaps the adjacent roads. In our example the area overlaps with roads east, west and south of the school.
- Apply the selection.
- Select its attribute tab on the Detail Panel.
- Under Add New Attribute, write the name of the Destination area attribute; for example ROUTING_AREA, and set its value to 1.
- Save the new attribute.
- Optionally adjust the area color; it will be used for the resulting overlay
- Open the Travel Distance Overlay and select the keys tab. Under the key Destination Area, select the attribute chosen attribute in step 3, in the example ROUTING_AREA. This ensures that the destination areas are identified using this attribute.
-
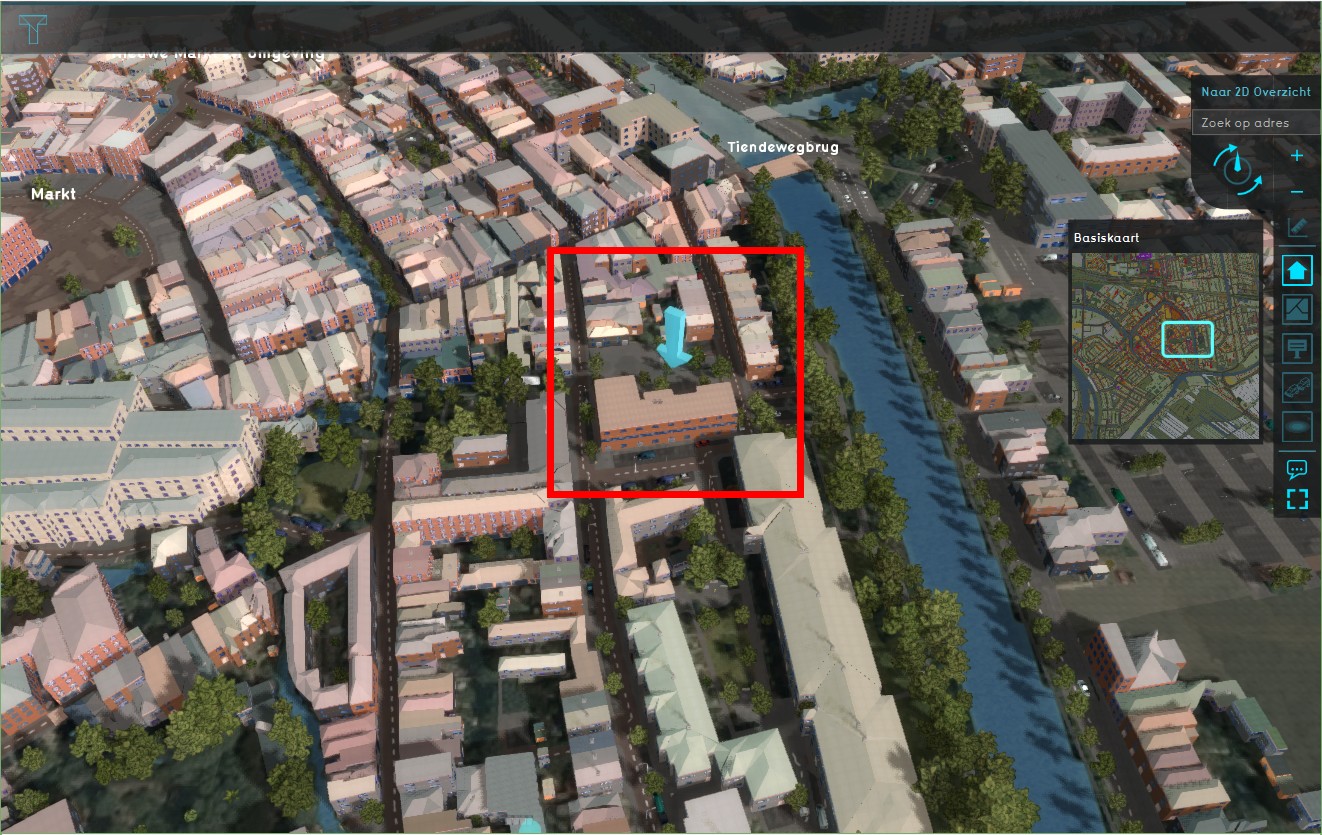 School selected as example, the blue arrow is added for clarity
 -
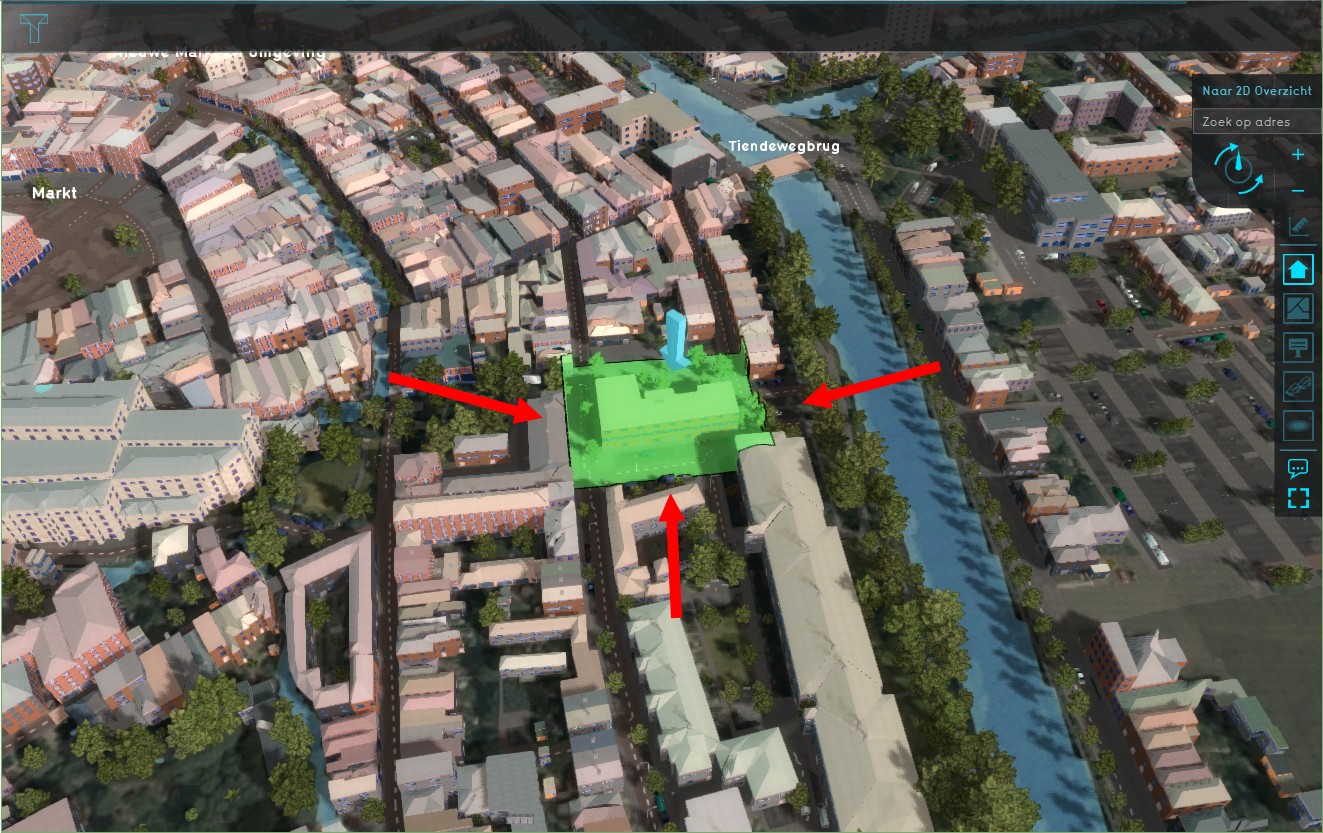 Please note that the area overlaps all adjacent roads east, west and south of the school
 -
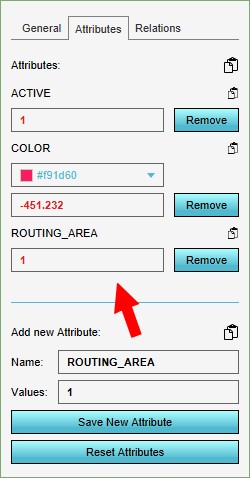 Added the attribute ROUTING_AREA to the Area.
 -
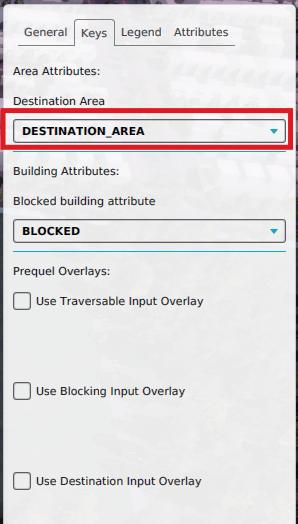 Setting the key for Destination Area to ROUTING_AREA.


Notes
- In case a grid is used to identify traversable cells, make sure that the destination areas overlap a traversable cell.