How to create a Destination area
Jump to navigation
Jump to search
Below an example with the Travel distance overlay based on a school and pedestrian traffic.
Creating a routing area
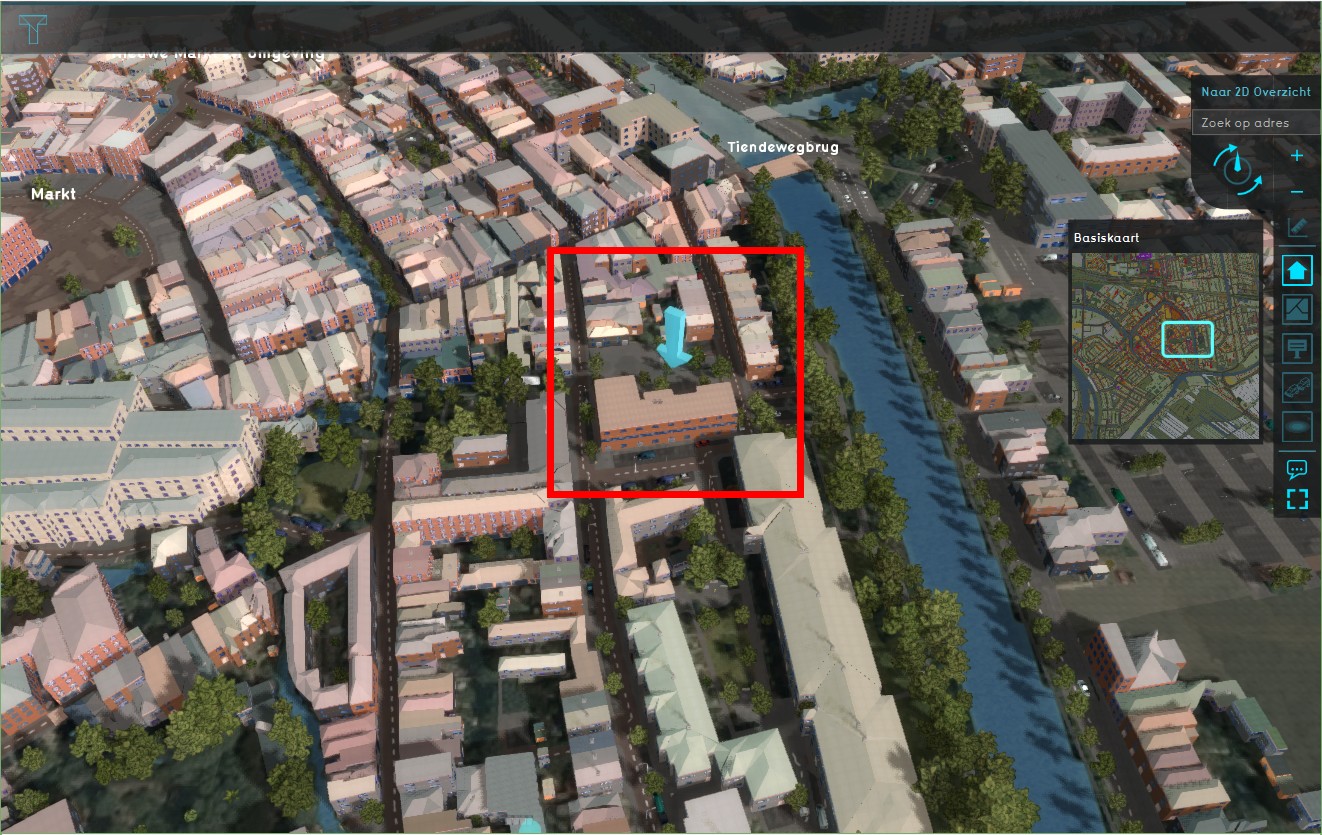
| 1 | Have a project loaded in the editor and decide the area of interest of the Travel Distance overlay, a school in our case. | |
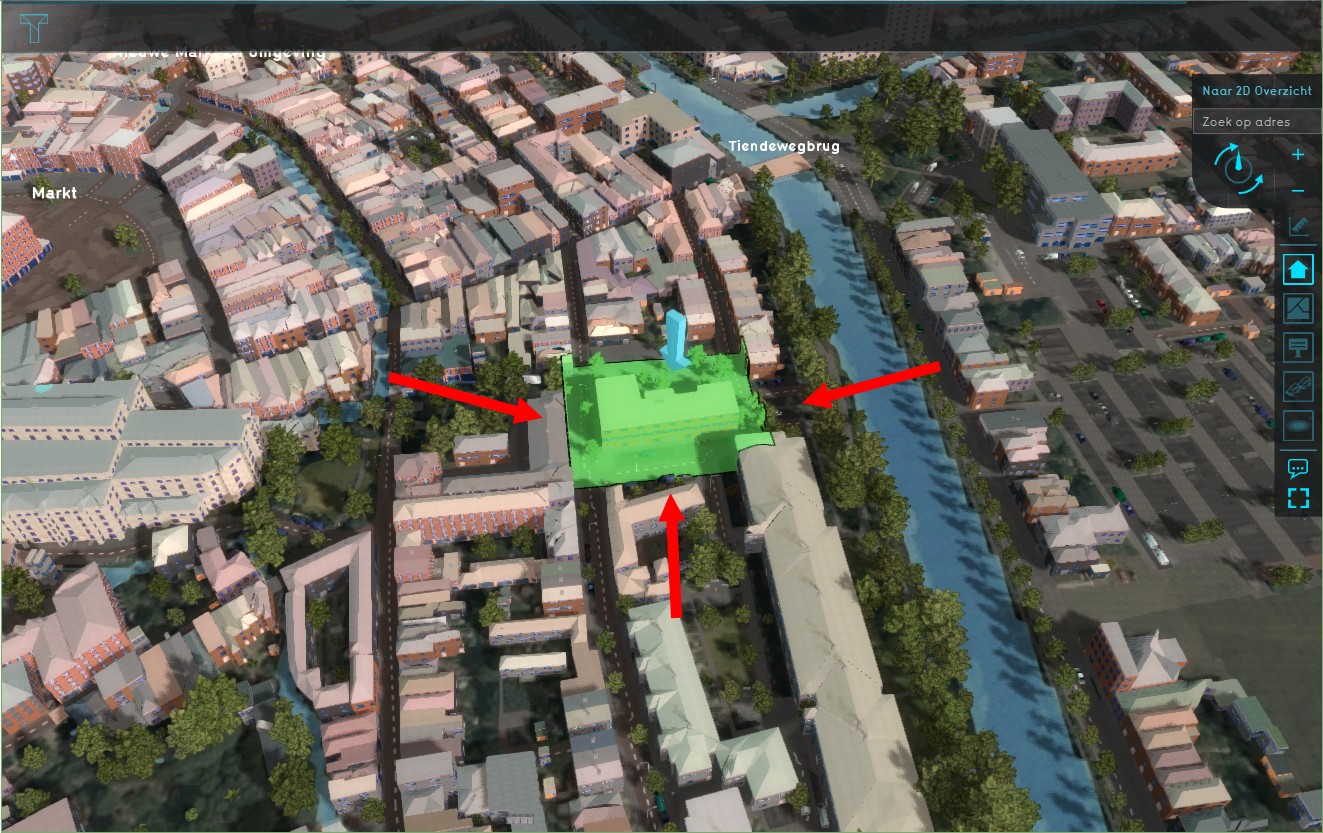
| 2 | Add an area and select to Adjust the area. Draw in the area around the school. Important: Ensure that the area overlaps the adjacent roads. In our example the area overlaps with roads east, west and south of the school. Apply the selection. | |
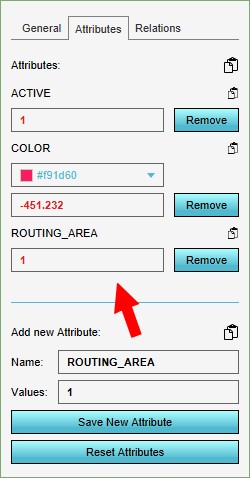
| 3 | Select the newly added area and select its attribute tab on the right side. Add on the bottom a new attribute, for example ROUTING_AREA, with a value of 1. Save the new attribute. The Area color will be used for the overlay, so pick an appropriate color here too. | |
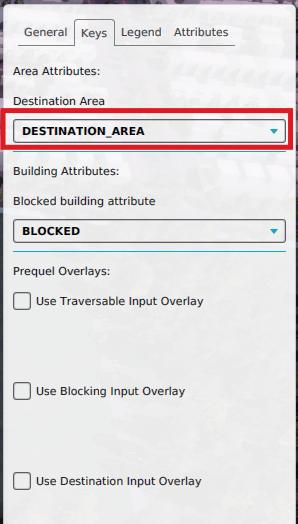
| 4 | Open the Travel Distance Overlay and select the keys tab. Under the key Destination Area, select the attribute chosen attribute in step 3, in the example ROUTING_AREA. This ensures that the destination areas are identified using this attribute. |
Notes
- In case a grid is used to identify traversable cells, make sure that the destination areas overlap a traversable cell.


