How to configure a Grid Overlay legend: Difference between revisions
Jump to navigation
Jump to search
Created page with "To influence the visualization for the Grid Overlay, first activate the custom overlay option for the overlay. {{Editor steps|title=activate the custom legend|Select the grid overlay you wish to configure in the editor.|On the right panel, select the "Legend" tab.|Make sure "Has Custom Legend" is checked.}} <gallery mode="nolines"> File:Select_grid_overlay.jpg|Select a grid overlay File:Select_legend.jpg|Select Legend in the right panel File:Select_custom.jpg| Se..." |
No edit summary |
||
| (8 intermediate revisions by 3 users not shown) | |||
| Line 1: | Line 1: | ||
[[Grid Overlay]]s can display wide ranges of values for a wide range of use-cases. The results are computed and stored as individual numeric values on a grid spanning the entire [[Project]]. Based on the [[Grid Overlay#Legend|Legend]] of the [[Grid Overlay]], specific values are visualized with specific colors. Configure the legend to ensure the full range of data is easily interpreted visually. | |||
{{editor location|overlay legend}} | |||
{{ | |||
{{ | {{howto|title=configure a Grid Overlay's legend | ||
| In the [[left panel]] of the editor, select the [[Grid Overlay]] to configure | |||
| In the [[right panel]], switch to the "Legend" tab | |||
| Activate the "Custom Legend" option | |||
| {{howtoblock|Ensure the right amount of entries exist: | |||
|Click "Add" in the [[right panel]] to add new entries (default value is 0). | |||
|Select entries and click "Remove" in the [[right panel]] to delete them. | |||
}} | |||
| {{howtoblock|Configure each individual entry: | |||
|Enter the name or description in the top input field. | |||
|Select a color using the color picker in the color dropdown. | |||
|Enter the numerical value in the value input field. | |||
}} | |||
}} | |||
{{ | {{gallery | ||
| Select_grid_overlay.jpg | Select a grid overlay | |||
| Select_legend.jpg | Select Legend in the right panel | |||
| Select_add1.jpg | Click on add to "add" an addition entry | |||
| New_item.jpg | Click on an entry to select it | |||
| Select_remove1.jpg | Click on "remove" to remove (a) selected entry or entries | |||
| Change_name.jpg | Change the name of the entry | |||
| Change_color.jpg | Change the color of the entry | |||
| Change_value.jpg | Change the value of the entry | |||
}} | |||
{{article end | {{article end | ||
|seealso=[[Grid Overlay]] | |notes= | ||
* The order of entries is dictated by the values of the entries. While editing the values, the entries may reorder automatically. | |||
* Any value in the [[Grid Overlay]] results which exactly matches an entry in the legend, will be displayed with that entry's color. | |||
** Any value higher or lower than the highest or lowest entry in the legend will be displayed with the color of the highest or lowest entry respectively. | |||
** For result types using the INTERPOLATED style, any value in between the values of two entries in the legend will be displayed with the interpolated color of the two closest entries. | |||
** {{nodata}} values are automatically visualized as transparent. | |||
* The name of an entry cannot be empty. However, a "space" can be used instead to display a color without a (visible) text. | |||
* The [[Grid Overlay]]'s legend can be reset to the default by unchecking the "Custom Legend" option. Any customizations to that [[Grid Overlay]]'s legend are then discarded. | |||
|seealso= | |||
* [[Grid Overlay]] | |||
}} | }} | ||
[[Category:How-to's]] | |||
Latest revision as of 11:36, 15 July 2026
Grid Overlays can display wide ranges of values for a wide range of use-cases. The results are computed and stored as individual numeric values on a grid spanning the entire Project. Based on the Legend of the Grid Overlay, specific values are visualized with specific colors. Configure the legend to ensure the full range of data is easily interpreted visually.
Editor → Current Situation (Ribbon tab) → Overlays (Ribbon bar) → The Overlay to edit (Left panel) → Legend tab (Right panel)
How to configure a Grid Overlay's legend:
- In the left panel of the editor, select the Grid Overlay to configure
- In the right panel, switch to the "Legend" tab
- Activate the "Custom Legend" option
- Ensure the right amount of entries exist:
Click "Add" in the right panel to add new entries (default value is 0).
Select entries and click "Remove" in the right panel to delete them. - Configure each individual entry:
Enter the name or description in the top input field.
Select a color using the color picker in the color dropdown.
Enter the numerical value in the value input field.
-
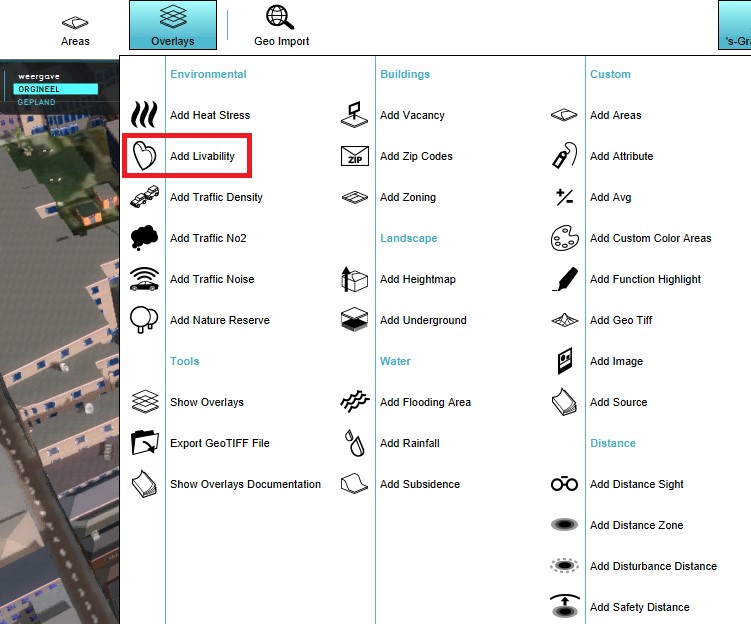 Select a grid overlay
 -
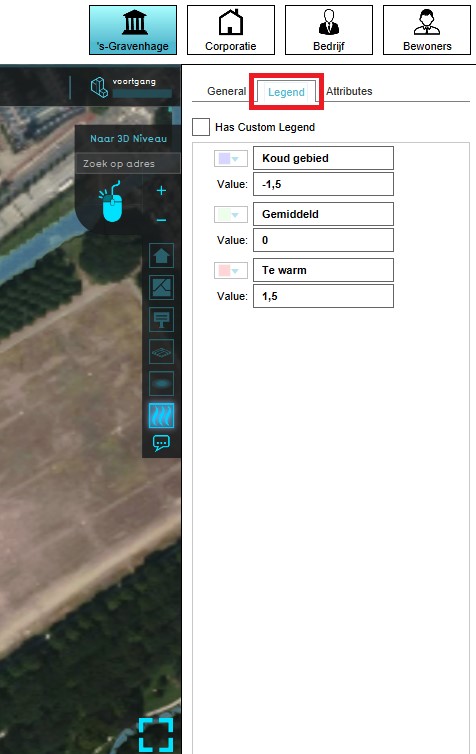 Select Legend in the right panel
 -
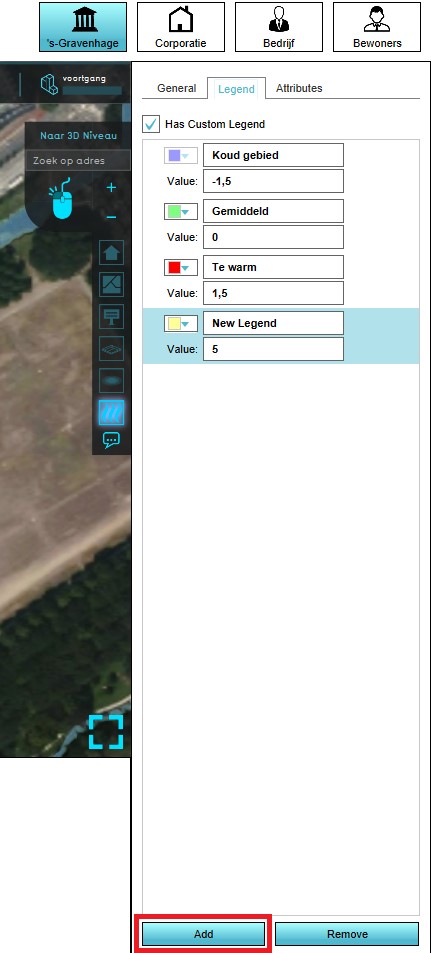 Click on add to "add" an addition entry
 -
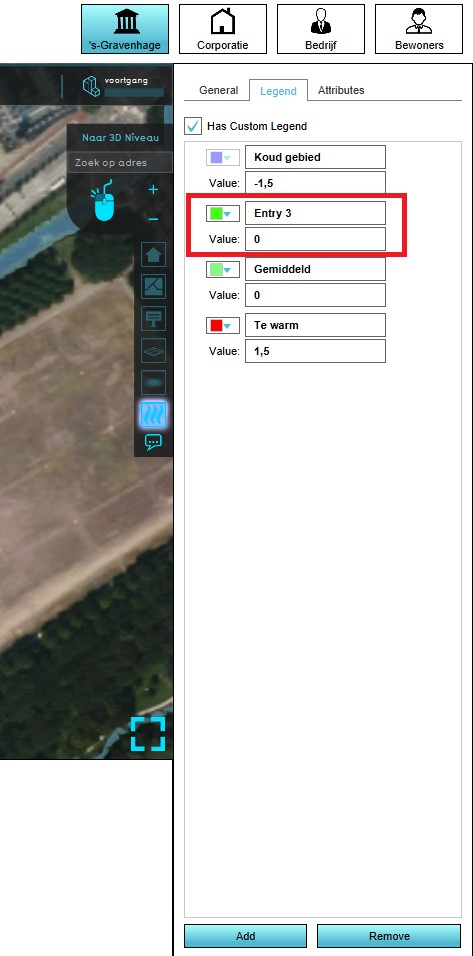 Click on an entry to select it
 -
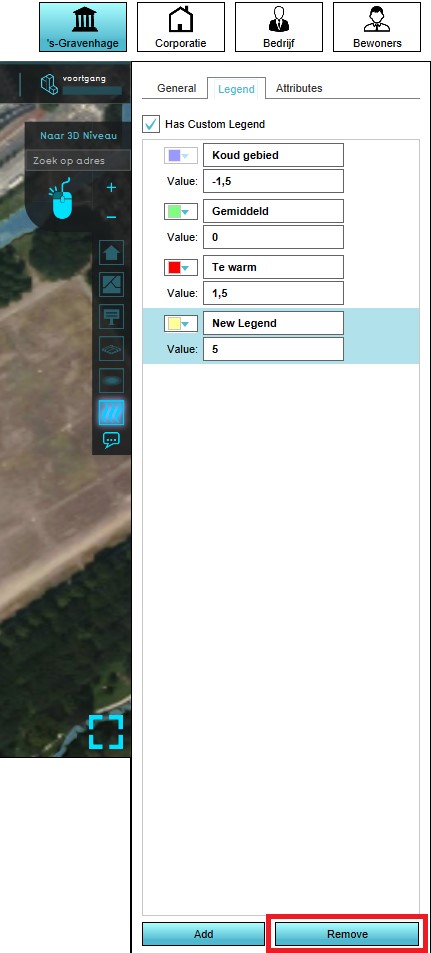 Click on "remove" to remove (a) selected entry or entries
 -
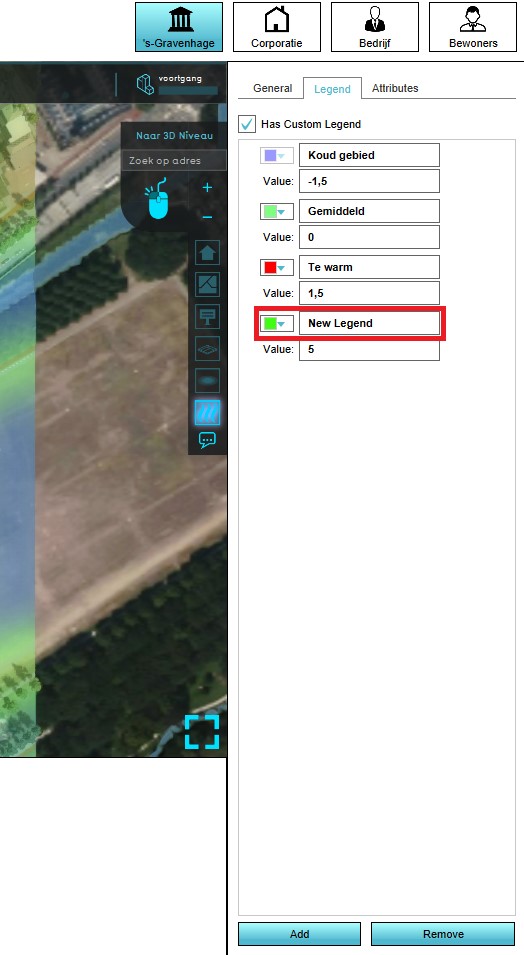 Change the name of the entry
 -
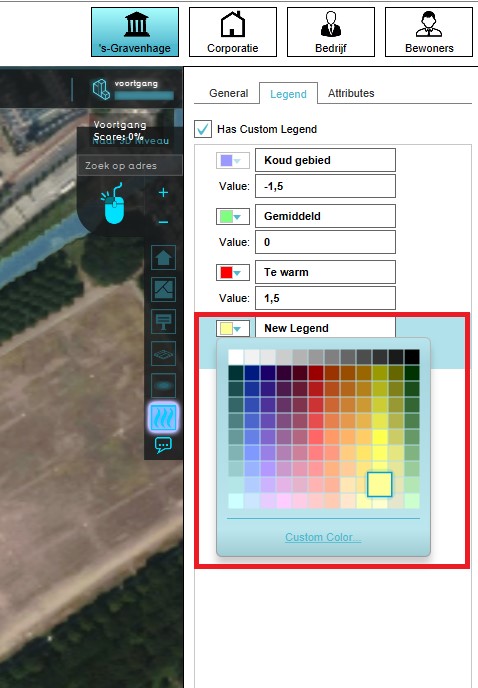 Change the color of the entry
 -
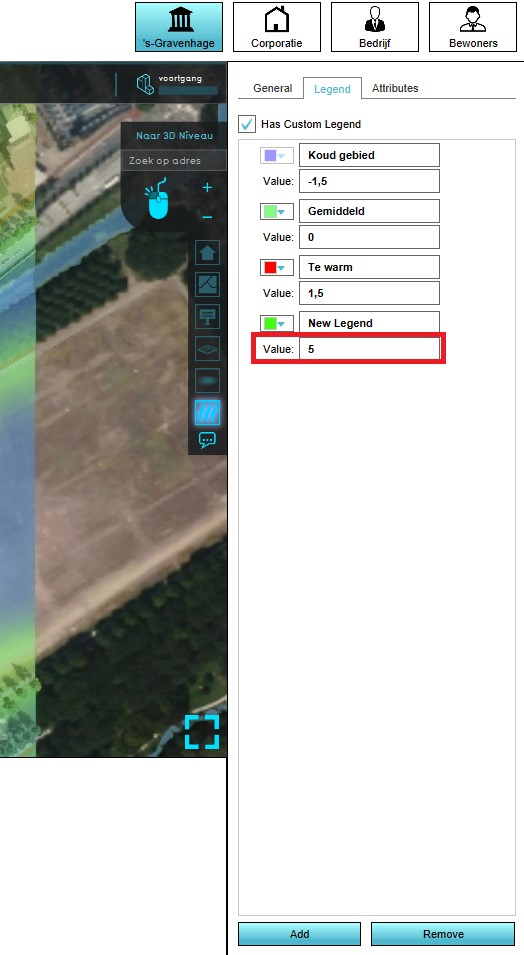 Change the value of the entry


Notes
- The order of entries is dictated by the values of the entries. While editing the values, the entries may reorder automatically.
- Any value in the Grid Overlay results which exactly matches an entry in the legend, will be displayed with that entry's color.
- Any value higher or lower than the highest or lowest entry in the legend will be displayed with the color of the highest or lowest entry respectively.
- For result types using the INTERPOLATED style, any value in between the values of two entries in the legend will be displayed with the interpolated color of the two closest entries.
- NO_DATA values are automatically visualized as transparent.
- The name of an entry cannot be empty. However, a "space" can be used instead to display a color without a (visible) text.
- The Grid Overlay's legend can be reset to the default by unchecking the "Custom Legend" option. Any customizations to that Grid Overlay's legend are then discarded.