How to edit a Measure with QGIS: Difference between revisions
Jump to navigation
Jump to search
No edit summary |
No edit summary |
||
| (2 intermediate revisions by one other user not shown) | |||
| Line 10: | Line 10: | ||
|In case the project does not contain a measure, add one by clicking on the ''Add'' Button. | |In case the project does not contain a measure, add one by clicking on the ''Add'' Button. | ||
|Optionally rename the added measure | |Optionally rename the added measure | ||
| | |Hover over Measures in the ribbon bar and select Export Geo Data. | ||
|For Filter, select the specific Measure you want to edit. | |For Filter, select the specific Measure you want to edit. | ||
|Click on copy URL next to Web Feature Service (WFS) | |Click on copy URL next to Web Feature Service (WFS) | ||
| Line 25: | Line 25: | ||
<gallery> | <gallery> | ||
File:Wfsmeasure.png|Obtain the URL by exporting a Measure as a WFS Service. | File:Wfsmeasure.png|Obtain the URL by exporting a Measure as a WFS Service. | ||
File:Qgis-measure.png|Select a | File:Qgis-measure.png|Select a layer from the project's Measure WFS connection in QGIS. | ||
</gallery> | </gallery> | ||
{{howto | {{howto | ||
|title=Edit a Measure WFS in QGIS | |title=Edit a Measure WFS in QGIS | ||
|With the Measure WFS Layers added by the previous How-to, select a Layer you want to edit. | |With the Measure WFS Layers added by the previous How-to, select a Layer you want to edit. | ||
|Additionally, [[How to add | |Additionally, [[How to add the Project WMS in QGIS|add the project's original satellite WMS for reference]]. | ||
|To edit the layer, follow the steps described in [[How to edit your project data via WFS]] | |To edit the layer, follow the steps described in [[How to edit your project data via WFS]] | ||
|}} | |}} | ||
| Line 47: | Line 47: | ||
|howtos=*[[How to edit your project data via WFS]] | |howtos=*[[How to edit your project data via WFS]] | ||
*[[How to access your Project WFS in QGIS]] | *[[How to access your Project WFS in QGIS]] | ||
*[[How to modify | *[[How to modify the Project WFS url to allow transactions to overwrite conflicting data]] | ||
}} | }} | ||
Latest revision as of 11:47, 8 July 2026
Follow the steps of the how-to's below to add a WFS layer to QGIS and edit a specific layer.
How to Add a Measure WFS to QGIS:
- Open a Project in Editor mode
- In the ribbon bar, select Future Design
- Click on Measures to inspect your measures
- In case the project does not contain a measure, add one by clicking on the Add Button.
- Optionally rename the added measure
- Hover over Measures in the ribbon bar and select Export Geo Data.
- For Filter, select the specific Measure you want to edit.
- Click on copy URL next to Web Feature Service (WFS)
- Open QGIS
- Hover over Layers in the ribbon bar, and under Add Layer, select Add WFS / OGC Api Feature Layer
- In the Data Source Manager window, Click on the New button
- Provide a custom name for the service
- Select the URL field and paste the copied WFS URL.
- Click on OK.
- Click on Connect
- Select the Layers you want to edit and click on Add.
- Close the Window.
-
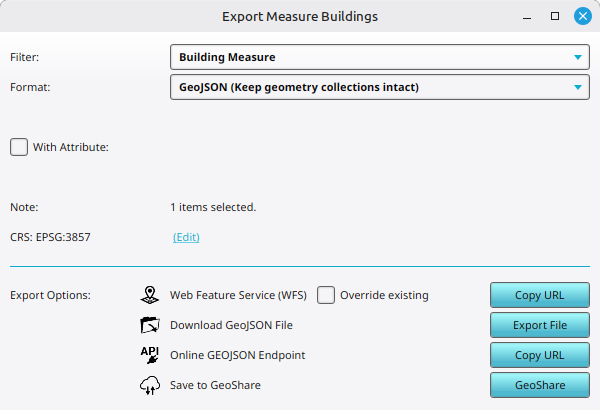 Obtain the URL by exporting a Measure as a WFS Service.
 -
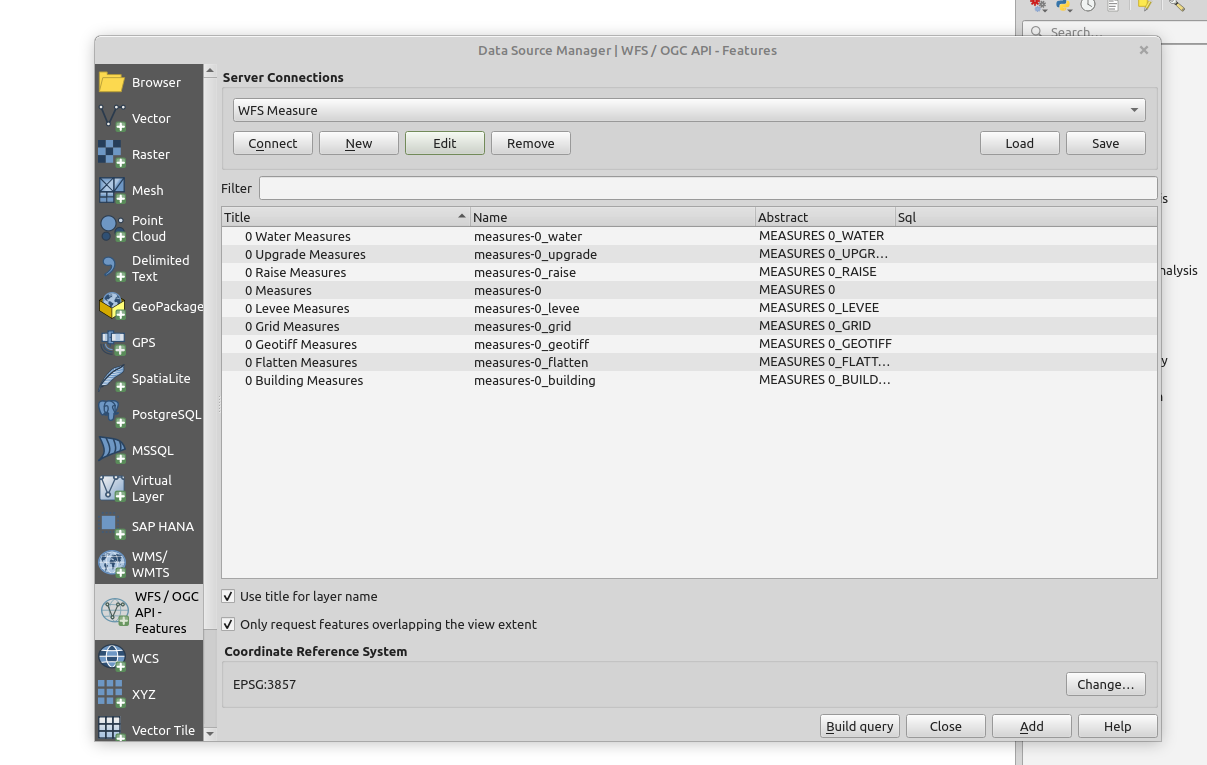 Select a layer from the project's Measure WFS connection in QGIS.


How to Edit a Measure WFS in QGIS:
- With the Measure WFS Layers added by the previous How-to, select a Layer you want to edit.
- Additionally, add the project's original satellite WMS for reference.
- To edit the layer, follow the steps described in How to edit your project data via WFS
-
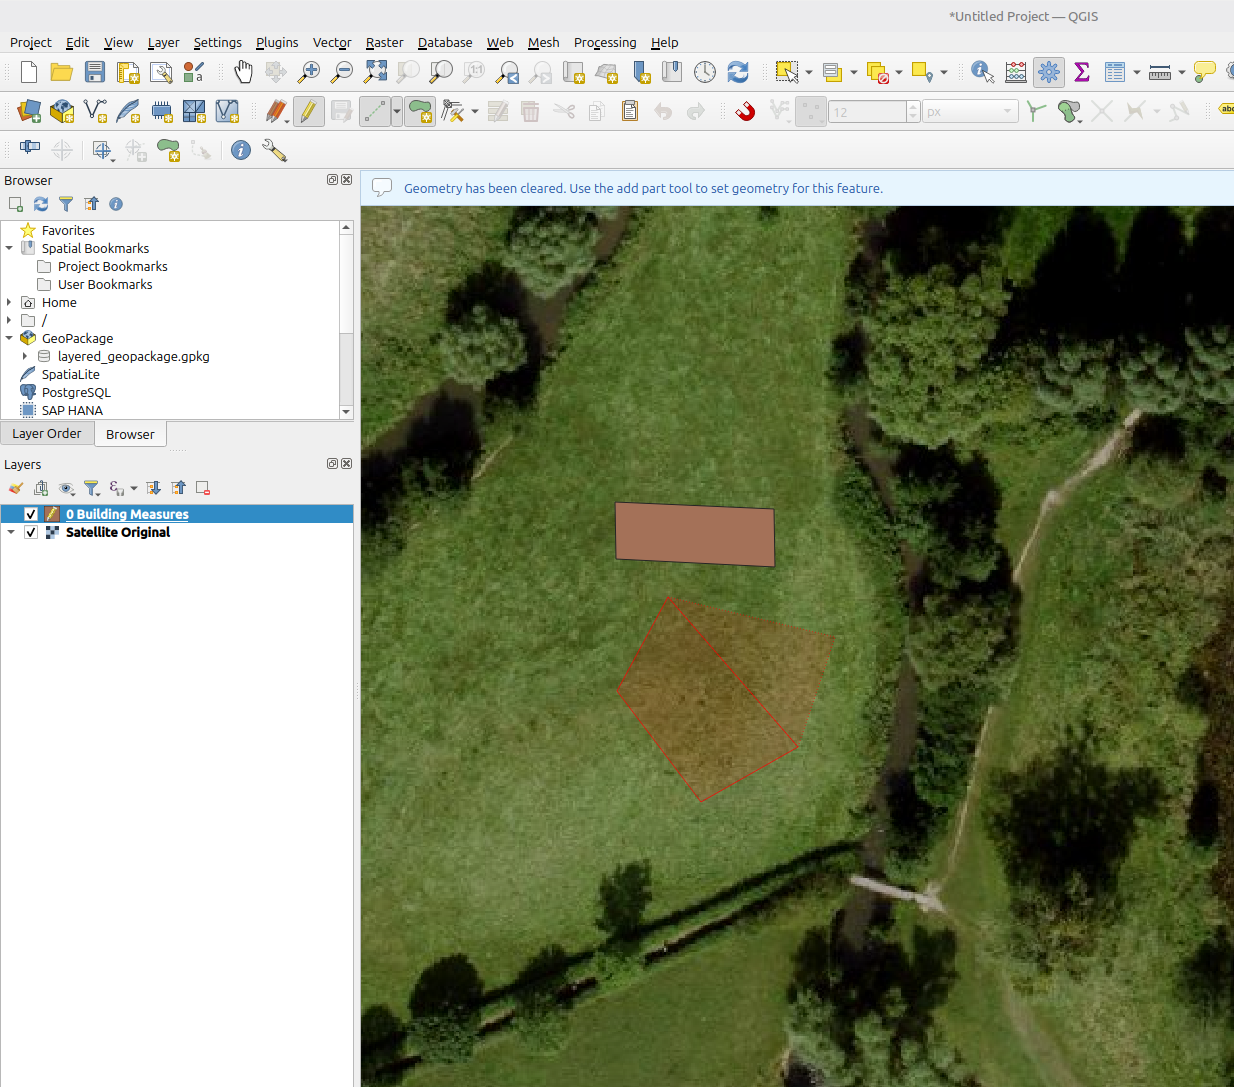 Drawing a new Measure building next to an existing one, with Satellite Original WMS as background.
 -
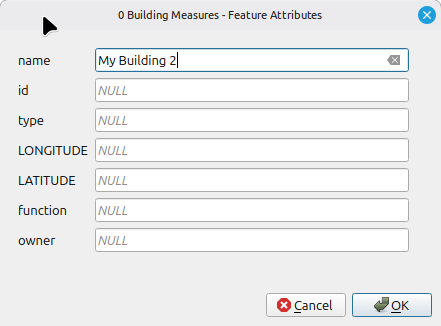 Providing a name for the added Measure Building.
 -
 Click on the save button to store the changes made to the layer.


