How to edit the Camera Position: Difference between revisions
No edit summary |
No edit summary |
||
| (One intermediate revision by the same user not shown) | |||
| Line 29: | Line 29: | ||
* [[How to create or remove Cinematics]] | * [[How to create or remove Cinematics]] | ||
* [[How to edit Cinematics]] | * [[How to edit Cinematics]] | ||
* [[How to edit | * [[How to edit Key Points]] | ||
* [[How to couple cinematics to stakeholders]] | * [[How to couple cinematics to stakeholders]] | ||
|seealso= | |seealso= | ||
| Line 35: | Line 35: | ||
* [[Camera#Cinematic Edit Camera]] | * [[Camera#Cinematic Edit Camera]] | ||
}} | }} | ||
[[Category:How-to's]] | |||
Latest revision as of 14:33, 30 January 2024
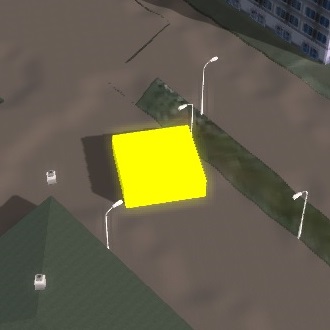
When the "Edit Camera Position" button is selected, you enter camera editing mode. This mode allows you to edit the camera location and orientation for the selected keypoint. In place of the "Edit Camera Position" button, new buttons will have appeared in the right panel to store the current camera position. In the 3D Visualization, an object will be visible to help orient the camera.
Moving the Camera
While editing the camera position for a cinematic, you have more exact control over the camera. This also means the controls are different from moving the camera normally, this can be done with your mouse or keyboard or both.
- To start moving the camera, by pressing both mouse buttons and drag your mouse
- To move the camera, use the left mouse button.
- To move the camera up and down, use both mouse buttons at the same time.
- To change the direction the camera is pointed at, use the right mouse button.
- To rotate the camera around its axis, scroll up or down with the scroll wheel.
- To navigate you can use the arrow buttons on your keyboard. The left and right directed arrows move the camera in the same direction, eventually allowing it to spin 360 degrees around the object.
- Also the up and down arrow buttons can be used, using these buttons the user can variate between a top and bottom view
Store Camera Position
When the camera is in the position you want for this keypoint, you can press "Store Camera Position" to store the current location and orientation of the camera for this keypoint.
Stop Editing Camera Position
When you are done editing the camera position for this keypoint, you can press "Stop Editing Camera Position" to leave the camera editing mode. The camera will reset to the camera position set for this keypoint. If you store your current camera position right before stopping camera editing mode, you will not see the camera move.

