How to create a new Project with 3D BAG data: Difference between revisions
Jump to navigation
Jump to search
(Created page with "300px|right|thumb|The checkbox in the advanced options overview. The 3D BAG data is created by the 3D geo-information research group, TU Delft. Th...") |
No edit summary |
||
| (3 intermediate revisions by 2 users not shown) | |||
| Line 1: | Line 1: | ||
[[File:Use_3dbag_check.png|300px|right|thumb|The checkbox in the advanced options overview.]] | [[File:Use_3dbag_check.png|300px|right|thumb|The checkbox in the advanced options overview.]] | ||
The 3D BAG data is created by the 3D geo-information research group, TU Delft. This dataset contains 3D models of the BAG data in different | The 3D BAG data is created by the 3D geo-information research group, TU Delft. This dataset contains 3D models of the BAG data in different LODs. This 3D dataset can be imported in a [[Project]] to replace the usual, 2D polygon-based [[Building]]s, even at [[Project]]-creation time. | ||
{{howto|title=use 3D BAG data when creating a new Project | {{howto|title=use 3D BAG data when creating a new Project | ||
| Line 16: | Line 16: | ||
* License information: https://docs.3dbag.nl/en/copyright/ | * License information: https://docs.3dbag.nl/en/copyright/ | ||
}} | }} | ||
[[Category:How-to's]] | |||
Latest revision as of 13:57, 30 January 2024
The 3D BAG data is created by the 3D geo-information research group, TU Delft. This dataset contains 3D models of the BAG data in different LODs. This 3D dataset can be imported in a Project to replace the usual, 2D polygon-based Buildings, even at Project-creation time.
How to use 3D BAG data when creating a new Project:
- Select a "New Project" in the Tygron Platform.
- In the "Select Area" part of the wizard click on "advanced options".
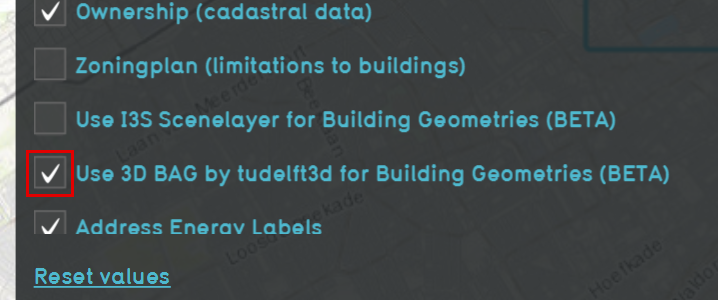
- Check the "Use 3D BAG by tudelft3d for Building Geometries" checkbox to enable the 3D BAG data to load automatically for this selected area.
- Generate map as usual to start the project.
See also
External links
- More information about 3D BAG data: https://3dbag.nl/en/viewer
- License information: https://docs.3dbag.nl/en/copyright/
