How to configure a dynamic infiltration factor for a Water Overlay: Difference between revisions
No edit summary |
No edit summary |
||
| Line 14: | Line 14: | ||
}} | }} | ||
<gallery widths=300px heights=300px> | <gallery widths=300px heights=300px> | ||
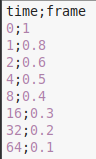
File:InfiltrationFactor_csv.png|Example of a CSV file | File:InfiltrationFactor_csv.png|Example of a CSV file. For each row, the first value is the time in hours is displayed. The second value is the infiltration factor. | ||
File:InfiltrationStep_waterwizard.png|Choose the option dynamic in the infiltration step of the water wizard and click on select. | File:InfiltrationStep_waterwizard.png|Choose the option dynamic in the infiltration step of the water wizard and click on select. | ||
File:Import_infiltration_csv.png|Adjust the import time setting to ''Hours'' first, since the values are formulated in hours. Choose import CSV and import the created file. | File:Import_infiltration_csv.png|Adjust the import time setting to ''Hours'' first, since the values are formulated in hours. Choose import CSV and import the created file. | ||
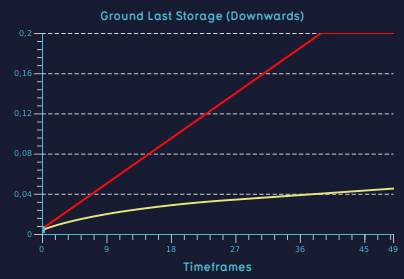
File:Infiltration_factor_dynamic.png|A dynamic infiltration factor (yellow) compared to the default infiltration factor (red). | File:Infiltration_factor_dynamic.png|A dynamic infiltration factor (yellow) compared to the default infiltration factor (red). | ||
</gallery> | </gallery> | ||
<gallery widths=300px heights=300px> | |||
File:InfiltrationFactor_decreasing_csv.png|Example of a CSV file with a decreasing infiltration factor over time. | |||
File:Infiltration_factor_decreasing.png|A decreasing infiltration factor (yellow) compared to the default infiltration factor (red). | |||
</gallery> | |||
{{article end | {{article end | ||
|notes= | |notes= | ||
Revision as of 13:43, 24 January 2023
By default, the amount of water that can infiltrate into the unsaturated zone is linear. This page describes how to configured a changing infiltration over time by configuring the infiltration factor s attribute of a Water Overlay.
- Prepare a CSV file with the desired timing data for the infiltration factor s.
- Open the configuration wizard of the Groundwater Overlay and continue to the step concerning infiltration.
- Set the infiltration factor s' mode to dynamic, and select 'Select'. This will open the CSV importing tool.
- Select 'Import new CSV'
- In the lower right of the panel, adjust the import parameters of the csv you are about to select first. This is required to interpret the file correctly.
- Select the CSV file with the desired timing data.
- The imported values now appear in the CSV importing tool. Optionally change the used time metric and verify that the data is interpreted correctly.
- The CSV importing tool can now be closed.
- Continue with the configuration wizard of the Flooding Overlay.
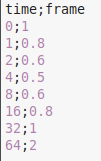
Example of a CSV file. For each row, the first value is the time in hours is displayed. The second value is the infiltration factor.
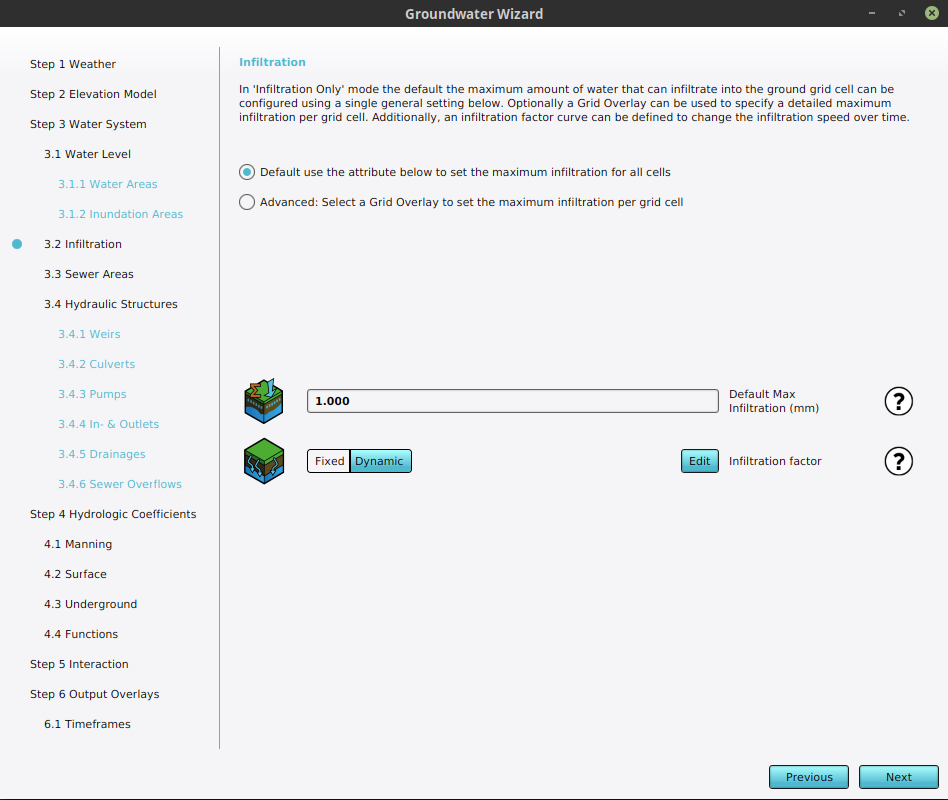
Choose the option dynamic in the infiltration step of the water wizard and click on select.
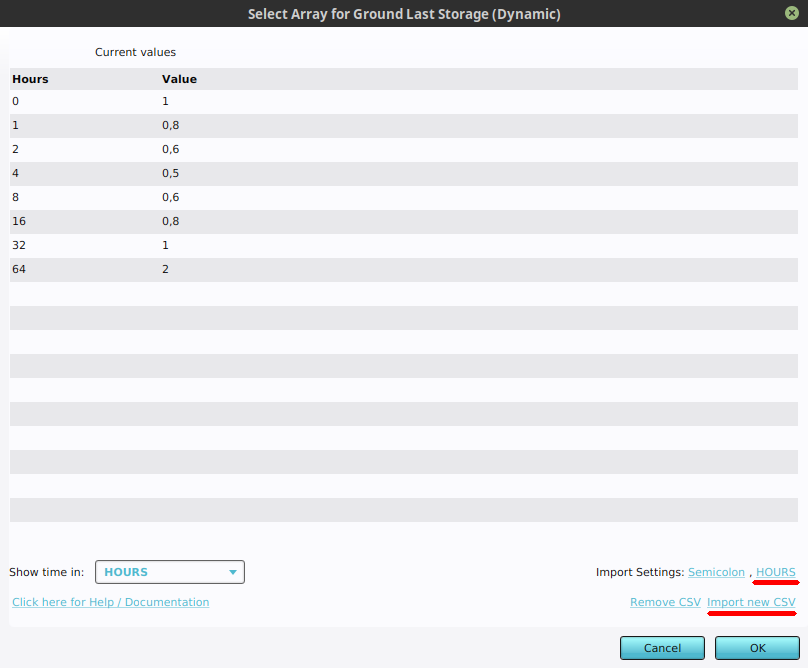
Adjust the import time setting to Hours first, since the values are formulated in hours. Choose import CSV and import the created file.
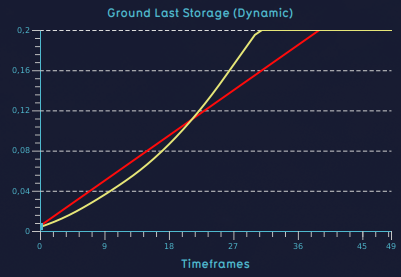
A dynamic infiltration factor (yellow) compared to the default infiltration factor (red).


Example of a CSV file with a decreasing infiltration factor over time.
A decreasing infiltration factor (yellow) compared to the default infiltration factor (red).

