How to add a Cinematic to the 3D Web Viewer: Difference between revisions
Jump to navigation
Jump to search
No edit summary |
No edit summary |
||
| Line 1: | Line 1: | ||
{{Editor steps|title=Add a [[Cinematic]] to the [[3D Web Viewer]] | {{Editor steps|title=Add a [[Cinematic]] to the [[3D Web Viewer]] | ||
|video=https://youtu.be/LL1DLKZRUGE | |||
|Load or create a project | |Load or create a project | ||
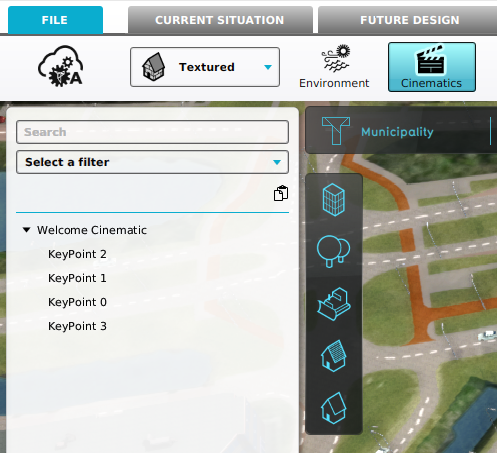
|From the [[Ribbon]], select [[Tools]] -> [[Cinematics]] to inspect the Cinematics in your project. | |From the [[Ribbon]], select [[Tools]] -> [[Cinematics]] to inspect the Cinematics in your project. | ||
Revision as of 08:15, 2 November 2023
How to Add a Cinematic to the 3D Web Viewer:
Watch the video: 
- Load or create a project
- From the Ribbon, select Tools -> Cinematics to inspect the Cinematics in your project.
- Remember the name of an existing Cinematic, or create a new Cinematic.
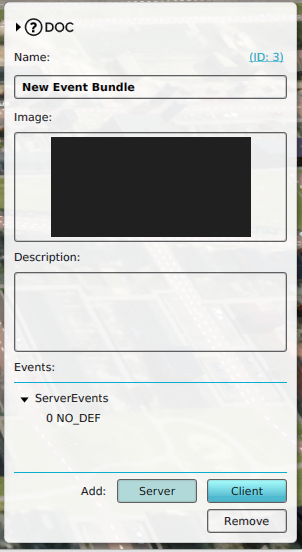
- From the Ribbon, select Future Design-> Event Bundles.
- Add a new Event Bundle.
- In the detail panel, click on the "Server" button.
- Select the event: "0 NO_DEF". A menu in the bottom opens.
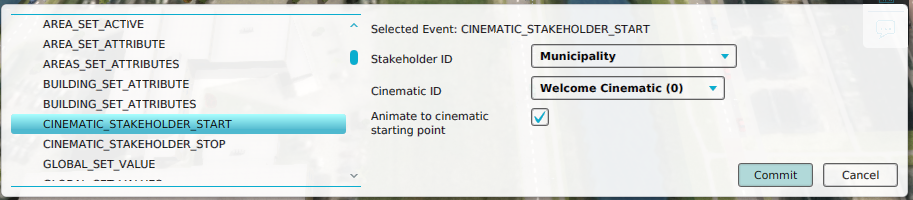
- Scroll down and select the Logic Event Type: "CINEMATIC_STAKEHOLDER_START".
- For the parameter "Cinematic ID", select a cinematic.
- Click on commit.
- The event should now have the name of the selected event type.
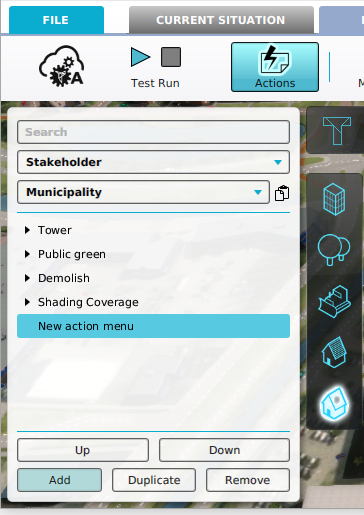
- Next, Select Actions.
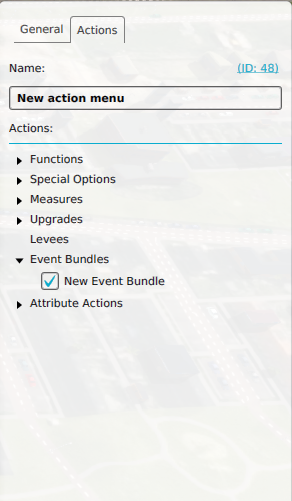
- Add a new Action Menu, and click on the Actions tab in its detail panel.
- Unfold the Event Bundles section and select the recently created Event Bundle.
- The cinematic should now be available in the 3D Web Viewer.
- To verify this, click on 3D Web link on the top right part of the screen. This should the 3D Web Viewer in a browser.
- Alternatively, go to Tools -> Web Interface, Show 3D Map (Cesium). This should the 3D Web Viewer in a browser as well.
- In the 3D Web Viewer, click on the action menu icon to activate the cinematic.
Inspecting the Cinematics in a project.

Add an Event Bundle.
Add a Server event to an Event Bundle.
Configuring Cinematic Stakeholder Start event.
Adding an Action Menu.
Adding an Event Bundle to an Action Menu.

Opening the 3D Web Viewer in the browser.
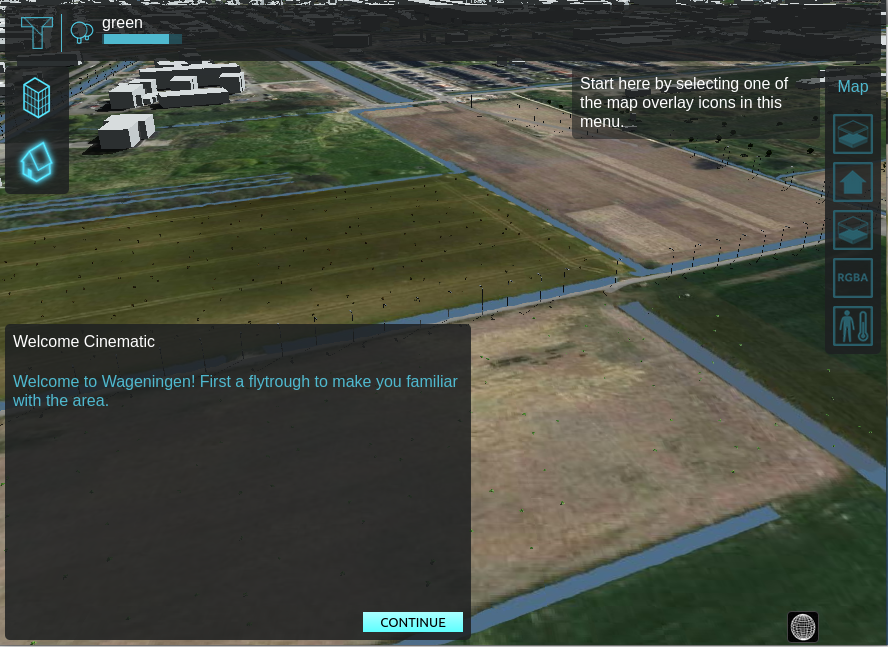
Activating a Cinematic in the 3D Web Viewer.


