How to select an attribute for a Geo Link based on a set of features
Revision as of 13:15, 12 January 2023 by Frank@tygron.nl (talk | contribs) (Created page with "A Geo Link can be configured better when it is directly based on the type of features that it is expected to be matched upon. This how-to describes how to provide feature information for the configuration of a Geo Link's matching and mapping attributes. {{editor location|geo plugins}} {{howto|title=Preparing a set of features for the attribute selection of a Geo link. | Select the Geo Plugin that the Geo Link is part of. | When configuring it based on an offline file...")
A Geo Link can be configured better when it is directly based on the type of features that it is expected to be matched upon. This how-to describes how to provide feature information for the configuration of a Geo Link's matching and mapping attributes.
How to Preparing a set of features for the attribute selection of a Geo link.:
- Select the Geo Plugin that the Geo Link is part of.
- When configuring it based on an offline file, uncheck the "Use for New Projects" option.
- Click on the Select hyperlink next to Configuration geometries. A new panel opens.
- Click on the link in the lower left to select features from a file.
- Follow the wizard to obtain the features. Once completed, return to the Geo Plugin general tab.
- Notice Configuration geometries now indicates how many geometries are available to inspect to use in the configuration.
- Switch to the GeoLinks tab of the Geo Plugin detail panel.
- Select the Geo Link that you want to configure.
- Switch to the "Matching Attributes" tab.
- Click on the Select button below Attributes. A new panel with a selection box opens. Select an available attribute.
- Next, click on the select button below Values and select the layer name that requires a match.
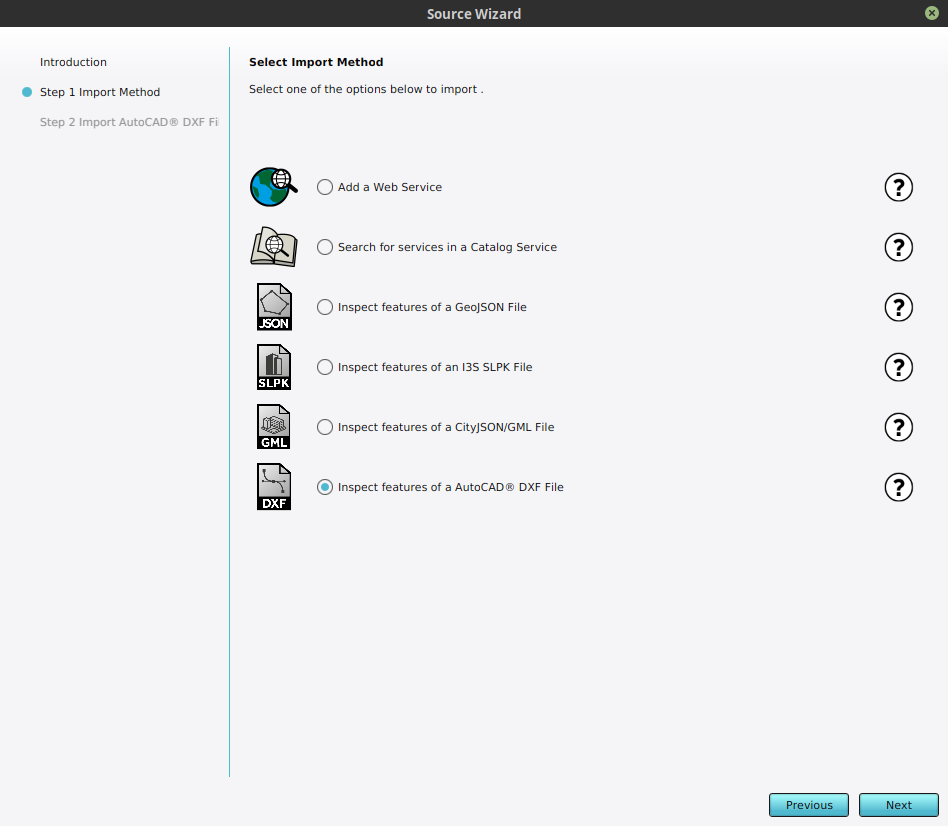
Wizard to inspect features from a DXF file.
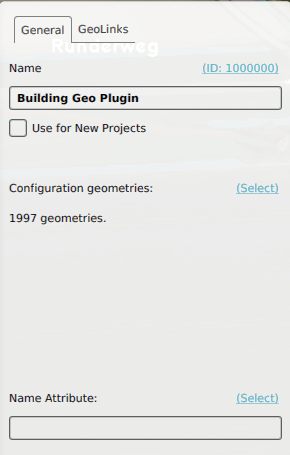
Geo Plugin detail panel indicating the amount of features that can be used for configuration.
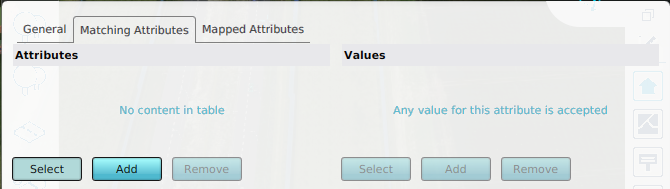
The matching tab of the geolink detail panel with the Select buttons.

Select the attribute LAYER from the attribute set of the DXF features.
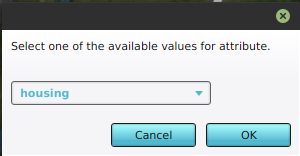
Select a value for the attribute LAYER.


Notes
- When a Geo Plugin uses a WFS source, attributes can also be obtained directly from the service without querying the features.