Scenario
By default, a project in the Tygron Platform always consists of at least one scenario.
How-to's
Removing a Scenario from a project
Sometimes an earlier implemented scenario becomes redundant, or an error has occurred that renders a scenario useless. In such cases it is possible to remove the scenario completely.
- Select Multi-Scenario → Scenarios
- Select the scenario to be removed on the left panel
- Select Remove on the bottom of the left panel
Changing the properties of a Scenario
Scenario
By selecting a scenario entry on the left panel, the following properties become available on the right panel:

Name
- In the Name field a more suitable name can be entered, if desired. Examples of this can be: "Tutorial", "Prologue", etc.
- Select Multi-Scenario → Scenarios
- Select scenario to be renamed from the left panel
- Select Name field on right panel
- Delete the previous name
- Enter new name
- Confirm by pressing the 'Enter' key
Description
- The description field allows for describing the scenario in the Editor. This is convenient when the scenario has added complexity.
- Select Multi-Scenario → Scenarios
- Select scenario to have description added from the left panel
- Select Description field on right panel
- Delete the previous text (if needed)
- Enter new description
- Text is instantly confirmed when typed ('Enter' key adds hard return to text)
Event Bundles
- Main article: Events
An event is something that occurs, on which the application can react. By selecting the Event Bundles option of a scenario, (a bundle of) Server events can be added to a scenario, that will trigger as soon as the scenario is activated.
Server Events fired when chosen
- This section manages Server Events that are fired when the scenario is activated. Events can be assigned on the right panel to the selected scenario, after being added with the 'Add Event' button on the bottom of the right panel. Then the desired event can be selected from a list on the bottom panel. The selection can be confirmed with the 'Commit' button, or cancelled with the 'Cancel' button.
- Select Multi-Scenario → Scenarios
- Select scenario to have events added to
- Select Event Bundles from the selected scenario
- Select 'Add event' on the bottom of the right panel
- Select the newly added event on the right panel
- Select the desired server event from the bottom panel
- Confirm the selection with the 'Commit' button, or use the 'Cancel' button to clear the selection

Measures
- Main article: Measures

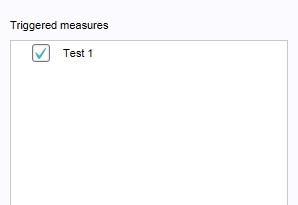
Besides events it is also possible to trigger measures (= predefined actions) when a scenario is activated. For example; in one scenario the stakeholders looked into different spatial alignments of possible solutions, in another scenario, a particular measure is applied, decreasing the space of possible solutions, which in turn can accommodate further discussions. Prerequisite for this is to have the measure(s) already available, then select the Measures entry on the left panel. The available measures will then show up on the right panel, which can then be assigned to the selected scenario.
- Ensure predefined measures are available in the project
- Select Multi-Scenario → Scenarios
- Select the scenario to have measures added to
- Select on the left panel the Measures property from the selected scenario
- Mark the check box of the desired measure from the available entries on the right panel
Stakeholders

- Main article: Stakeholders
Selecting the arrow next to 'Stakeholders' on the left panel opens up the stakeholder section, containing the names of all active stakeholders in the project. Here the stakeholder properties can be set up per scenario. The following properties can be adjusted:
Start with Cinematic
- Main article: Cinematics
- To introduce a scenario with a cinematic, each stakeholder can have a tailor made cinematic triggered at the start of the scenario to inform about the intricacies of this particular scenario. These cinematics must be created first, before they are available for selection from the drop down menu on the right panel.
- Ensure a proper cinematic is available
- Select Multi-Scenario → Scenarios
- Select the Scenario to have the stakeholder cinematic changed from
- Select on the left panel the affected Stakeholder from the Stakeholder list of the selected scenario
- Select on the right panel the desired cinematic from the drop down menu
- Mark the check box 'Start with Cinematic' to activate the cinematic at the start of the scenario
Active Action Menus
- Main article: Actions
- It is possible to assign more (or even different) action menus for each scenario, for each stakeholder. This is very useful when scenarios are implemented to build up complexity or restrict actions for that scenario. Available action menus are present in a list with check boxes. Checking a box adds the action menu to the selected stakeholder for that scenario.
- Select Multi-Scenario → Scenarios
- Select the scenario to have the stakeholder actions changed from
- Select on the left panel the affected Stakeholder from the Stakeholder list of the selected scenario
- Mark on the right panel the check boxes of the desired action menus