Use cases Distance Overlay: Difference between revisions
No edit summary |
|||
| (43 intermediate revisions by 3 users not shown) | |||
| Line 1: | Line 1: | ||
This page describes how to set up a project to calculate the | This page describes two use cases. The first use case is how to set up a project to calculate the surface area of a set of constructions within a certain distance of a waterway. See section {{inlink|Variations}} for other examples and inspirations how to model your distance calculations for your own use cases. The second use case is about counting the number of houses within a certain distance from two bus stops. | ||
==Distance Overlay== | ==Distance Overlay== | ||
| Line 8: | Line 5: | ||
==Use Case 1== | ==Use Case 1== | ||
As an authority, I am interested in how to calculate the amount of water-edge friendly vegetation, within 20 meters of the water edge. Using TQL, it is already easy to calculate the amount of square meters of a specific function or category, but how to restrict counting the vegetation within 20 meters of the water edge? | |||
<br> | |||
Let us consider the use case, where I, as an authority, want to calculate the amount of square meters of deciduous trees within 20 meters of the water edge. It is currently possible to model this calculation. It requires the following: | Let us consider the use case, where I, as an authority, want to calculate the amount of square meters of deciduous trees within 20 meters of the water edge. It is currently possible to model this calculation. It requires the following: | ||
* An attribute representing the distance; | * An attribute representing the distance; | ||
| Line 22: | Line 21: | ||
|Select Terrain in the ribbon bar; | |Select Terrain in the ribbon bar; | ||
|Select a Terrain. ''In this case Water''; | |Select a Terrain. ''In this case Water''; | ||
|Click on the tab [[ | |Click on the tab [[Attribute]]; | ||
|Scroll down the list and fill in the attribute in the text field of '''Add new Attribute with Name'''. ''In this case DISTANCE_TO_WATER_EDGE''; | |Scroll down the list and fill in the attribute in the text field of '''Add new Attribute with Name'''. ''In this case DISTANCE_TO_WATER_EDGE''; | ||
|Fill in the desired distance in the text field of '''Add new Attribute with Value'''. ''In this case 20. For reasons described in | |Fill in the desired distance in the text field of '''Add new Attribute with Value'''. ''In this case 20. For reasons described in {{inlink|Notes}}, it can also be set to a slightly larger value than 20, for example 25''; | ||
|Click on Save new Attribute; | |Click on Save new Attribute; | ||
|Notice that the attribute has been added to the selected Terrain Type. | |Notice that the attribute has been added to the selected Terrain Type. | ||
| Line 60: | Line 59: | ||
===Testing the setup=== | ===Testing the setup=== | ||
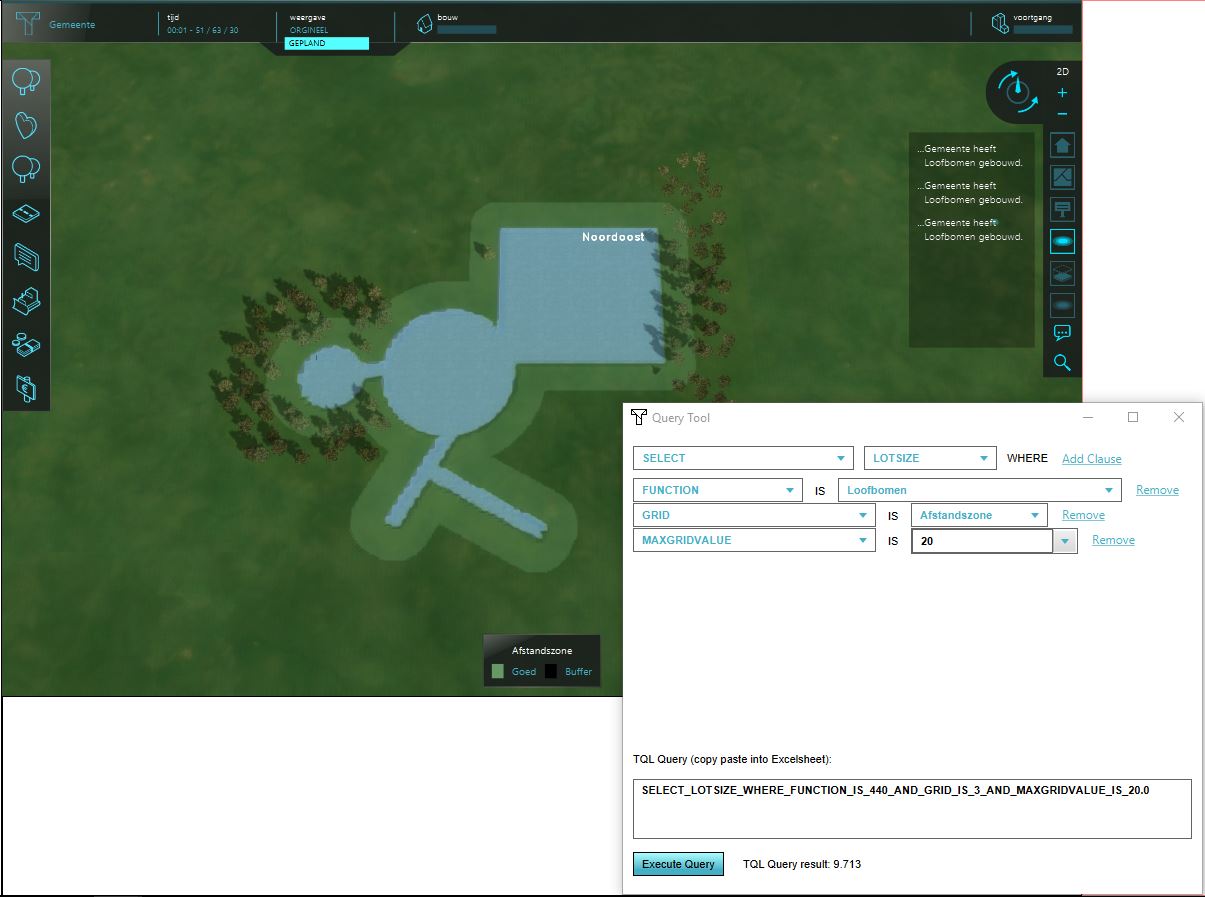
[[File:distancequerytestrunexample.jpg|thumb|400px|right|A result of a test run with a distance overlay and a query for deciduous trees with 20 meters.]] | [[File:distancequerytestrunexample.jpg|thumb|400px|right|A result of a test run with a distance overlay and a query for deciduous trees with 20 meters.]] | ||
In order to test the setup in a dynamic case, we optionally have to do one or more things. We can add the deciduous trees function to the [[Action|Actions]] of our [[Stakeholder]]. Furthermore, we can add open water to the actions or our stakeholder as well. With these two actions added to our stakeholder, we can start a [[ | In order to test the setup in a dynamic case, we optionally have to do one or more things. We can add the deciduous trees function to the [[Action|Actions]] of our [[Stakeholder]]. Furthermore, we can add open water to the actions or our stakeholder as well. With these two actions added to our stakeholder, we can start a [[test run]] and plan both deciduous trees and open water. By keeping the Query tool opened, we can, at any time, execute the query and calculate the current amount of square meters of deciduous trees within 20 meters of water! | ||
Optionally, you can construct an indicator that calculates this query instead, and visualize this number for users during a Single or Multi-user session. | Optionally, you can construct an indicator that calculates this query instead, and visualize this number for users during a Single or Multi-user session. | ||
| Line 78: | Line 77: | ||
==Use Case 2== | ==Use Case 2== | ||
Let us consider the use case, where I, as an authority, want to calculate the number of | Let us consider the use case, where I, as an authority, want to calculate the number of houses that are located within 200 meters from two bus stops. If from a house, multiple bus stops are accessible, we can say something about the accessibility of public transport in that Neighborhood. It requires the following to calculate this: | ||
* A function value representing the | * A function value representing the radius of the distance zone; | ||
* A Distance Zone Overlay, calculating the | * A Distance Zone Overlay, calculating the number of overlapping distance zones; | ||
* A TQL query calculating the number of | * A TQL query calculating the number of houses within the distance of multiple bus stops; | ||
<br> | |||
First an action needs to be created that can resemble a Bus stop. In order to create a Bus stop action, a function needs to be assigned to this action. For our use case the Parkeerbord function will be chosen and this function will resemble the bus stop function.<br> Next the distance zone of the function needs to be set. For this use case, the Distance Zone attribute of the Parkeerbord functions needs to be modified. In the Distance Zone attribute field the desired radius of the distance zone can be specified in meters, in our case 200 meters.<br>The next step is to select the "Count Hits instead of Distance" in the Distance Zone Overlay. By selecting this option, the number of overlapping distance zones will be counted. For this use case, this number will be 2 because we want to retrieve the number of houses located within 200 meters of two bus stops. | |||
===Step 1: Creating the Bus-stop Action=== | ===Step 1: Creating the Bus-stop Action=== | ||
First, for this use | First, for this use case, let us choose an action that can resemble a '''Bus stop'''. Next, we find the type of [[Functions|function]] we want to assign to this action. Take the following steps: | ||
<br> | |||
{{Editor steps|title=How to add an action to a stakeholder | {{Editor steps|title=How to add an action to a stakeholder | ||
|Open the project in Editor Mode; | |Open the project in Editor Mode; | ||
| Line 94: | Line 95: | ||
|Select Assigned [[Actions]] in the drop-down menu of the action menu; | |Select Assigned [[Actions]] in the drop-down menu of the action menu; | ||
|Select [[Functions]] in the [[right panel]]; | |Select [[Functions]] in the [[right panel]]; | ||
| | |Choose a function that resembles a bus stop or create a new function; | ||
|Notice that the selected function is now added to the Assigned [[Actions]] in the [[left panel]]; | |Notice that the selected function is now added to the Assigned [[Actions]] in the [[left panel]]; | ||
}} | }} | ||
| Line 110: | Line 110: | ||
</gallery> | </gallery> | ||
===Step 2: | ===Step 2: Specifying the Distance Zone radius of a function === | ||
{{Editor steps|title=How to specify the distance zone radius | |||
{{Editor steps|title=How to | |||
|Open the project in Editor Mode; | |Open the project in Editor Mode; | ||
|Select [[Indicators]] in the ribbon header; | |Select [[Indicators]] in the ribbon header; | ||
|Select [[Function Values]] in the ribbon bar; | |Select [[Function Values]] in the ribbon bar; | ||
|Notice that a table has appeared with all the [[Functions|functions]] in a row and their attributes in the columns; | |Notice that a table has appeared with all the [[Functions|functions]] in a row and their attributes in the columns; | ||
|Find the | |Find the function used as a bus stop [[Functions|function]] in the table and select the Distance Zone Attribute in the corresponding column; | ||
|Write the desired | |Write the desired radius in meters for the distance zone attribute; | ||
}} | }} | ||
<gallery mode=nolines> | <gallery mode=nolines> | ||
| Line 129: | Line 127: | ||
===Step 3: Configuring the Distance Zone Overlay=== | ===Step 3: Configuring the Distance Zone Overlay=== | ||
To add and configure a Distance Zone Overlay, use the following steps: | |||
{{Editor steps|title=How to configure a Distance Zone Overlay | {{Editor steps|title=How to configure a Distance Zone Overlay | ||
|Open the project in [[Editor | Editor Mode]]; | |Open the project in [[Editor | Editor Mode]]; | ||
| Line 136: | Line 134: | ||
|Select Add Distance Zone in the Overlays popup; This adds a new Distance Zone Overlay; | |Select Add Distance Zone in the Overlays popup; This adds a new Distance Zone Overlay; | ||
|The Overlays list should be shown on the left and the newly added Distance Zone Overlay should be selected. If not, select it manually; | |The Overlays list should be shown on the left and the newly added Distance Zone Overlay should be selected. If not, select it manually; | ||
|Select the "Count Hits instead of Distance" option; | |Select the "Count Hits instead of Distance" option in the [[right panel]]; | ||
| (Optional) Change the general grid size of grid Overlays in your project; | | (Optional) Change the general grid size of grid Overlays in your project; | ||
| (Optional) Change the name of the Overlay; | | (Optional) Change the name of the Overlay; | ||
}} | }} | ||
<gallery mode=nolines> | |||
File:Geo_data_select.jpg | |||
File:Overlays_select.jpg | |||
File:Distance_zone_overlay_.jpg | |||
File:Select_distance_zone_overlay.jpg | |||
File:Select_count_hits_instead_of_distance.jpg | |||
</gallery> | |||
===Step 4: Creating the TQL Query=== | ===Step 4: Creating the TQL Query=== | ||
In order to dynamically calculate the number of | In order to dynamically calculate the number of houses that lie within 200 meters of two bus stops, we have to create a [[TQL|TQL query]]. Optionally, we can add this query to an [[Excel (Indicator)| Excel Indicator]]. To construct the [[TQL|TQL query]], follow these steps: | ||
{{Editor steps|title=How to create a distance TQL query | {{Editor steps|title=How to create a distance TQL query | ||
|Open the project in [[Editor| Editor Mode]]; | |Open the project in [[Editor| Editor Mode]]; | ||
| Line 150: | Line 155: | ||
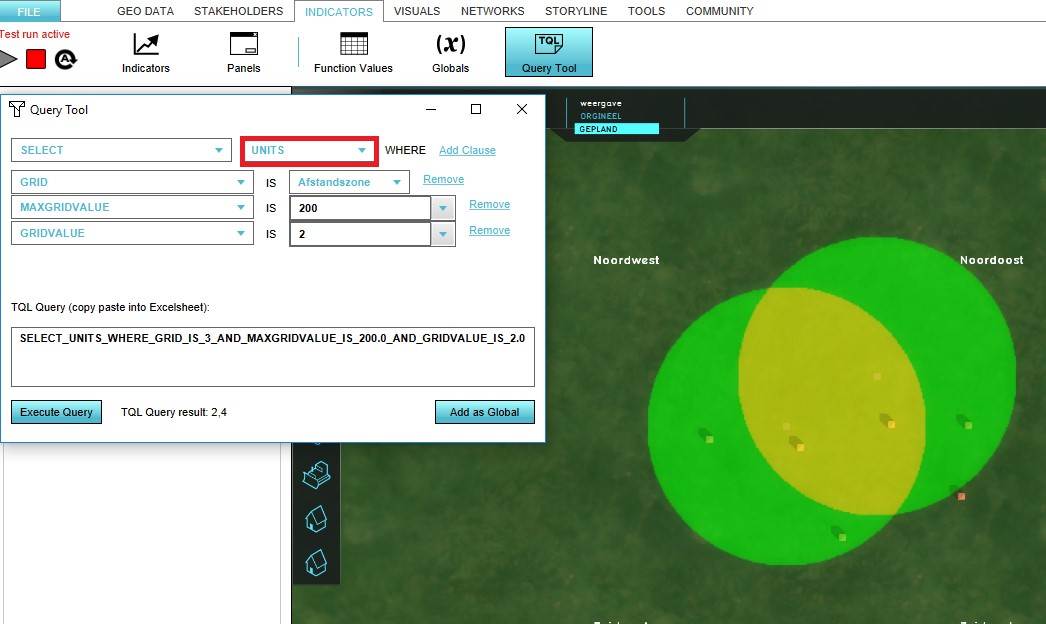
|Select in the second drop-down the type of information calculated. '''UNITS'''; | |Select in the second drop-down the type of information calculated. '''UNITS'''; | ||
|Add three clauses; | |Add three clauses; | ||
|Select GRID in the first clause, and | |Select GRID in the first clause, and select the Grid Overlay 'Distance Zone'; | ||
|Select MAXGRIDVALUE in the second clause, and fill in the | |Select MAXGRIDVALUE in the second clause, and fill in the radius in meters; | ||
|Select GRIDVALUE in the third clause, and fill in the | |Select GRIDVALUE in the third clause, and fill in the overlapping distance zones. Here you can fill in 2, since we have two bus stops. | ||
|Press the execute query to calculate the result of the query; | |Press the execute query to calculate the result of the query; | ||
}} | }} | ||
<gallery mode=nolines> | |||
File:Tql_selection.jpg | |||
File:SELECT_statement.jpg | |||
File:Units_statement.jpg | |||
File:Grid_value_statement.jpg | |||
File:Maxgridvalue_statement.jpg | |||
File:Grid_statement.jpg | |||
</gallery> | |||
===Testing the setup=== | ===Testing the setup=== | ||
With the added | With the added Bus stop function to the [[Action|Actions]] of our [[Stakeholder]] we can start a [[test run]] and start building our Bus stops in the [[project area]]. By keeping the Query tool opened, we can, at any time, execute the query and calculate the current number of houses located within 200 meters of two bus stops.The following values will be used for the TQL query: MAXGRIDVALUE: 200 and GRIDVALUE: 2. <br> | ||
Optionally, you can construct an indicator that calculates this query instead, and visualize this number for users during a Single or Multi-user session. | Optionally, you can construct an indicator that calculates this query instead, and visualize this number for users during a Single or Multi-user session. | ||
===Notes=== | ===Notes=== | ||
* The Distance Zone Overlay is a [[Grid Overlay]]. The accuracy is determined by the size of the grid cells. For more information about the grid size and its limits and Grid Overlays in general, see [[Grid Overlay]]. | * The Distance Zone Overlay is a [[Grid Overlay]]. The accuracy is determined by the size of the grid cells. For more information about the grid size and its limits and Grid Overlays in general, see [[Grid Overlay]]. | ||
Latest revision as of 17:55, 27 January 2023
This page describes two use cases. The first use case is how to set up a project to calculate the surface area of a set of constructions within a certain distance of a waterway. See section Variations for other examples and inspirations how to model your distance calculations for your own use cases. The second use case is about counting the number of houses within a certain distance from two bus stops.
Distance Overlay
Preview Server version 2017.2.0 added the possibility to add multiple instances of the distance overlay and customize the attribute containing the distance. Originally this distance was used as safety distance or noise disturbance distance. These distances describe a negative impact. However, with the customizable attribute, it can also be used in a more positive way.
Use Case 1
As an authority, I am interested in how to calculate the amount of water-edge friendly vegetation, within 20 meters of the water edge. Using TQL, it is already easy to calculate the amount of square meters of a specific function or category, but how to restrict counting the vegetation within 20 meters of the water edge?
Let us consider the use case, where I, as an authority, want to calculate the amount of square meters of deciduous trees within 20 meters of the water edge. It is currently possible to model this calculation. It requires the following:
- An attribute representing the distance;
- A terrain type describing the water;
- A function describing the deciduous trees;
- An distance overlay, calculating the distances;
- A TQL query calculating the lot-size of the deciduous trees within distance of the water;
Step 1: Assigning the distance Attribute
First, for this use-case, let us name the distance attribute DISTANCE_TO_WATER_EDGE. Next, we find the type of object we want to assign this attribute to. Since we want to calculate the area size of trees within a distance of 20 meters of water, we have to configure the water terrain with this distance attribute. Take the following steps:
- Open the project in Editor Mode;
- Select Geo Data in the ribbon header;
- Select Terrain in the ribbon bar;
- Select a Terrain. In this case Water;
- Click on the tab Attribute;
- Scroll down the list and fill in the attribute in the text field of Add new Attribute with Name. In this case DISTANCE_TO_WATER_EDGE;
- Fill in the desired distance in the text field of Add new Attribute with Value. In this case 20. For reasons described in Notes, it can also be set to a slightly larger value than 20, for example 25;
- Click on Save new Attribute;
- Notice that the attribute has been added to the selected Terrain Type.
Step 2: Configuring the Distance Zone Overlay
Configuring a distance Overlay is relatively easy. Currently, multiple Overlays of the same type can be created and customized. To add and configure a distance Overlay, use the following steps:
- Open the project in Editor Mode;
- Select Geo Data in the ribbon header;
- Hover Overlays in the ribbon bar to show the Overlays popup;
- Select Add Distance Zone in the Overlays popup; This adds a new distance Overlay;
- The overlays list should be shown on the left and the newly added distance Overlay should be selected. If not, select it manually;
- In the text field Attribute selected in first: Building, Terrain, Area or Neighborhood on the right, fill in the attribute name. In this case fill in DISTANCE_TO_WATER_EDGE;
- (Optional) Change the general grid size of grid Overlays in your project;
- (Optional) Change the name of the Overlay
Step 3: Creating the TQL Query
In order to dynamically calculate the amount of deciduous trees within 20 meters, we have to create a TQL query. Optionally, we can add this query to an Excel Indicator. To construct the TQL query, take the following steps:
- Open the project in Editor Mode;
- Select Indicators in the ribbon header;
- Select Query Tool in the ribbon bar to show the Query Tool panel;
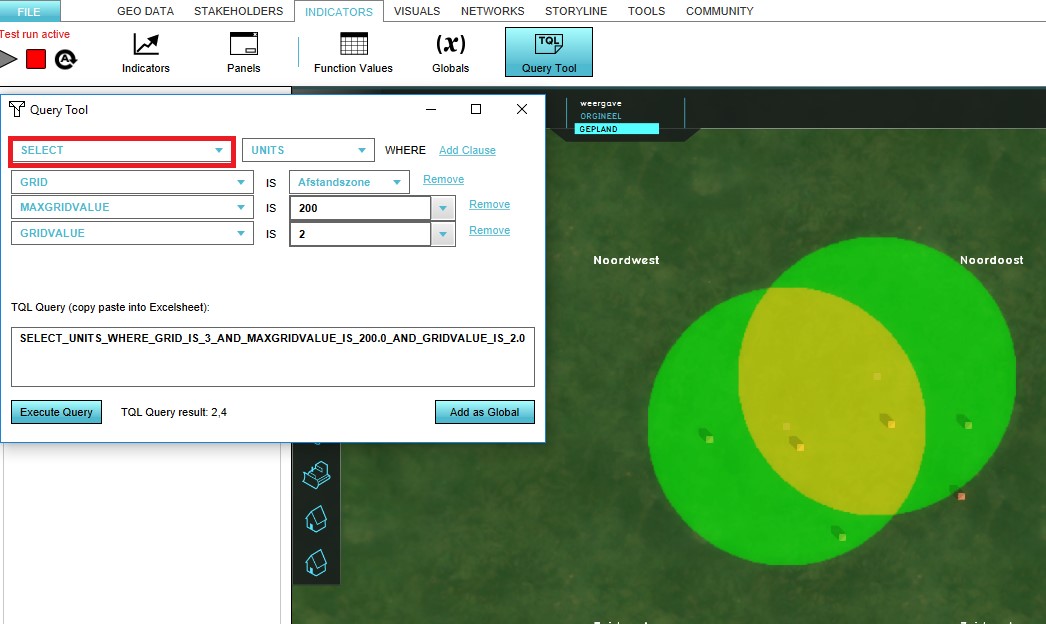
- Set the upper left drop-down on SELECT;
- Select in the second drop-down the type of information calculated. In our case lot size;
- Add three clauses;
- Select FUNCTION in the first clause, and select the desired Function in the second drop-down. In our case, select the Function 'Deciduous Trees';
- Select GRID in the second clause and select the desired Grid Overlay. In our case, this is the added distance overlay in the previous section;
- Select MAXGRIDVALUE in the third clause, and fill in the distance in meters. In our case fill in 20;
- (Optionally) Notice the query is created in the text field at the bottom of the panel.
- Press the execute query to calculate the result of the query.
Testing the setup
In order to test the setup in a dynamic case, we optionally have to do one or more things. We can add the deciduous trees function to the Actions of our Stakeholder. Furthermore, we can add open water to the actions or our stakeholder as well. With these two actions added to our stakeholder, we can start a test run and plan both deciduous trees and open water. By keeping the Query tool opened, we can, at any time, execute the query and calculate the current amount of square meters of deciduous trees within 20 meters of water! Optionally, you can construct an indicator that calculates this query instead, and visualize this number for users during a Single or Multi-user session.
Notes
There are several things to consider:
- The Distance Zone Overlay is a Grid Overlay. The accuracy is determined by the size of the grid cells. For more information about the grid size and its limits and Grid Overlays in general, see Grid Overlay.
- Since the distance is calculated using a grid, round-off effects occur when converting the Geo Data to a grid. This difference is noticeable for the defined distance in the Water terrain and the TQL query. To improve the accuracy, it is advised to make the distance in the water Terrain slightly larger than the maximum grid distance in the TQL query. In our case, lets say the configured grid size is 2 meters. An additional distance of two times 2 meters extra is more than enough. So a terrain attribute with distance 24 or 25 meters and a query maxgridvalue of 20 meters improves the accuracy of the returned result.
Variations
Several variations of this use case can be made. Consider for example:
- A different function;
- Instead of a function, a category of functions;
- Adding the distance attribute to multiple Terrain types, optionally with different distances per type of Terrain;
- Instead of adding the attribute to a Terrain, add the attribute to Function or a specific Building, or a self defined Area or Neighborhood;
- Optionally add a minimum grid Distance as well;
- The distance overlay legend can be customized. For example, in case the distance attribute is larger than the queried distance, only two categories can be made, one with the valid area of 20 meters, and a buffer zone with value 20.1 meters. The buffer zone color can even be made transparent.
Use Case 2
Let us consider the use case, where I, as an authority, want to calculate the number of houses that are located within 200 meters from two bus stops. If from a house, multiple bus stops are accessible, we can say something about the accessibility of public transport in that Neighborhood. It requires the following to calculate this:
- A function value representing the radius of the distance zone;
- A Distance Zone Overlay, calculating the number of overlapping distance zones;
- A TQL query calculating the number of houses within the distance of multiple bus stops;
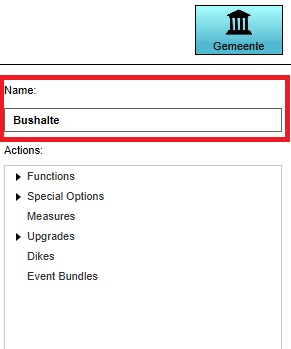
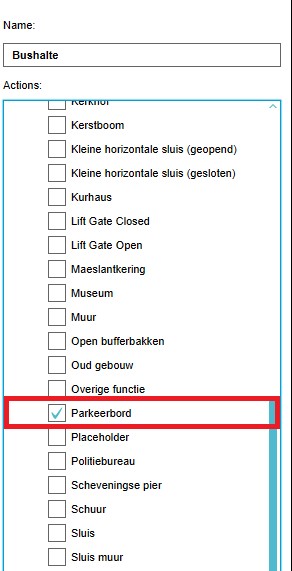
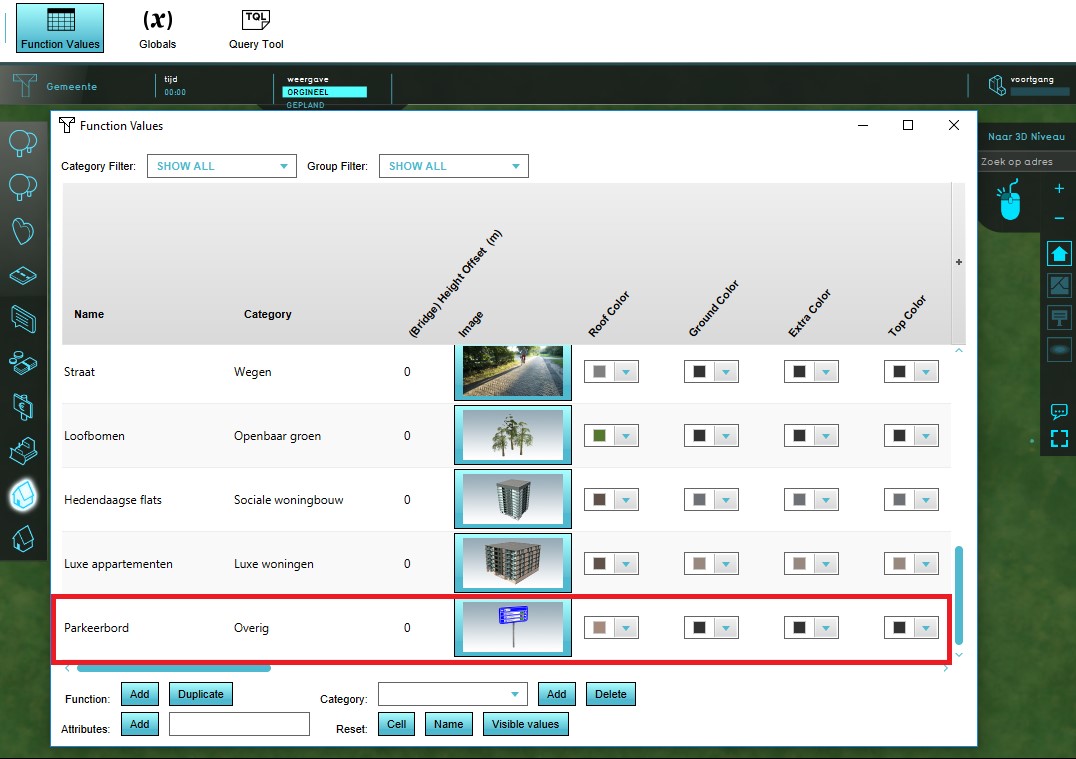
First an action needs to be created that can resemble a Bus stop. In order to create a Bus stop action, a function needs to be assigned to this action. For our use case the Parkeerbord function will be chosen and this function will resemble the bus stop function.
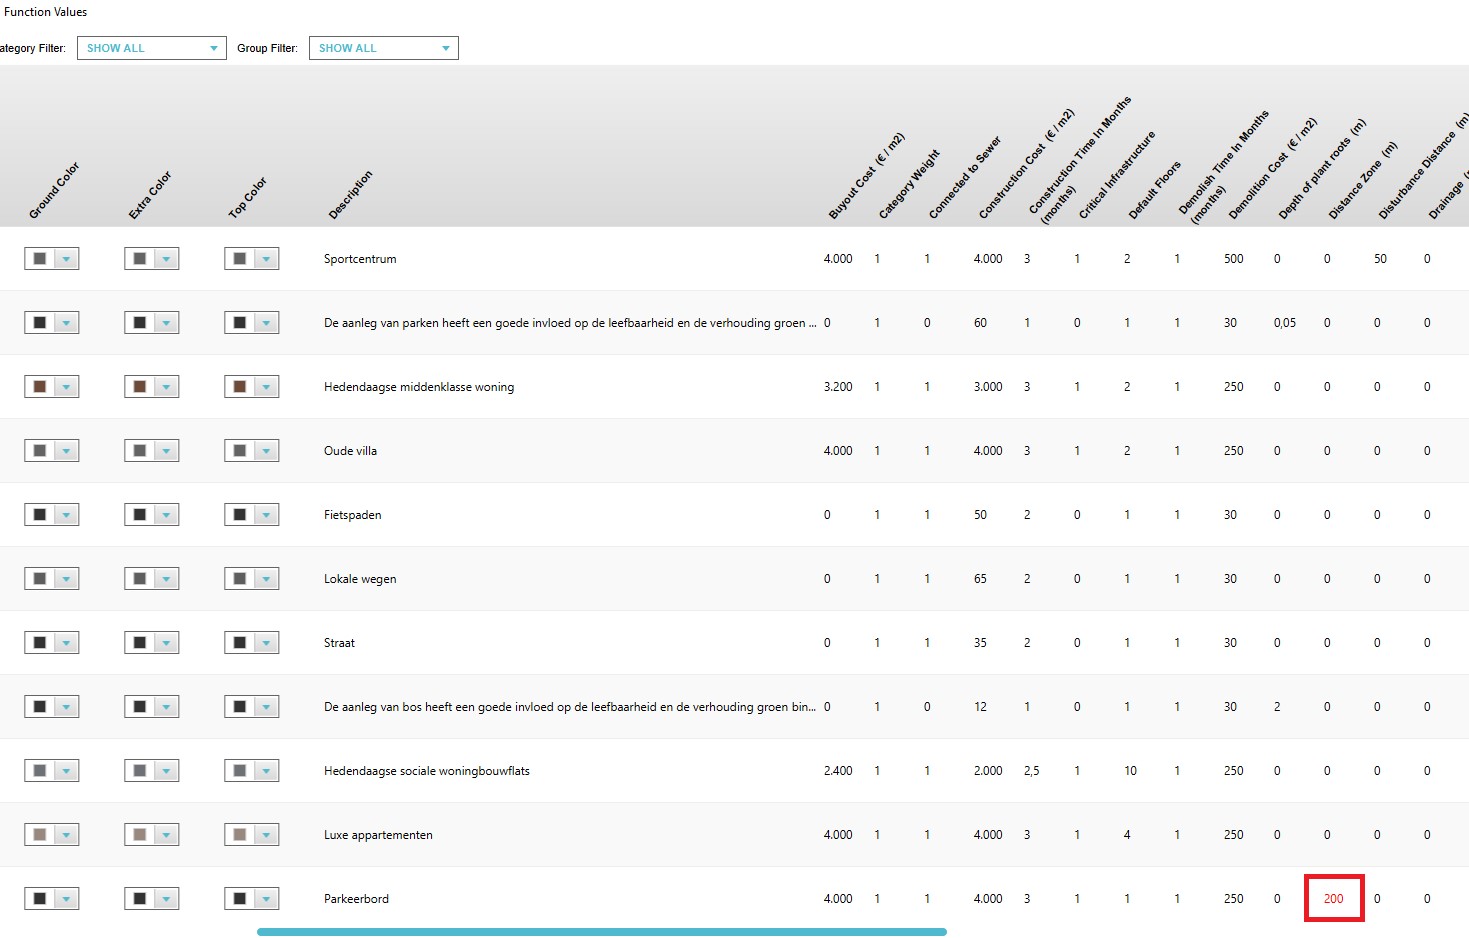
Next the distance zone of the function needs to be set. For this use case, the Distance Zone attribute of the Parkeerbord functions needs to be modified. In the Distance Zone attribute field the desired radius of the distance zone can be specified in meters, in our case 200 meters.
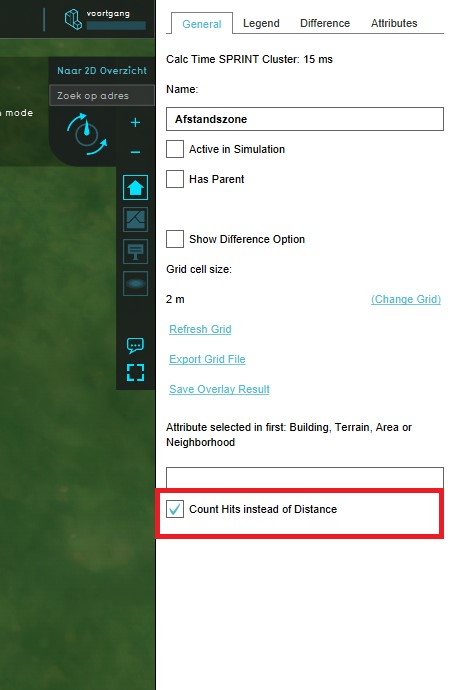
The next step is to select the "Count Hits instead of Distance" in the Distance Zone Overlay. By selecting this option, the number of overlapping distance zones will be counted. For this use case, this number will be 2 because we want to retrieve the number of houses located within 200 meters of two bus stops.
Step 1: Creating the Bus-stop Action
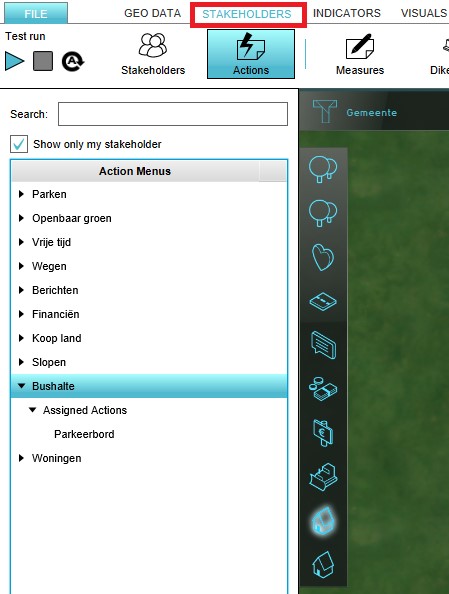
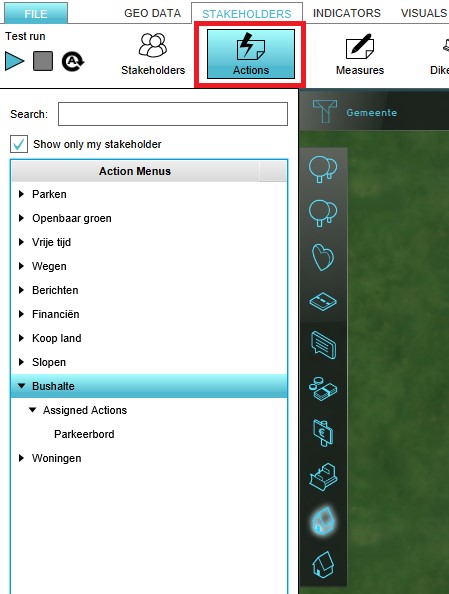
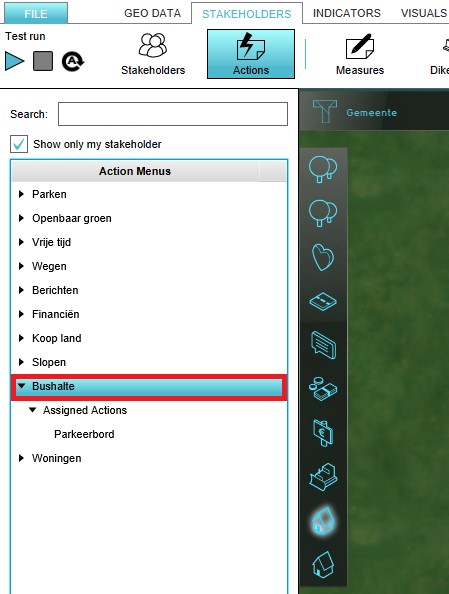
First, for this use case, let us choose an action that can resemble a Bus stop. Next, we find the type of function we want to assign to this action. Take the following steps:
- Open the project in Editor Mode;
- Select Stakeholders in the ribbon header;
- Select Actions in the ribbon bar;
- Select Add at the bottom of the left panel. A new action menu will appear in the list on the left panel;
- Select the new action menu in the left panel;
- Change the name of the new action menu in the right panel;
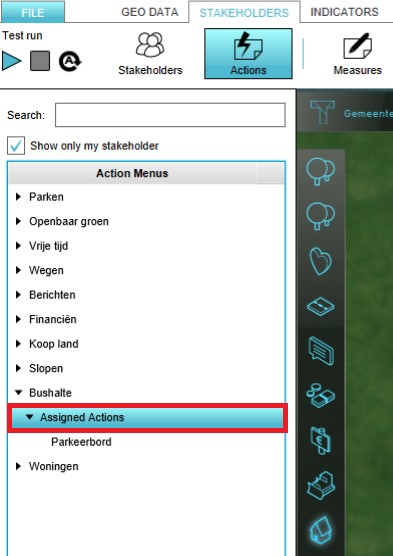
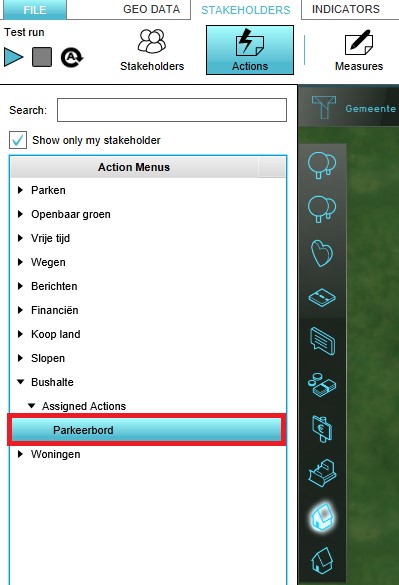
- Select Assigned Actions in the drop-down menu of the action menu;
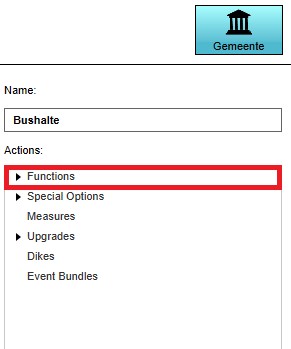
- Select Functions in the right panel;
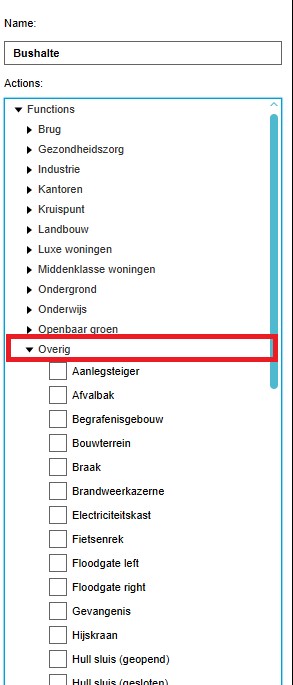
- Choose a function that resembles a bus stop or create a new function;
- Notice that the selected function is now added to the Assigned Actions in the left panel;
Step 2: Specifying the Distance Zone radius of a function
- Open the project in Editor Mode;
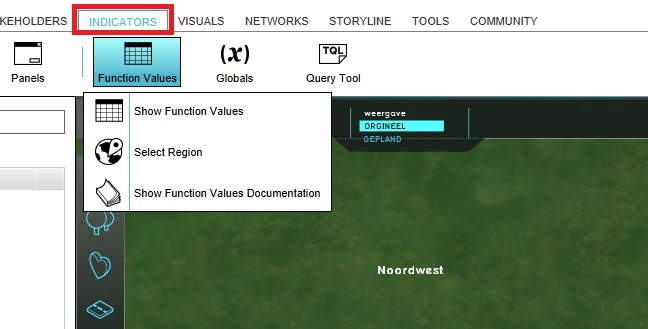
- Select Indicators in the ribbon header;
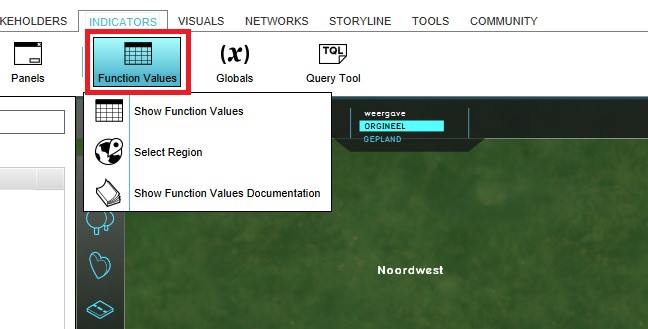
- Select Function Values in the ribbon bar;
- Notice that a table has appeared with all the functions in a row and their attributes in the columns;
- Find the function used as a bus stop function in the table and select the Distance Zone Attribute in the corresponding column;
- Write the desired radius in meters for the distance zone attribute;
Step 3: Configuring the Distance Zone Overlay
To add and configure a Distance Zone Overlay, use the following steps:
- Open the project in Editor Mode;
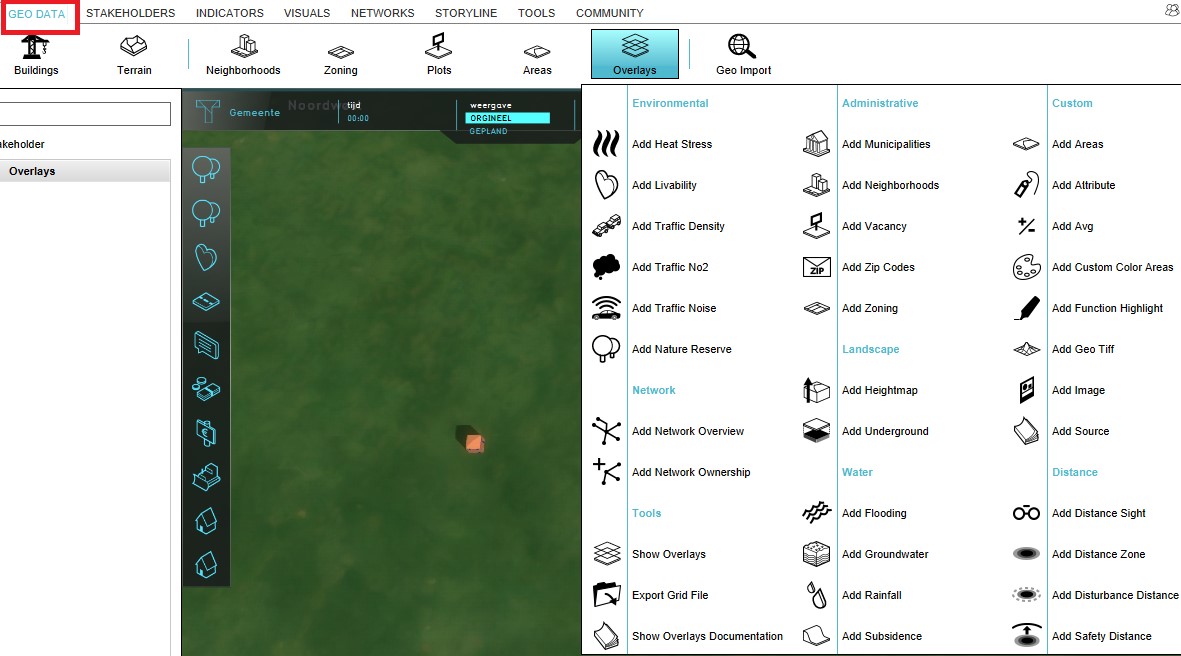
- Select Geo Data in the ribbon header;
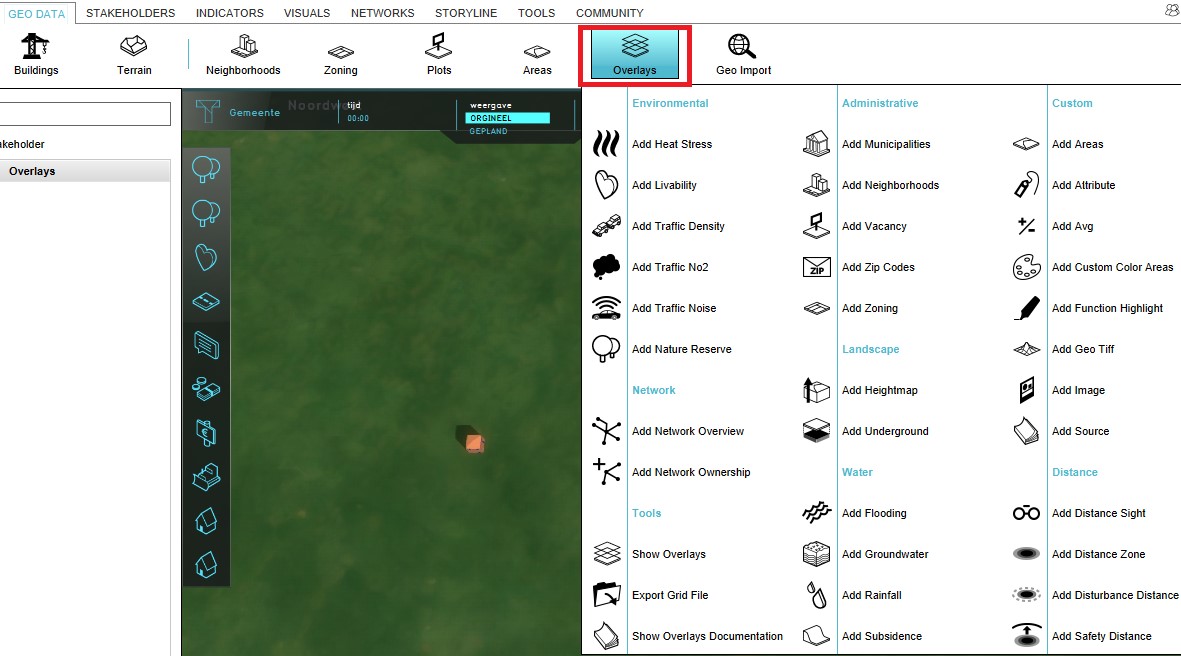
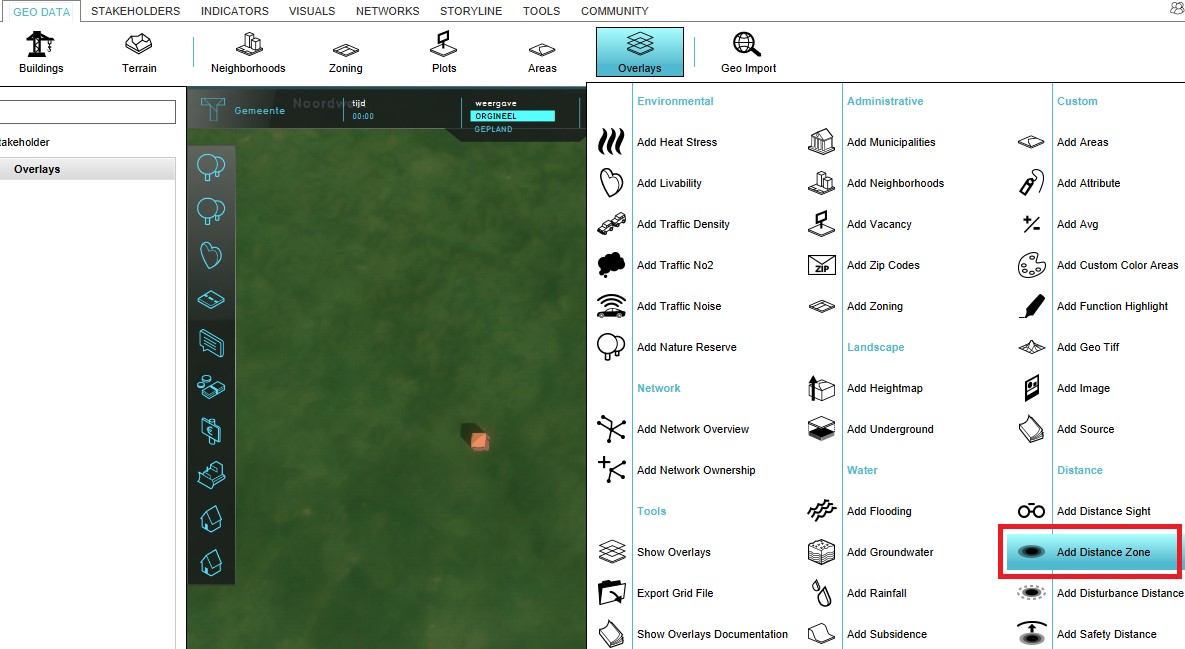
- Hover Overlays in the ribbon bar to show the Overlays popup;
- Select Add Distance Zone in the Overlays popup; This adds a new Distance Zone Overlay;
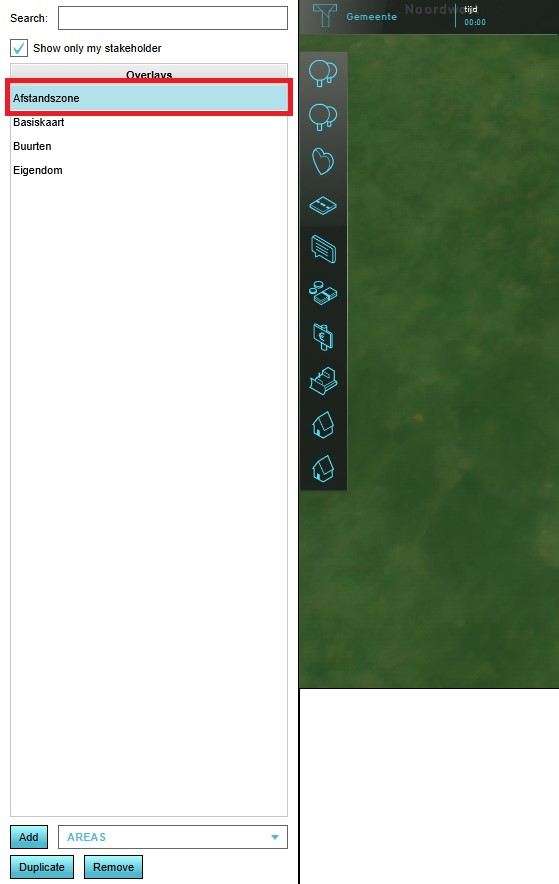
- The Overlays list should be shown on the left and the newly added Distance Zone Overlay should be selected. If not, select it manually;
- Select the "Count Hits instead of Distance" option in the right panel;
- (Optional) Change the general grid size of grid Overlays in your project;
- (Optional) Change the name of the Overlay;
Step 4: Creating the TQL Query
In order to dynamically calculate the number of houses that lie within 200 meters of two bus stops, we have to create a TQL query. Optionally, we can add this query to an Excel Indicator. To construct the TQL query, follow these steps:
- Open the project in Editor Mode;
- Select Indicators in the ribbon header;
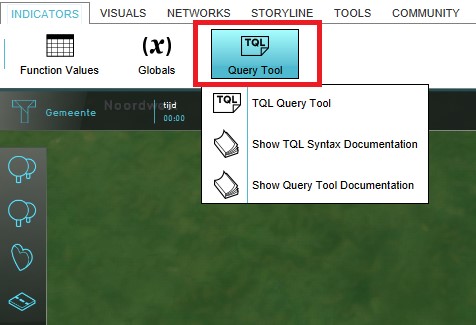
- Select Query Tool in the ribbon bar to show the Query Tool panel;
- Set the upper left drop-down on SELECT;
- Select in the second drop-down the type of information calculated. UNITS;
- Add three clauses;
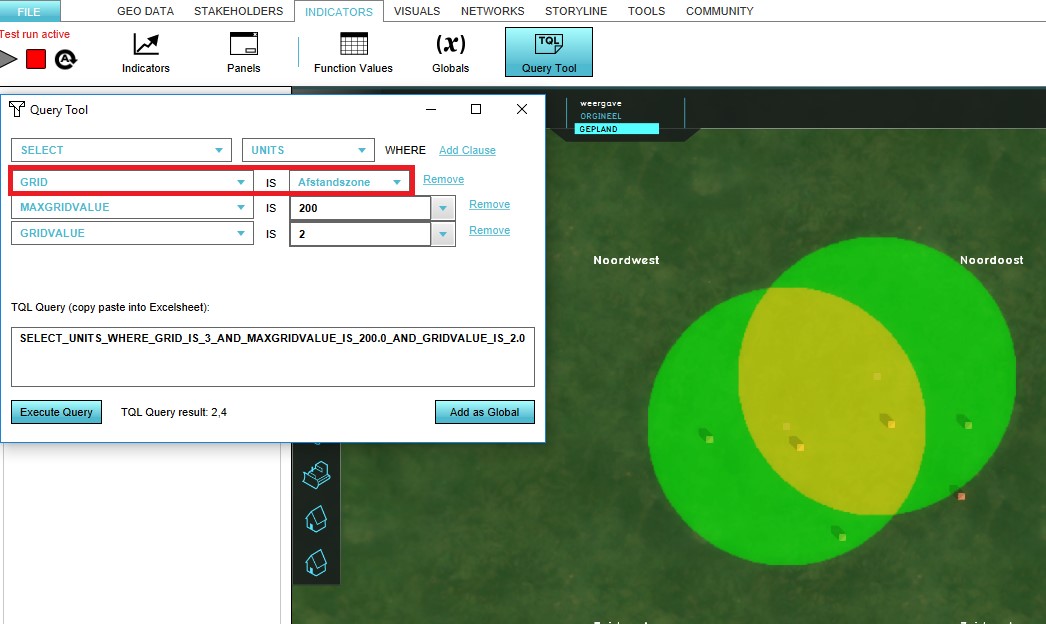
- Select GRID in the first clause, and select the Grid Overlay 'Distance Zone';
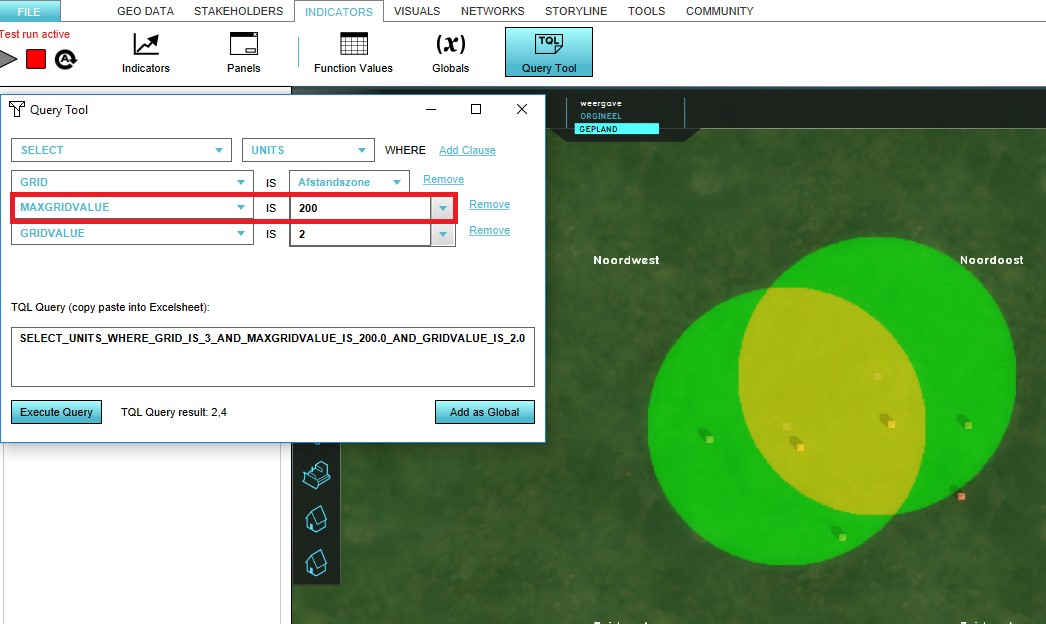
- Select MAXGRIDVALUE in the second clause, and fill in the radius in meters;
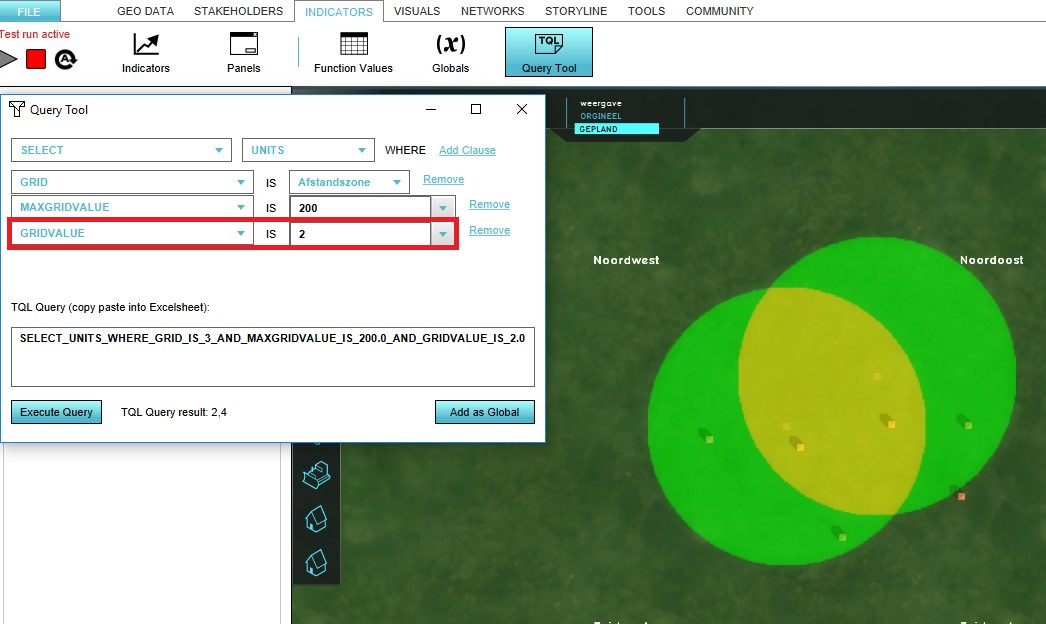
- Select GRIDVALUE in the third clause, and fill in the overlapping distance zones. Here you can fill in 2, since we have two bus stops.
- Press the execute query to calculate the result of the query;
Testing the setup
With the added Bus stop function to the Actions of our Stakeholder we can start a test run and start building our Bus stops in the project area. By keeping the Query tool opened, we can, at any time, execute the query and calculate the current number of houses located within 200 meters of two bus stops.The following values will be used for the TQL query: MAXGRIDVALUE: 200 and GRIDVALUE: 2.
Optionally, you can construct an indicator that calculates this query instead, and visualize this number for users during a Single or Multi-user session.
Notes
- The Distance Zone Overlay is a Grid Overlay. The accuracy is determined by the size of the grid cells. For more information about the grid size and its limits and Grid Overlays in general, see Grid Overlay.
