How to add an Attribute: Difference between revisions
Jump to navigation
Jump to search

mNo edit summary |
mNo edit summary |
||
| Line 13: | Line 13: | ||
| The [[Attribute]] has now been added. | | The [[Attribute]] has now been added. | ||
|}} | |}} | ||
==Notes== | |||
* Adding an [[Attribute]] which already exists will change the existing [[Attribute]] value to the new value. | |||
{{clear}} | {{clear}} | ||
==See also== | ==See also== | ||
Revision as of 09:14, 12 June 2020

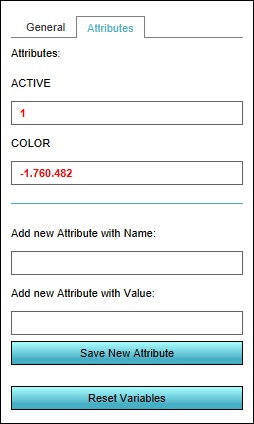
The right panel allows you to add new attributes. The top half displays existing Attributes, the bottom half allows you to add new Attributes.
Many things in a Project, ranging from Stakeholders to Overlays to Constructions, have Attributes, allowing generic properties to be configured for them. For most kinds of data, Attributes can be added and edited in a similar fashion.
Editor → The type of data to edit (Ribbon bar) → The data to edit (Left panel) → Attributes tab (Right panel)
How to add an attribute:
- Select the type of data to add an Attribute to.
- Switch to the "Attributes" tab.
- Scroll to the bottom of the right panel, if neccesary.
- For "Add new Attribute with name", enter the desired TQL name name.
- For "Add new Attribute with value", enter the desired value.
- Click on "Save new Attribute".
- The Attribute has now been added.