How to inspect object output attributes of an overlay using the measurement tool
Jump to navigation
Jump to search
How to use the measurement tool:
- Select a Water Overlay in the overlay menu. Notice the [[System_visualization_(Water_Overlay)
|water system visualization]] is shown in the 3D Visualization as well.
- Select the measuring tool icon (signified by a ruler) in the overlay menu, located between the zoom buttons and the overlay icons.
- Select the Point Measurement option (signified by a point) at the top of the measuring tool window.
- Click on a visualized hydraulic structure of interest in the 3D Visualization.
- The graph in the measuring tool window now displays the selected hydraulic structure's name and an output attribute.
- Click consecutively to cycle to all the output attributes for that object related to the selected overlay.
-
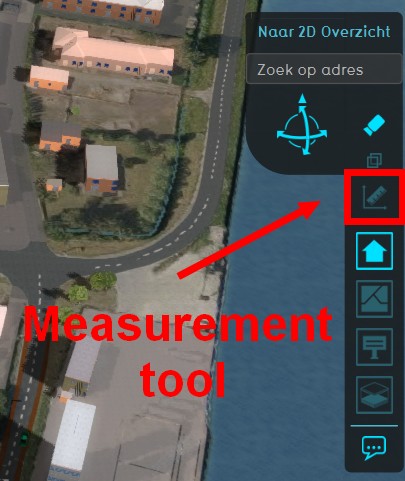 Step 2: Select the measuring tool icon (signified by a ruler) in the overlay menu, located between the zoom buttons and the overlay icons.
 -
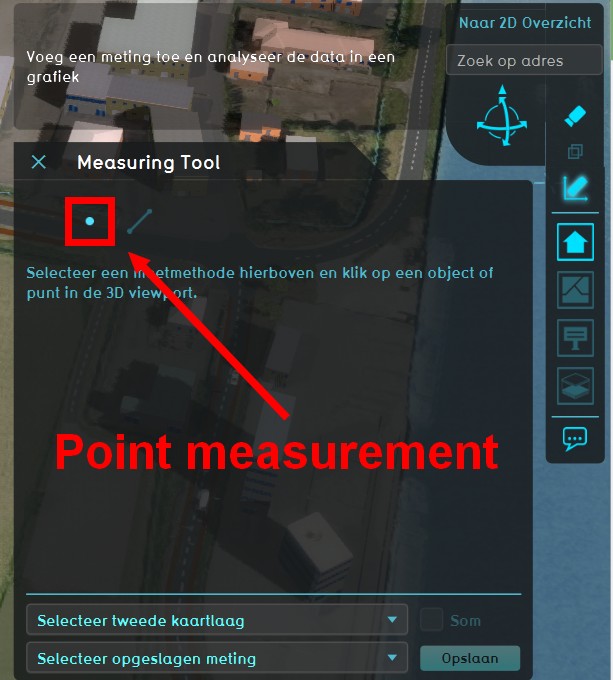 Step 3: Select the Point Measurement option (signified by a point) at the top of the measuring tool window.
 -
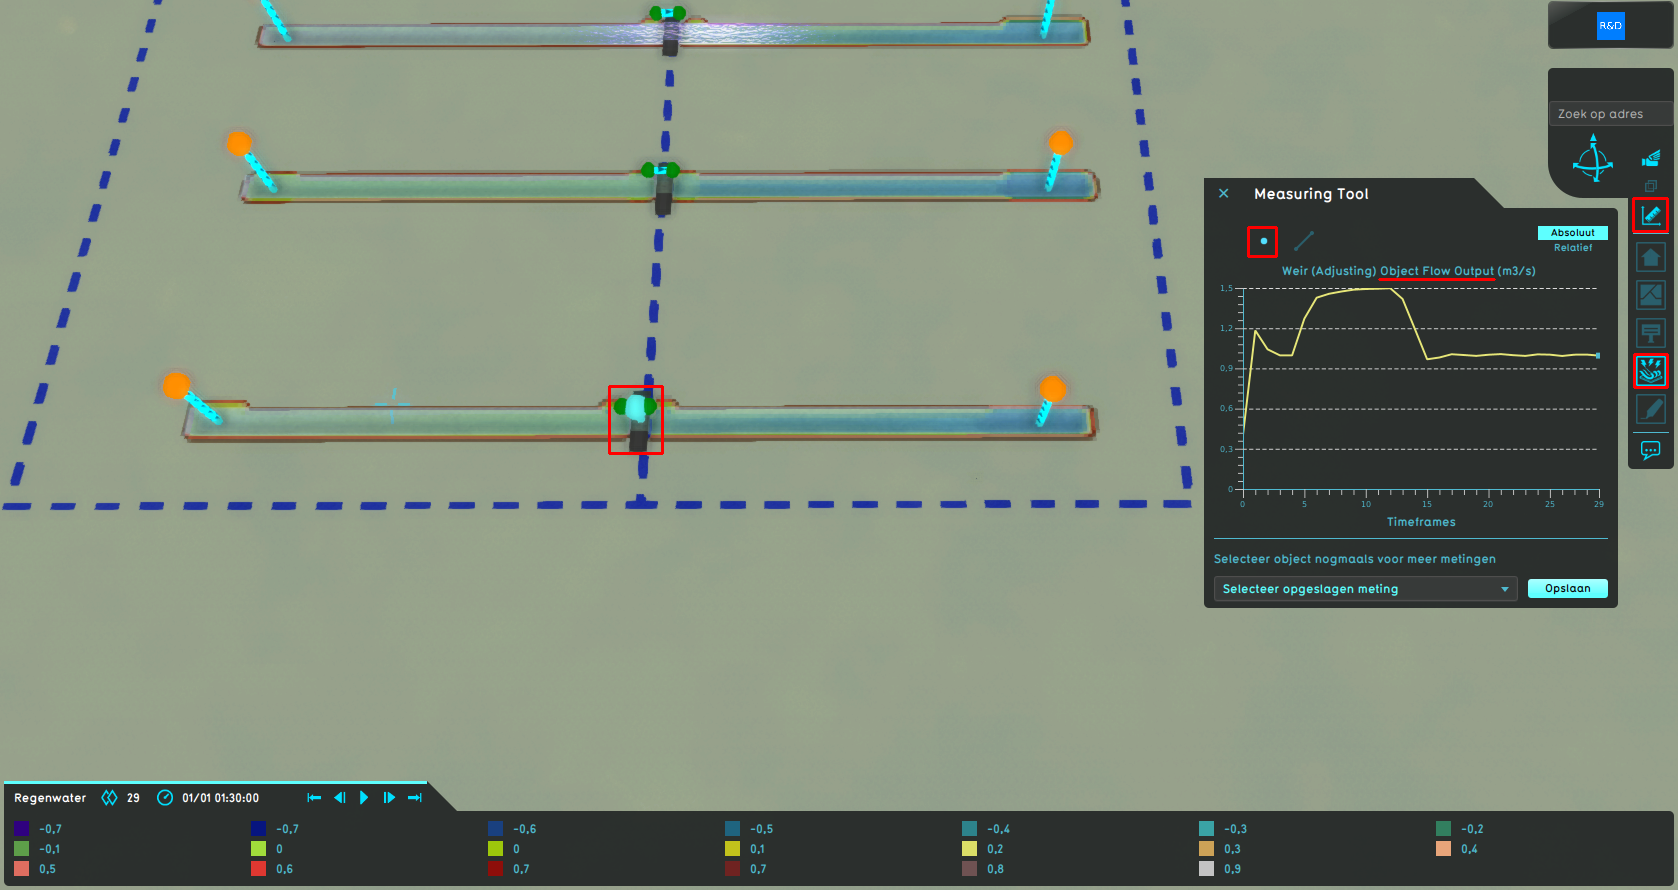 A weir in a Water Overlay's visualization that is being inspected with the measurement tool.


