How to configure the Travel Distance Overlay for Pedestrians
Jump to navigation
Jump to search
Below an example with the Travel distance overlay based on a school and the travel distance for pedestrian traffic. We want to visualise which houses (and other buildings), within a range of 20m to a connecting sidewalk, are within a walking distance of 500m from a certain school.
How to configure the Travel Distance Overlay for Pedestrians:
- Select the Current Situation tab
- Hover over Overlays, and under Grid Calculation, select to add a Travel Distance Overlay.
- Go to the Attributes tab of the Travel Distance Overlay. The ROAD_DISTANCE is set by default on 20m and the MAX_TRAVEL_DISTANCE on 500.
- Set the Route cars on 0 to not include roads for car traffic. Set the Route pedestrians on 1 to include roads for pedestrian traffic.
- On the Keys tab of the overlay, on the right side of the editor, the defaults keys DESTINATION_AREA and BLOCKED are already filled in.
- You can change a key to another attribute, such as 'WALKING_DESTINATION', by selecting it from the drop-down menu for each key. For this how to this is not necessary.
- Draw an area over the school of which you want to calculate the travel distance from.
- Add the corresponding key as an attribute to the area. In this example add the attribute DESTINATION_AREA with a value of 1 to the area.
- Select the general tab and optionally adjust the grid as desired; 1 meter will give a nice resolution in our example.
- Update the Travel Distance Overlay.
-
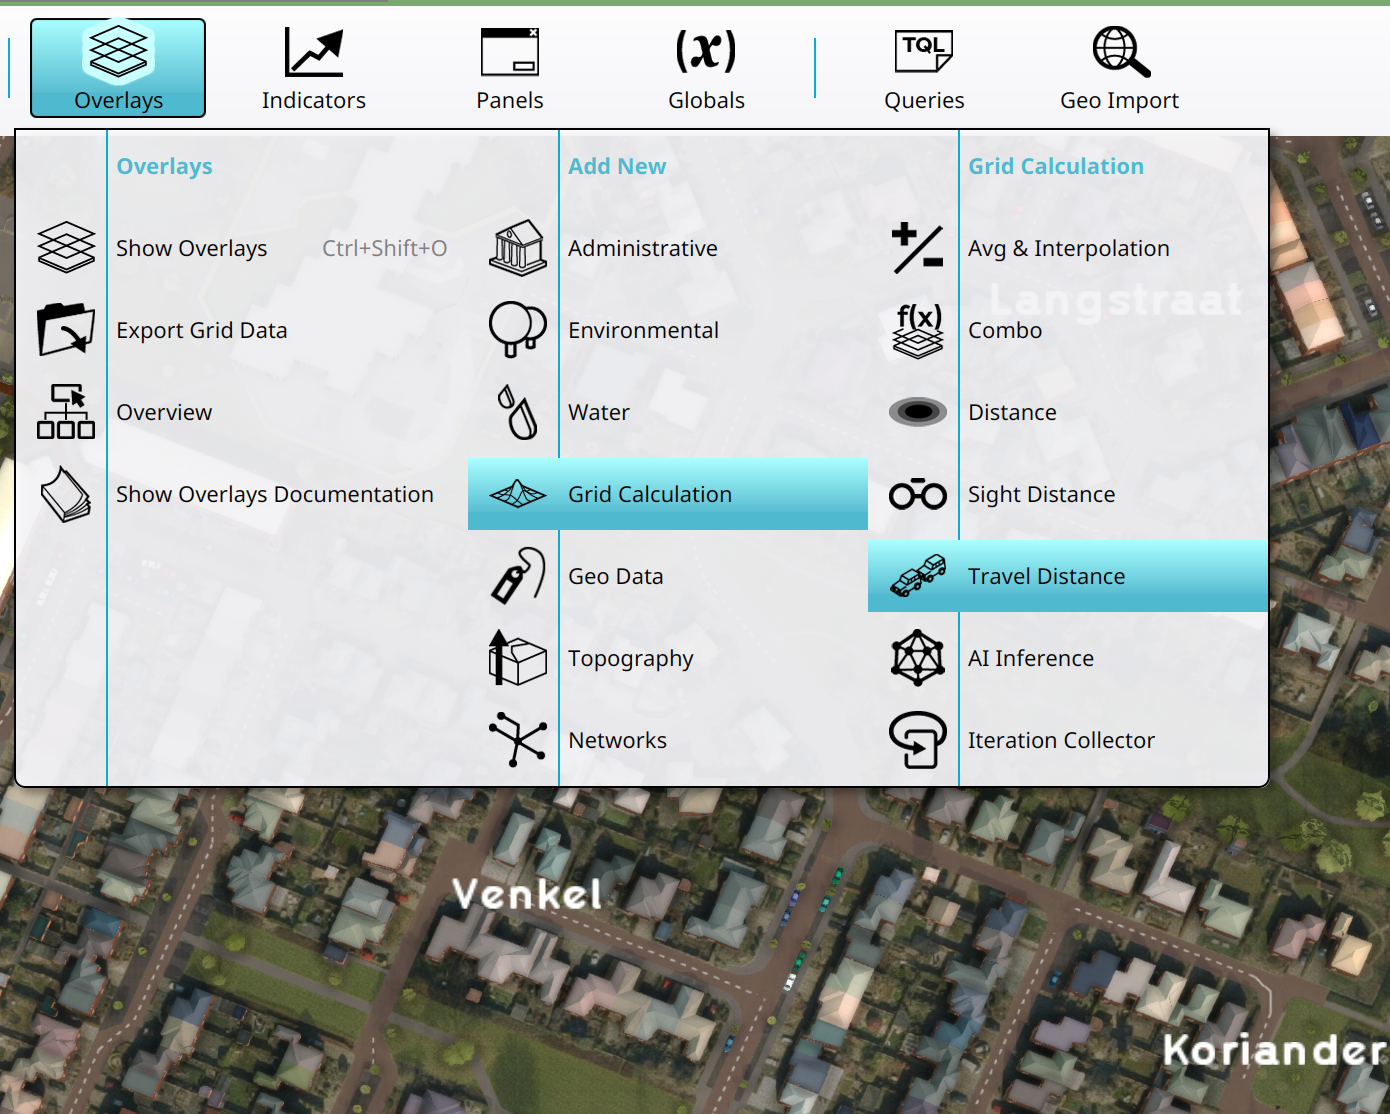 Adding a new Travel Distance Overlay.
-
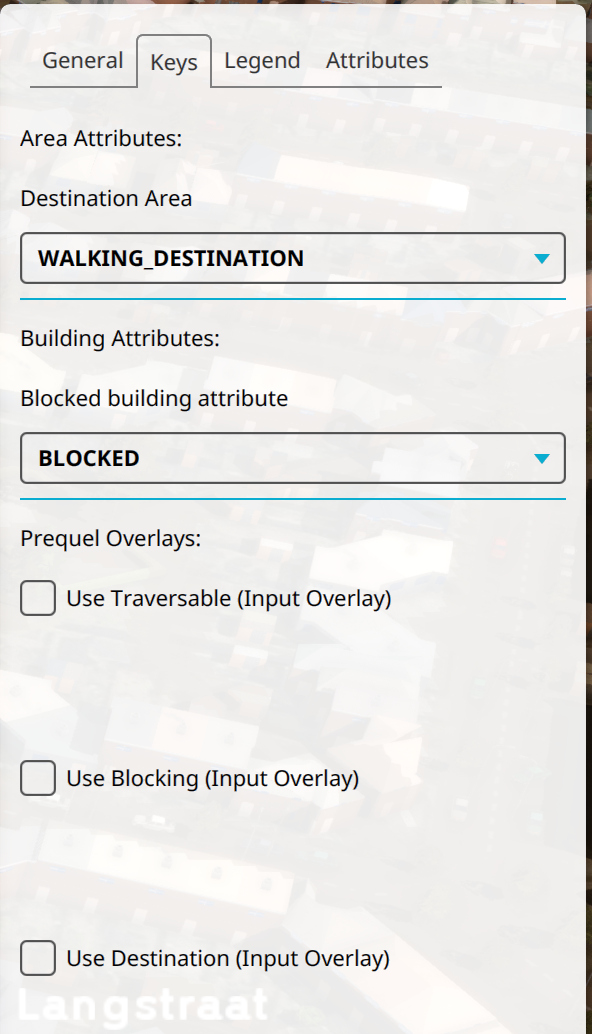 Configured DESTINATION_AREA key for the Travel Distance Overlay.
-
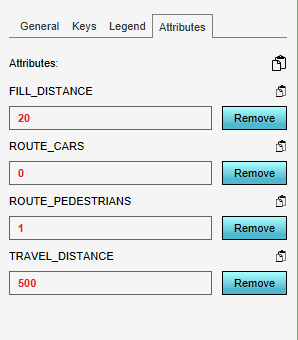 Configured attributes for the Travel Distance Overlay.
-
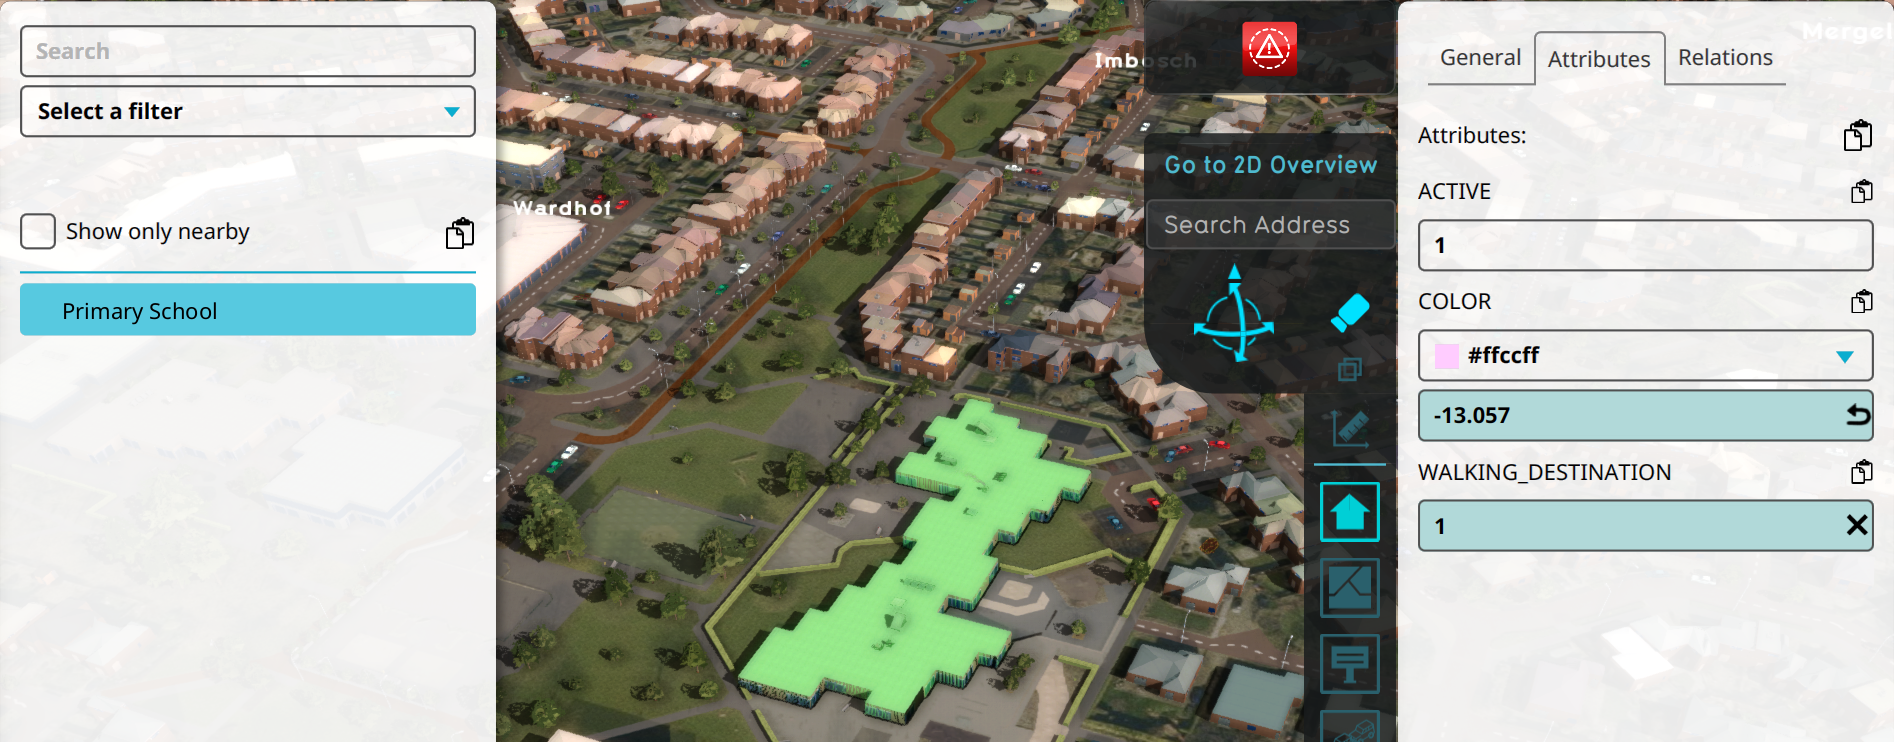 Destination Area drawn and configured with the WALKING_DESTINATION attribute.


Pedestrian Traffic
It might be necessary to define which Functions allow pedestrians to traverse. This is done by setting the Function Value NUM_PEDESTRIANS to a value larger than 0.
How to configure Functions for Pedestrian traffic:
- Select Current Situation in the ribbon
- Hover over Buildings and select Edit Function Values
- Set Category to Road
- Set Group to OTHER_TRAFFIC
- At the bottom, click on the Add button next to Function.
- For the selected Category, (shift)-select all Roads and click on the Select button to add all to the Table View.
- Select the cells in the Pedestrians/hour column and set the value to 1 (or more) when this Function allows Pedestrians.
- Close the window and recalculate the project.
-
 Edit function values in the Building popup under Current Situation
-
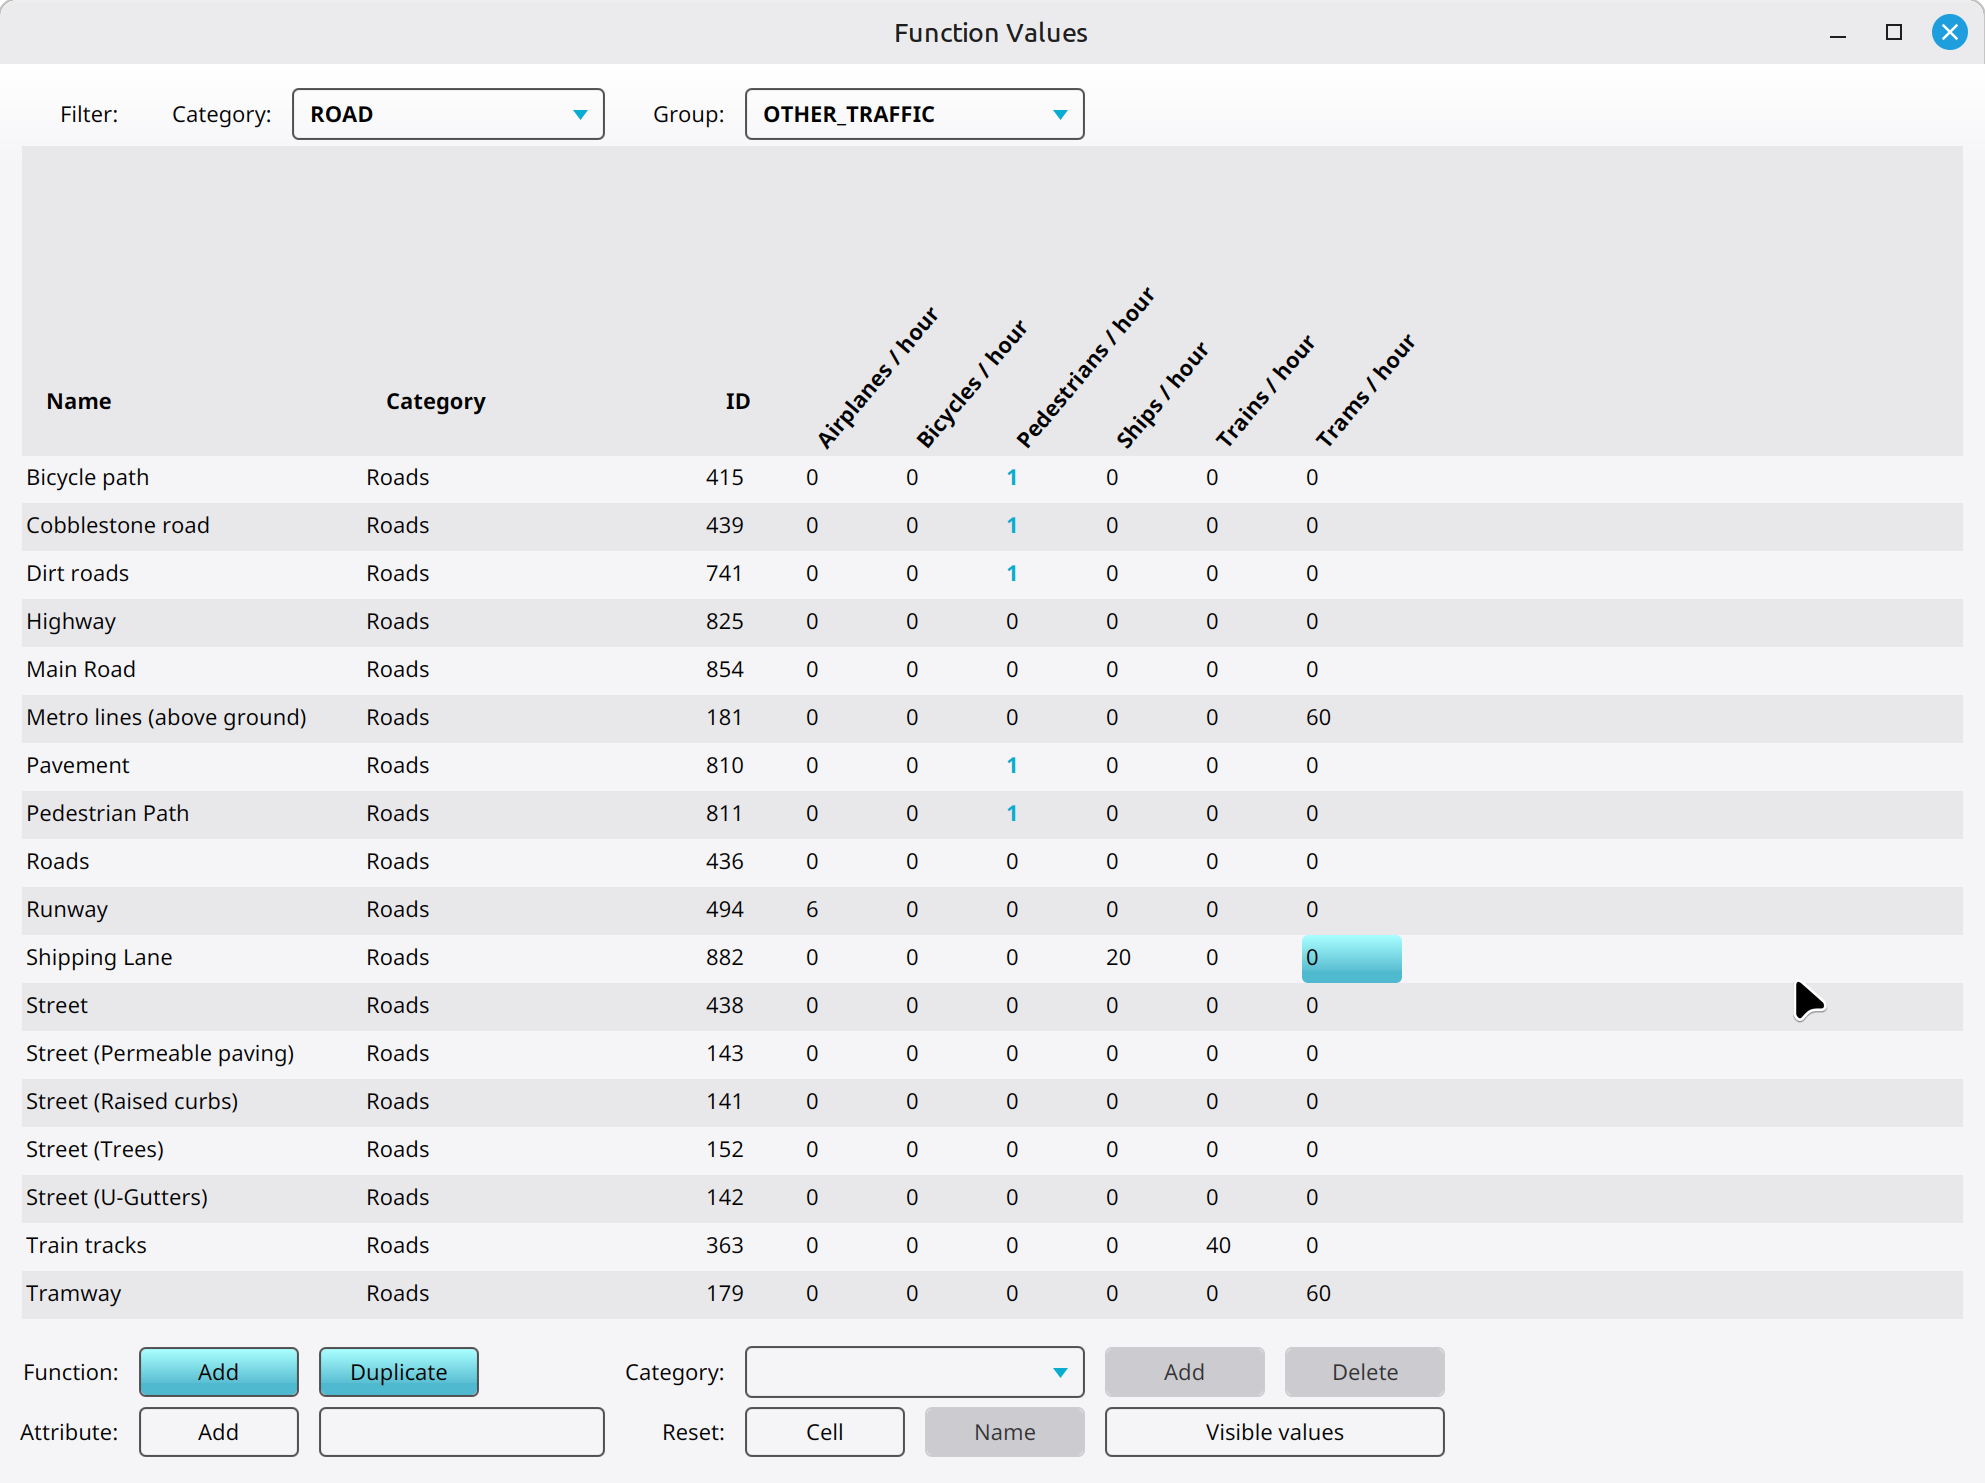 Roads configured for pedestrians.


Notes
- You can also set the NUM_PEDESTRIANS for specific Buildings.
- You should also set the NUM_PEDESTRIANS for Functions of the Bridge and Intersection category.