How to take a Screenshot: Difference between revisions
Jump to navigation
Jump to search
No edit summary |
No edit summary |
||
| Line 12: | Line 12: | ||
}} | }} | ||
<gallery> | <gallery> | ||
File: | File:Tools_ribbon.png|200px|Select the Tools header in the Editor | ||
File:Screenshot_bar.png|200px|Select the Screenshot ribbon bar | File:Screenshot_bar.png|200px|Select the Screenshot ribbon bar | ||
File:Take_screenshot_panel.png|200px|Select the 'Take a Screenshot Now' option | File:Take_screenshot_panel.png|200px|Select the 'Take a Screenshot Now' option | ||
Revision as of 14:51, 6 November 2023
This how-to described how you can make a screenshot of the 3D visualization without a visual interface.
How to take a Screenshot:
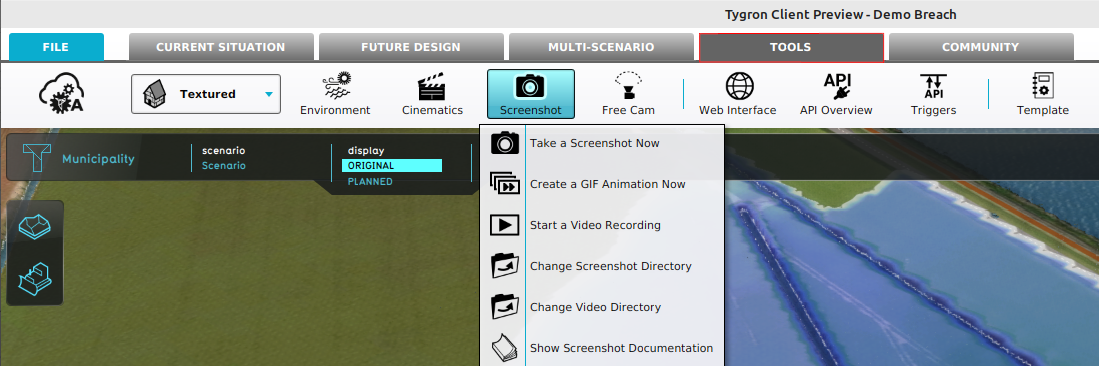
- Select in the editor 'Tools' from the ribbon
- Click on the 'Screenshot' button in the ribbon bar.
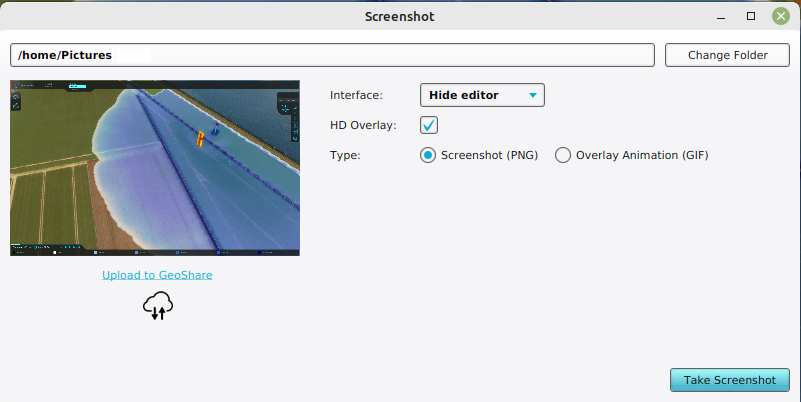
- In the newly opened panel, make sure Screenshot (png) is selected.
- Optionally change the destination folder for newly taken screenshots.
- Select whether you want to include the interface.
- Select HD Overlay when taking a screenshot of an overlay and you want a higher resolution (less gritty) version.
- Click on take screenshot to create an image. It will be shown in the left side of the panel.
Select the Tools header in the Editor

Select the Screenshot ribbon bar
Select the 'Take a Screenshot Now' option
