How to import a time sequence with a CSV: Difference between revisions
Jump to navigation
Jump to search
(Created page with "{{Editor steps|title=|In the Water Overlay Wizard, check the ''Multi'' checkbox.|Click on the ''Set Values'' button for the specific attribute you have a CSV file for....") |
No edit summary |
||
| (9 intermediate revisions by 3 users not shown) | |||
| Line 1: | Line 1: | ||
{{Editor steps|title=|In the [[Water Overlay Wizard]], | {{Editor steps|title=import a time sequence using a csv | ||
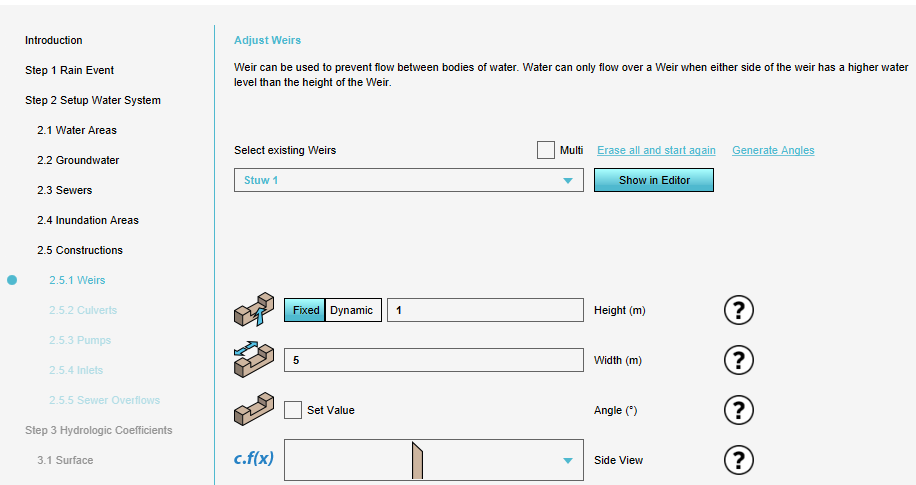
| In the [[Water Overlay Wizard]], go to the step related to the [[Hydraulic structures (Water Overlay)|structure]], [[Hydrological features (Water Overlay)|feature]], or other data you would like to enter a time sequence for. | |||
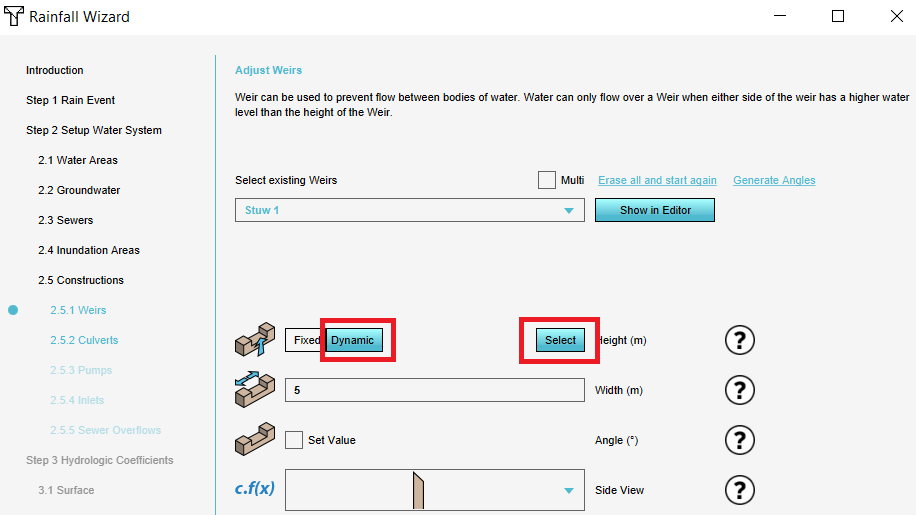
| Click on the ''Dynamic'' button for the desired attribute and click then on ''Select''. | |||
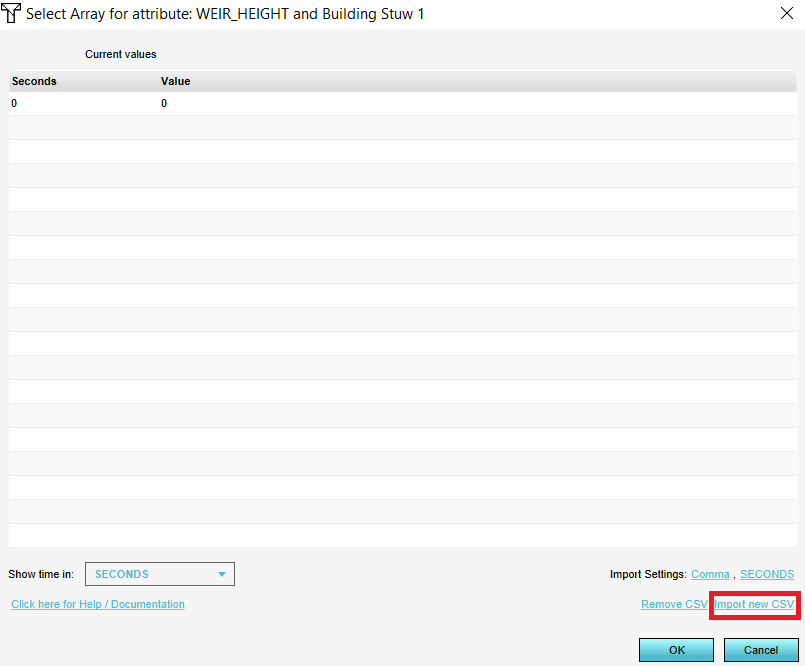
| In the new panel that pops up, click on ''Import new CSV'' and select the CSV file. | |||
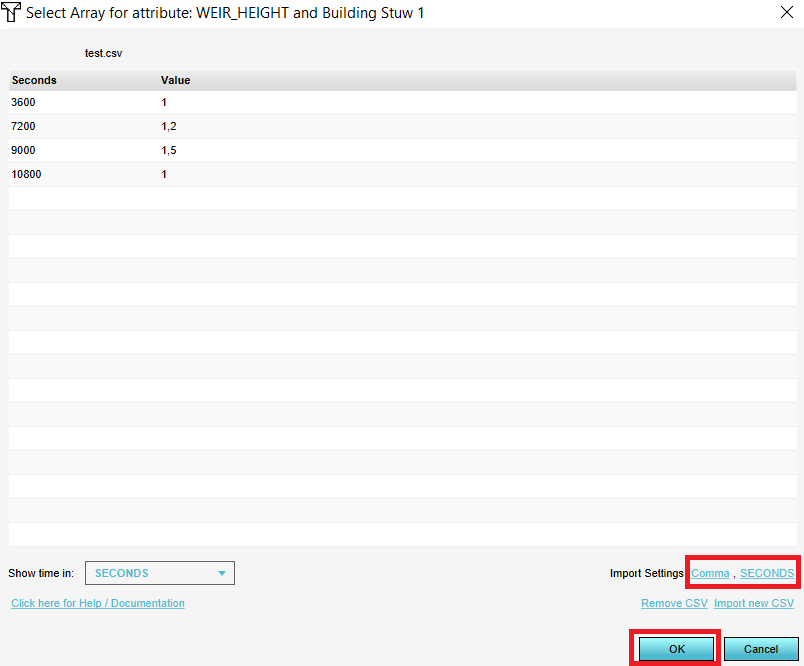
| Optionally, change the delimiter and time units and click on ''Ok''. The data in the CSV is now used to set the attribute dynamically. | |||
}} | |||
<gallery mode=nolines> | <gallery mode=nolines> | ||
File: | File:Step_1_csv_time_sequence.PNG | ||
File: | File:Dynamic_csv.PNG | ||
File: | File:Import_new_csv.PNG | ||
File:Change_settings_csv_import.PNG | |||
</gallery> | </gallery> | ||
{{article end | |||
|notes= | |||
* The [[CSV]] file to import a time sequence should look as follows: | |||
{{code|1= | {{code|1= | ||
time,weir | |||
3600,0.03 | 3600,0.03 | ||
7200,0 | 7200,0 | ||
| Line 16: | Line 23: | ||
10800,0.06 | 10800,0.06 | ||
}} | }} | ||
The first row should contain the headers. The first column should be the time. The name of the headers above are an example and may vary. | |||
* When importing a [[CSV]] for a time sequence, it's possible to indicate whether the time is in seconds, minutes, or hours. The {{software}} then automatically converts the time to the correct data for the model. | |||
* For the [[CSV]], it is possible to choose a comma or semicolon as delimiter. | |||
|seealso= | |||
* [[Time sequence (Water Overlay)]] | |||
* [[CSV]] | |||
|howtos= | |||
* [[How to import a time sequence for multiple structures]] | |||
}} | |||
[[Category:How-to's]] | |||
Latest revision as of 15:25, 30 January 2024
How to import a time sequence using a csv:
- In the Water Overlay Wizard, go to the step related to the structure, feature, or other data you would like to enter a time sequence for.
- Click on the Dynamic button for the desired attribute and click then on Select.
- In the new panel that pops up, click on Import new CSV and select the CSV file.
- Optionally, change the delimiter and time units and click on Ok. The data in the CSV is now used to set the attribute dynamically.
Notes
- The CSV file to import a time sequence should look as follows:
time,weir
3600,0.03
7200,0
9000,0.03
10800,0.06
The first row should contain the headers. The first column should be the time. The name of the headers above are an example and may vary.
- When importing a CSV for a time sequence, it's possible to indicate whether the time is in seconds, minutes, or hours. The Tygron Platform then automatically converts the time to the correct data for the model.
- For the CSV, it is possible to choose a comma or semicolon as delimiter.


