How to create a WMS of a GeoShare Viewer: Difference between revisions
Jump to navigation
Jump to search
(Created page with "A GeoShare Viewer allows for the sharing of geographical data, most notably the results of calculations, without requiring the recipient to have an account for the {{software}}. The viewer can also be accessed as a WMS {{editor location|geoshare}} {{editor steps|title=Create a WMS of a GeoShare Viewer | Follow the wizard first on how to create a GeoShare Viewer. | Once you have a Viewer on your GeoShare, continue. | Click on the edit icon next to the...") |
No edit summary |
||
| Line 12: | Line 12: | ||
| Copy the URL to use it in any other application that supports communicating with a [[WMS]]. | | Copy the URL to use it in any other application that supports communicating with a [[WMS]]. | ||
}} | }} | ||
<gallery widths=200px heights=200px> | |||
File:share_viewer_edit_button.png|Edit button in the [[GeoShare]] | |||
File:share_viewer_edit_panel.png|Edit panel of a [[GeoShare Viewer]] where you can find the link to its [[WMS]]. | |||
</gallery> | |||
{{article end | {{article end | ||
| seealso= | | seealso= | ||
Revision as of 15:58, 31 January 2023
A GeoShare Viewer allows for the sharing of geographical data, most notably the results of calculations, without requiring the recipient to have an account for the Tygron Platform. The viewer can also be accessed as a WMS
How to Create a WMS of a GeoShare Viewer:
- Follow the wizard first on how to create a GeoShare Viewer.
- Once you have a Viewer on your GeoShare, continue.
- Click on the edit icon next to the GeoShare Viewer of interest. An edit panel opens.
- Next to the label URL, click on the WMS link.
- The browser should open and show the capabilities of the WMS of the selected GeoShare Viewer.
- Copy the URL to use it in any other application that supports communicating with a WMS.

Edit button in the GeoShare
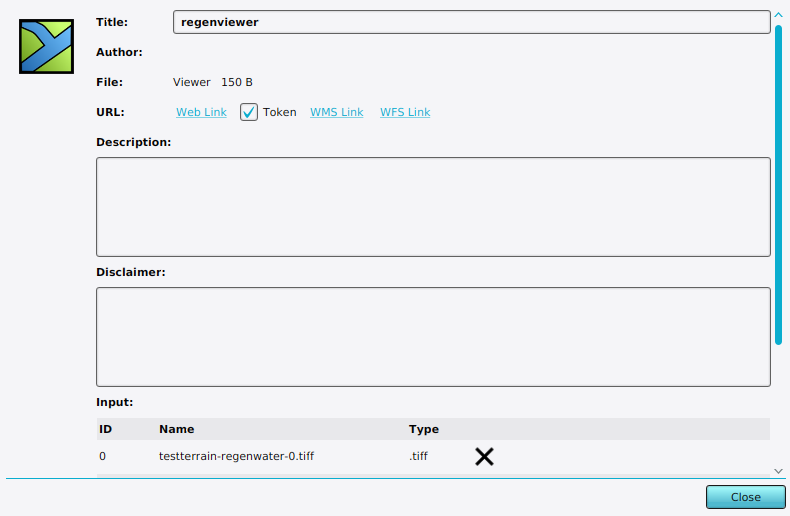
Edit panel of a GeoShare Viewer where you can find the link to its WMS.

