How to add and configure hydraulic structures (Water Overlay): Difference between revisions
Jump to navigation
Jump to search
(Created page with "{{being_updated}} ==Manually add and remove hydraulic structures== {{Editor location|Buildings}} {{Editor steps|title=add an inlet|From the ''Buildings'' dropdown select "Ad...") |
No edit summary |
||
| Line 4: | Line 4: | ||
{{Editor location|Buildings}} | {{Editor location|Buildings}} | ||
{{Editor steps|title=add an inlet|From the ''Buildings'' dropdown select "Add Building".|Name your new building.|Click ''Change Function''.|Select (1) the correct category > (2) the desired function > (3) ''Apply''.|Click ''Draw Area''.|Select (1) one or more grid cells on the map for the location of the new building > (2) ''Apply Selection''.|In the Configuration Wizard of the Flooding Overlay | {{Editor steps|title=add an inlet|From the ''Buildings'' dropdown select "Add Building".|Name your new building.|Click ''Change Function''.|Select (1) the correct category > (2) the desired function > (3) ''Apply''.|Click ''Draw Area''.|Select (1) one or more grid cells on the map for the desired location of the new building > (2) ''Apply Selection''.|In the Configuration Wizard of the Flooding Overlay at (1) the corresponding step > select (2) the new building > (3) ''Next''.|Finally, test the new hydraulic structure by running the simulation.}} | ||
<gallery> | <gallery> | ||
| Line 12: | Line 12: | ||
File:Select_function_inlet.png|4. Select (1) the correct category > (2) the desired function > (3) ''Apply''. | File:Select_function_inlet.png|4. Select (1) the correct category > (2) the desired function > (3) ''Apply''. | ||
File:Draw_area_inlet.png|5. Click ''Draw Area''. | File:Draw_area_inlet.png|5. Click ''Draw Area''. | ||
File:Apply_selection.png|6. Select (1) one or more grid cells on the map for the location of the new building > (2) ''Apply Selection''. | File:Apply_selection.png|6. Select (1) one or more grid cells on the map for the desired location of the new building > (2) ''Apply Selection''. | ||
File:Inlet_config.PNG|7. In the Configuration Wizard of the Flooding Overlay | File:Inlet_config.PNG|7. In the Configuration Wizard of the Flooding Overlay at (1) the corresponding step > select (2) the new building > (3) ''Next''. | ||
File:Inlet_action.png|8. Finally, test the new hydraulic structure by running the simulation. | File:Inlet_action.png|8. Finally, test the new hydraulic structure by running the simulation. | ||
</gallery> | </gallery> | ||
Revision as of 14:05, 19 June 2019
Please note: This page is currently being updated.
Manually add and remove hydraulic structures
How to add an inlet:
- From the Buildings dropdown select "Add Building".
- Name your new building.
- Click Change Function.
- Select (1) the correct category > (2) the desired function > (3) Apply.
- Click Draw Area.
- Select (1) one or more grid cells on the map for the desired location of the new building > (2) Apply Selection.
- In the Configuration Wizard of the Flooding Overlay at (1) the corresponding step > select (2) the new building > (3) Next.
- Finally, test the new hydraulic structure by running the simulation.
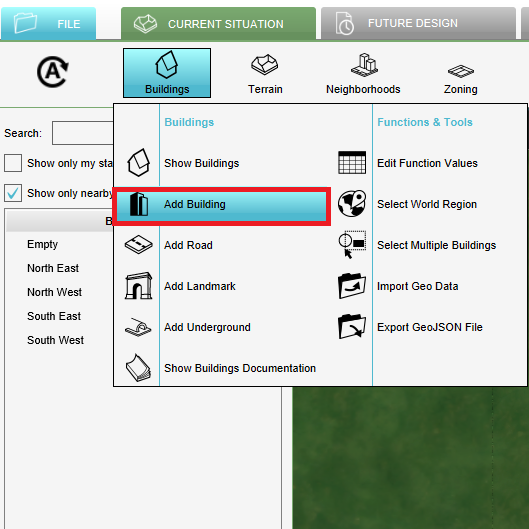
1. Select Add Building.
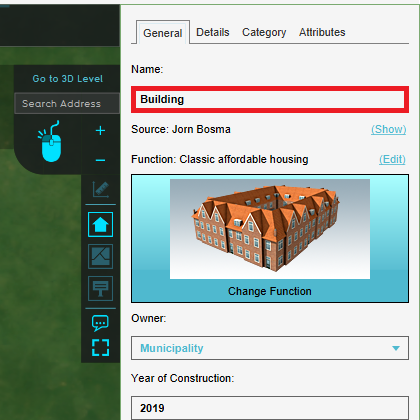
2. Name your new building.
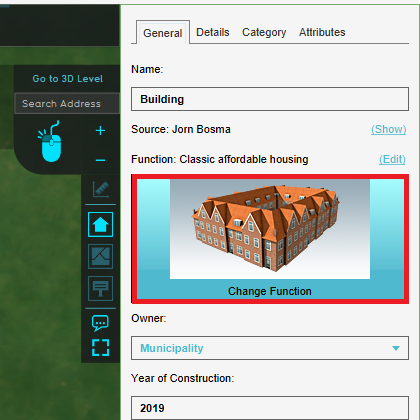
3. Click Change Function.
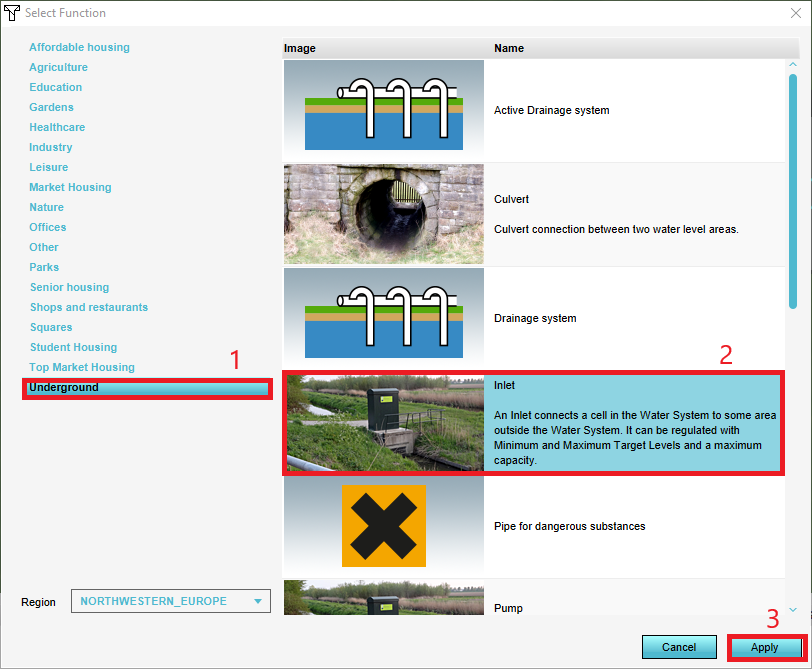
4. Select (1) the correct category > (2) the desired function > (3) Apply.
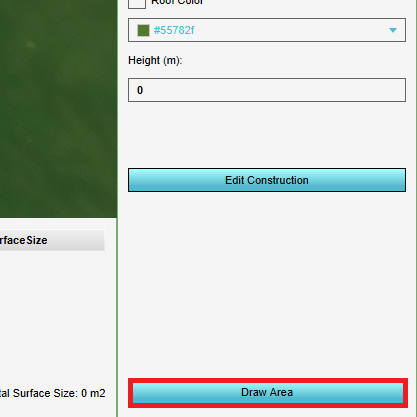
5. Click Draw Area.
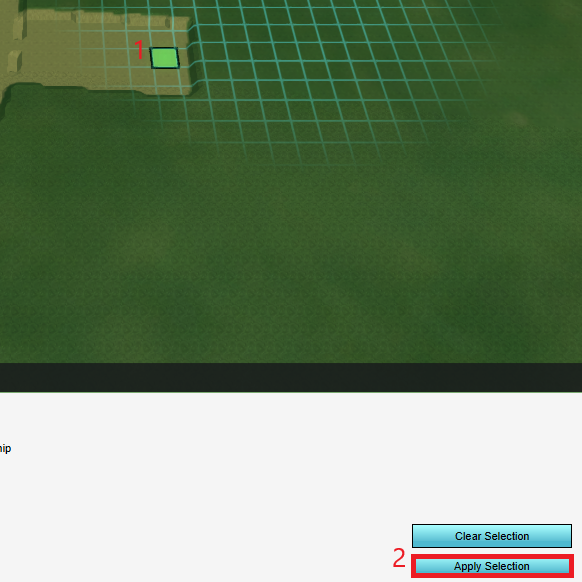
6. Select (1) one or more grid cells on the map for the desired location of the new building > (2) Apply Selection.
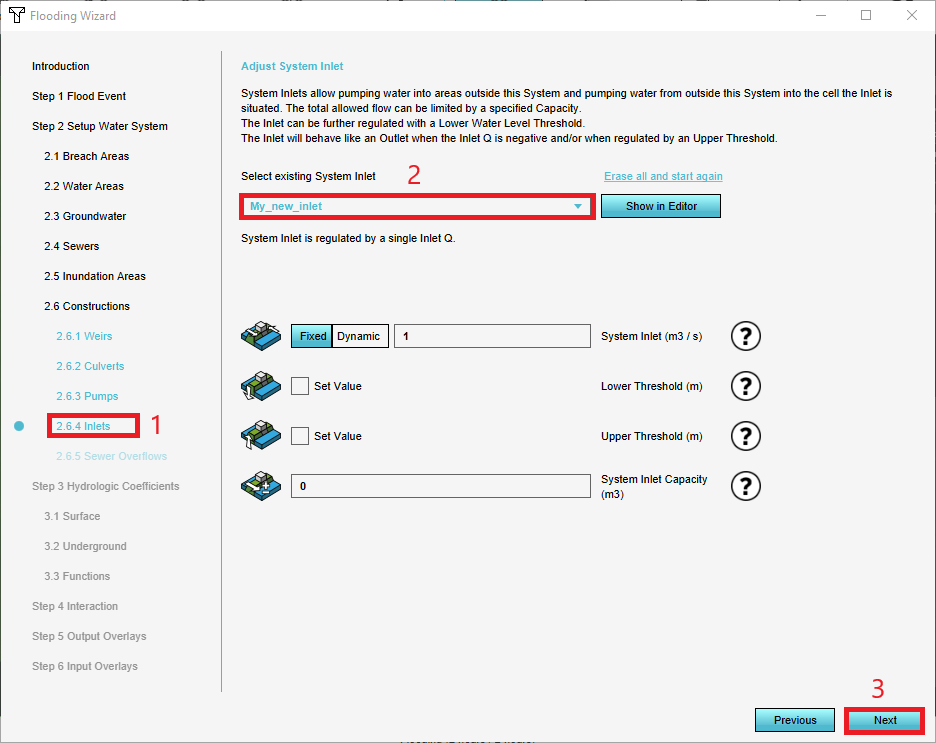
7. In the Configuration Wizard of the Flooding Overlay at (1) the corresponding step > select (2) the new building > (3) Next.
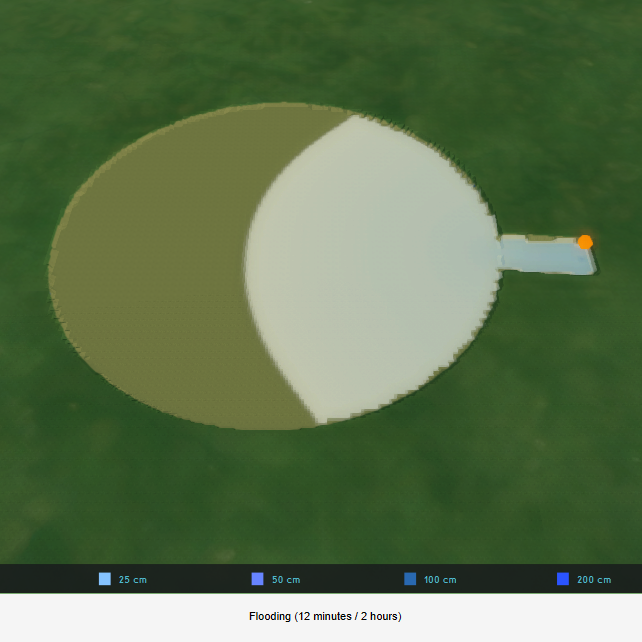
8. Finally, test the new hydraulic structure by running the simulation.


How to remove an inlet:
- From the Buildings dropdown select "Show Buildings".
- Select (1) the inlet you whish to remove > (2) Remove > (3) Yes.

1. Select Show Building.
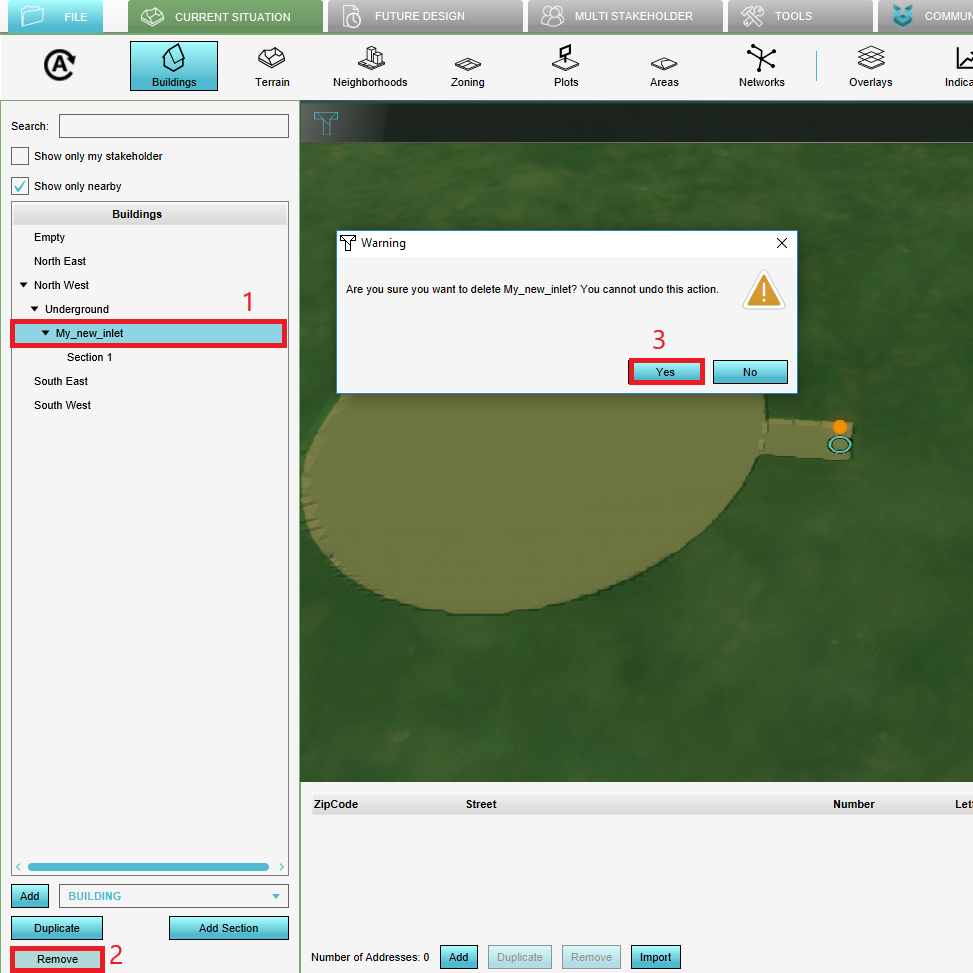
2. Select (1) the inlet you whish to remove > (2) Remove > (3) Yes.

