How to assign ownership based on Online GIS data
It is also possible to assign ownership to real life stakeholders based on available online GIS data. For this an ArcGIS account is required to upload and access a proper data set, unless a suitable public data set is already available.
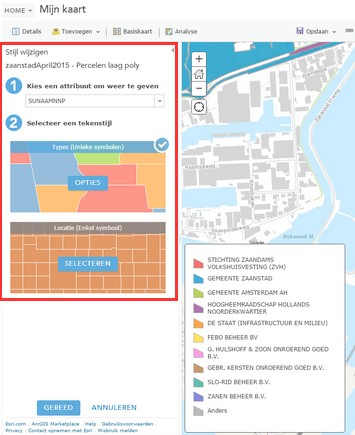
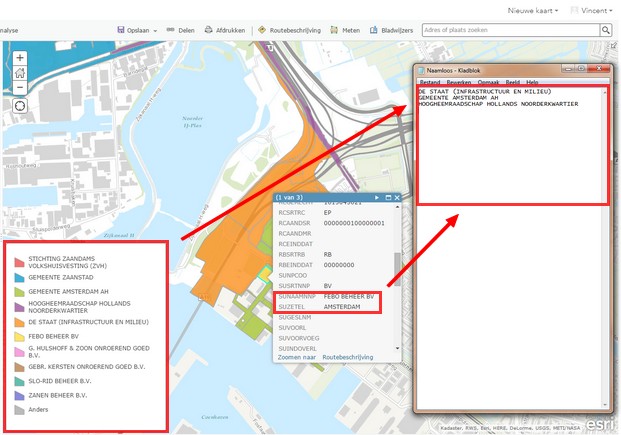
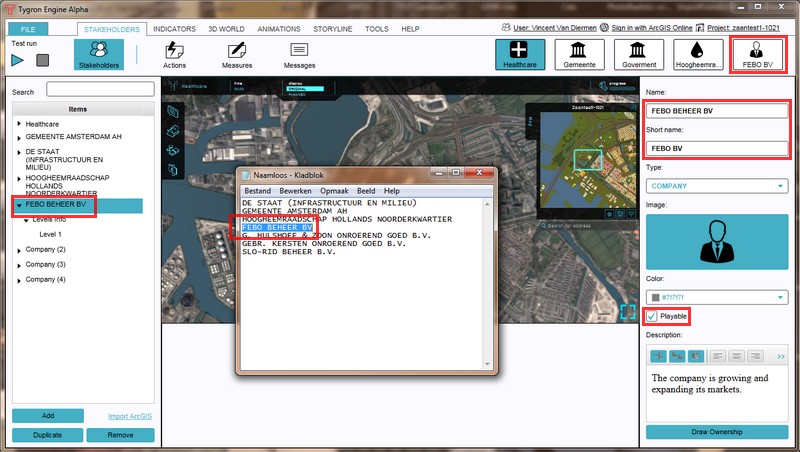
First ensure that the data service is uploaded to ArcGIS, then make a list of all actual stakeholder names in the project area. These names can be copied directly from the ArcGIS viewer, after setting up the correct attribute and style. All default stakeholders will be replaced by the stakeholders from the list, therefore it is important that the full names of these new stakeholders match with the data set, so that ownership will be automatically assigned when importing the data from ArcGIS. The short names can be set up as is convenient.
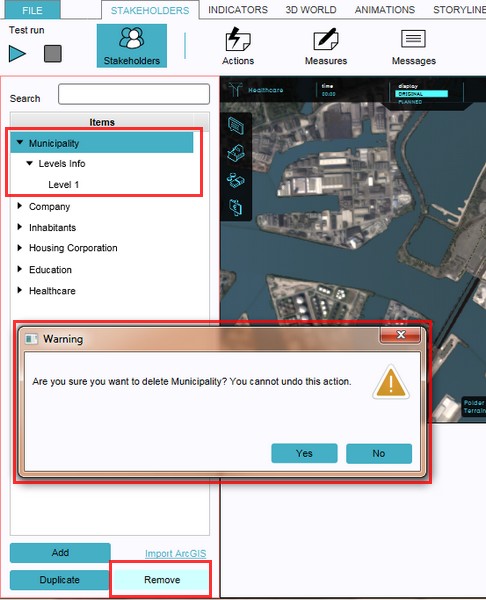
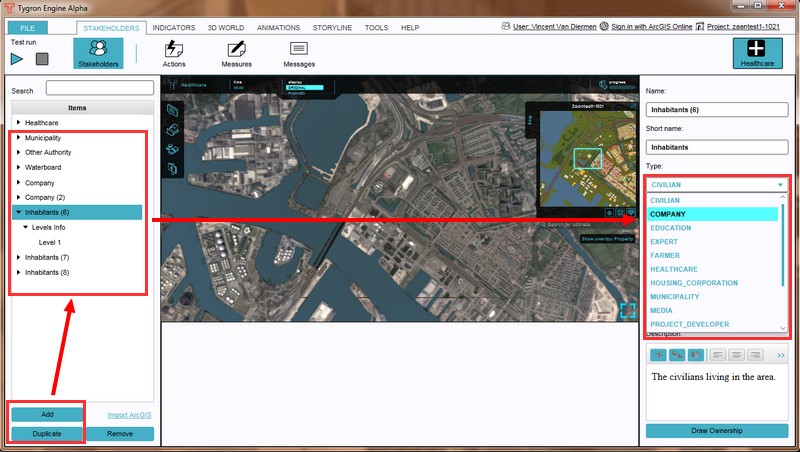
After setting up the data set and copying the actual stakeholder names, load or create the project and remove all default stakeholders except the selected stakeholder for editing. This remaining stakeholder can be removed later, but best is to select a stakeholder type that does not exist in the project yet, to avoid any mishaps.
Now create the same amount of new stakeholders that match the types of stakeholder from the actual data set. In the example, there are 3 companies, a municipality, a governmental department (infrastructure & environment)and a water authority (hoogheemraadschap) active in the project area. Therefore 3 Company stakeholders, A Municipality stakeholder, an Other Authority stakeholder and a Water Authority stakeholder need to be created. On the stakeholder property panels (right panel) the full names need to be copied over from the list. A convenient short name can be set up too, otherwise all companies will be displayed in this example as the generic 'company' for short.
Besides the minimal steps to import ArcGIS ownership, it is of course also possible to configure other stakeholder properties, such as the image, playability, property overlay colors and description. See also the main article about Stakeholders .
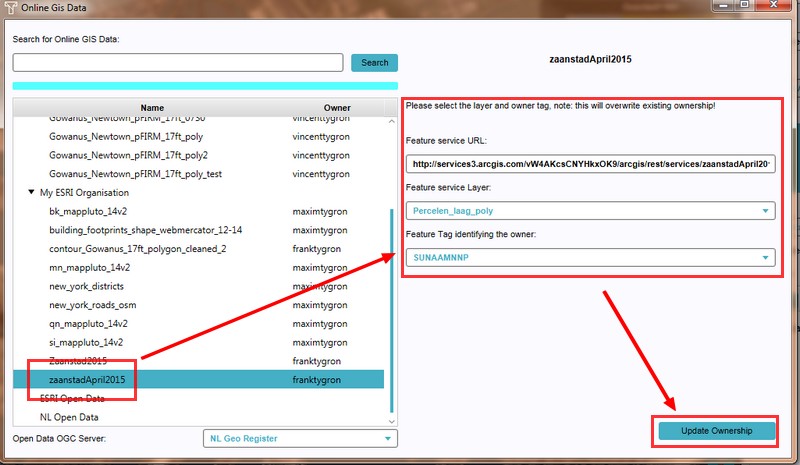
When all stakeholders are set up as described, select 'Import ArcGIS' from the bottom of the left panel. The Online GIS Data window will now open. Use the search bar, or scroll through available data sets to select the proper GIS data service. After a short while the new Online GIS based ownership will be present in the project.
- Make a list of actual stakeholder names in the project area, based on the Online GIS data service
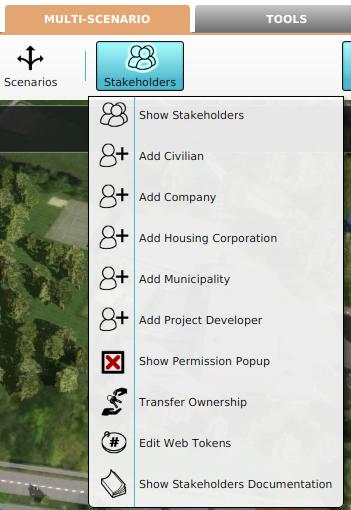
- Load or create the project and Select Multi Scenario > Stakeholders > Show Stakeholders
- Remove all default stakeholders, but keep selected stakeholder for editing purposes (can be removed later)
- Create the stakeholder and types according to the list from the ArcGIS service
- Change the full stakeholder names ad verbatim to the names from the ArcGIS service
- Select 'Import ArcGIS'(bottom left panel)
- Search and select the desired ArcGIS service
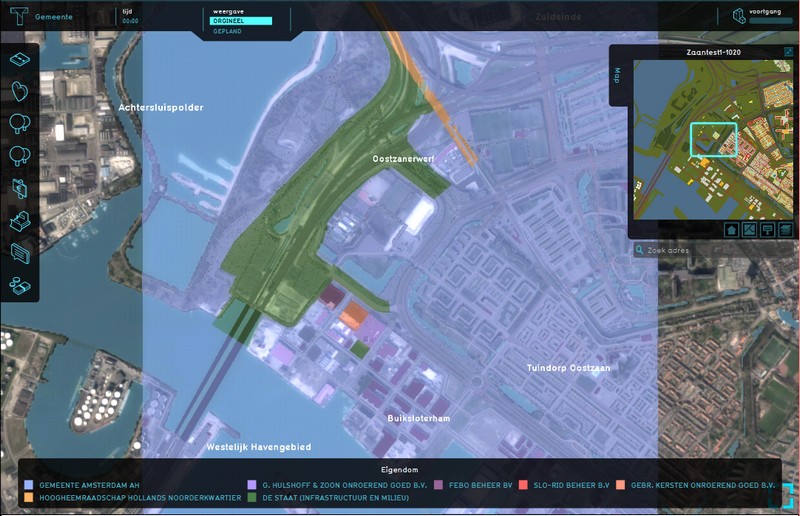
- The new ownership will now appear in the project
2. Select Multi Scenario > Stakeholders > Show Stakeholders
