How to import KNMI weather data into Microsoft Excel
- Main article: Text Import Wizard
When importing KNMI weather data into Microsoft Excel for further processing in the Tygron Platform, the following steps are advised.
Office 2019 and later
In the newest versions of Excel, the import from text/csv route is simplified and will probably not properly interpret the data as numbers. It is better to use the legacy method, for which the legacy Text Import Wizard needs to be activated first.
- Select File > Options
- Select Data on the panel Options for Excel
- Under Show legacy data import wizards, select From Text (Legacy)
- Select OK
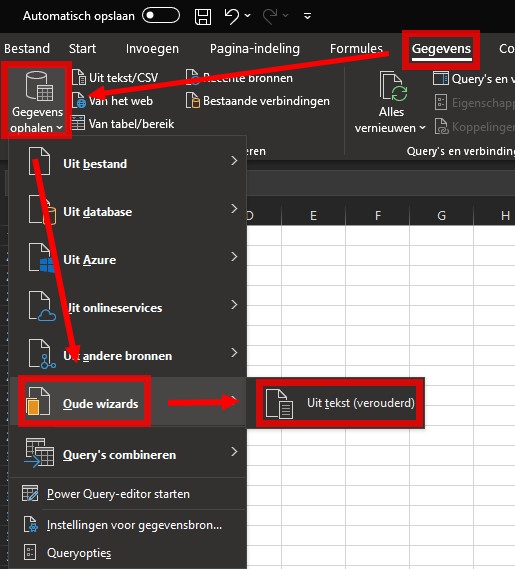
When the legacy Text Import Wizard is activated, it can be found under: Data > Get Data > Legacy Wizards > From Text (Legacy). When prompted, in the import File dialog, select the KNMI file you need.
Older Office versions
Select Data > Get External Data > From Text. In the import File dialog, select the KNMI file you need.
Text Import Wizard
Step 1 of 3
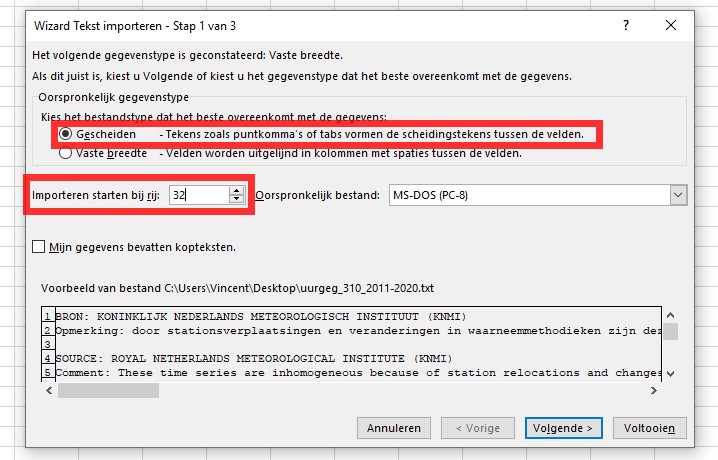
As the data in the KNMI files is separated by commas, select Delimited. it can also be convenient to enter '32' as the line number to Start import at row, to skip the header texts from the file and start at the top of the table of actual values. If the date range is also known, that line number can be used too. No other settings are required in this step.
Step 2 of 3
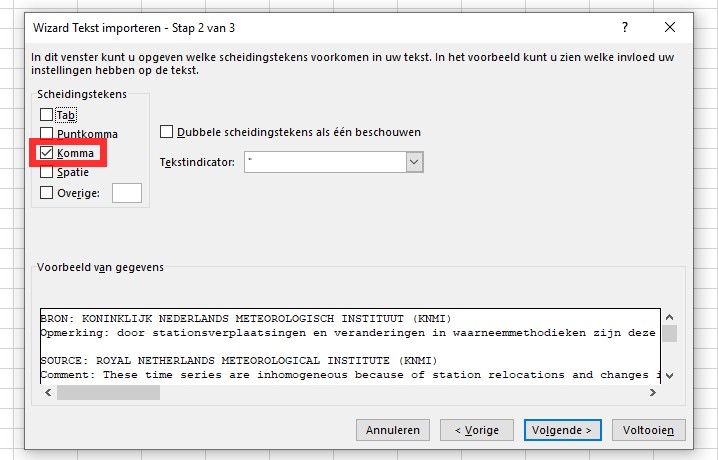
On this panel, select the çomma'as separator. nothing else needs to be changed.


