How to configure the Water Overlays: Difference between revisions
mNo edit summary |
mNo edit summary |
||
| Line 17: | Line 17: | ||
==Analyses== | ==Analyses== | ||
* [[Trace_water_through_project_area_use_case_(Water_Overlay)|Track flow in a hydrological system over time]] | |||
Revision as of 12:58, 8 April 2019
This page describes several use cases and examples of configurations in different water overlays based on the water module.
Excessive water
Flooding
- Levee breach with all water inside the project area (river, small lake)
- Levee breach with water from outside the project area (large lake, sea)
Rain
Water shortage
- Drought from excessive drains in the project area
- Drought from excessive evaporation in the project area
Water quality
Analyses
Time-controlled flow rate in a breach area
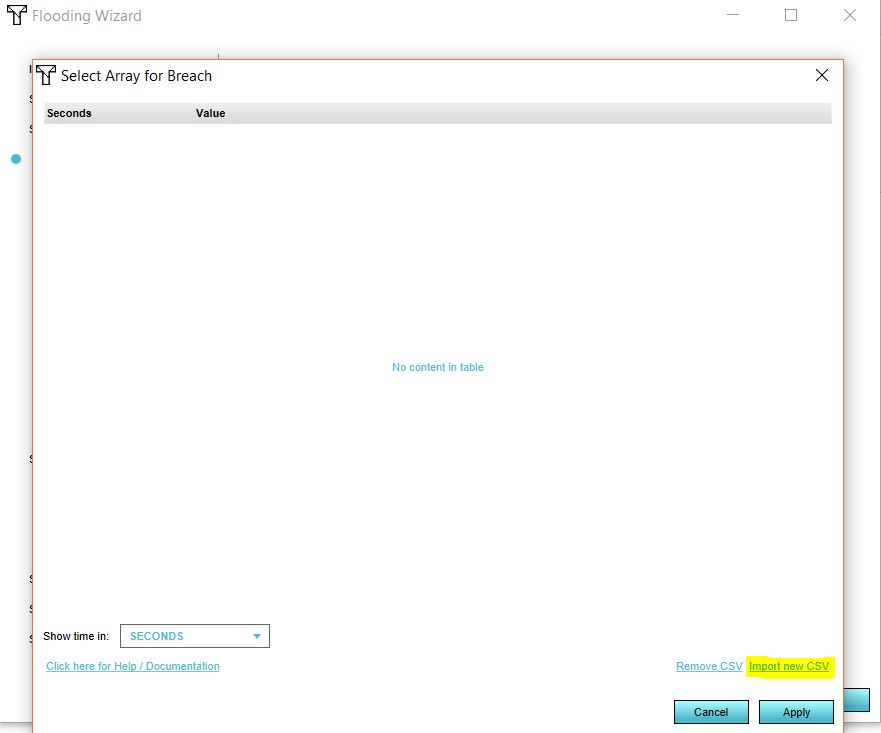
To create a variable Outlet Q in a breach area, a CSV (comma-separated values) file can be imported. Below the steps on how to create such a breach area. For this example we create the CSV in Excel, but you can also use another program to create the CSV.
- Open Excel.
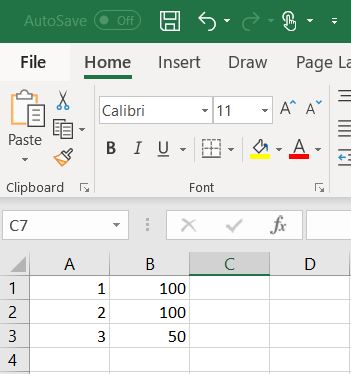
- In the first column, define your time steps. This can be in seconds, minutes, hours or days.
- Add the corresponding flow rates per step in the second column.
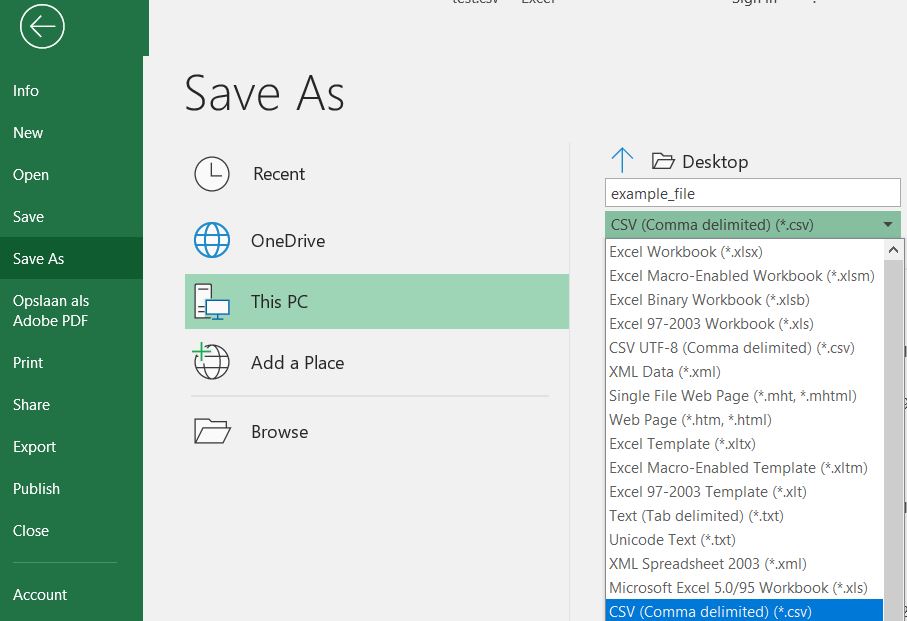
- Save the Excel as a CSV.
- Either add a breach area or have your GeoJSON file with your breach area ready. The area should have at least a breach floor attribute.
- Add a Flooding Overlay.
- Go to the Configuration Wizard of the Flooding Overlay.
- In step 2.1 either select the attribute that specifies your breach floor or import your GeoJSON file.
- Click on Next.
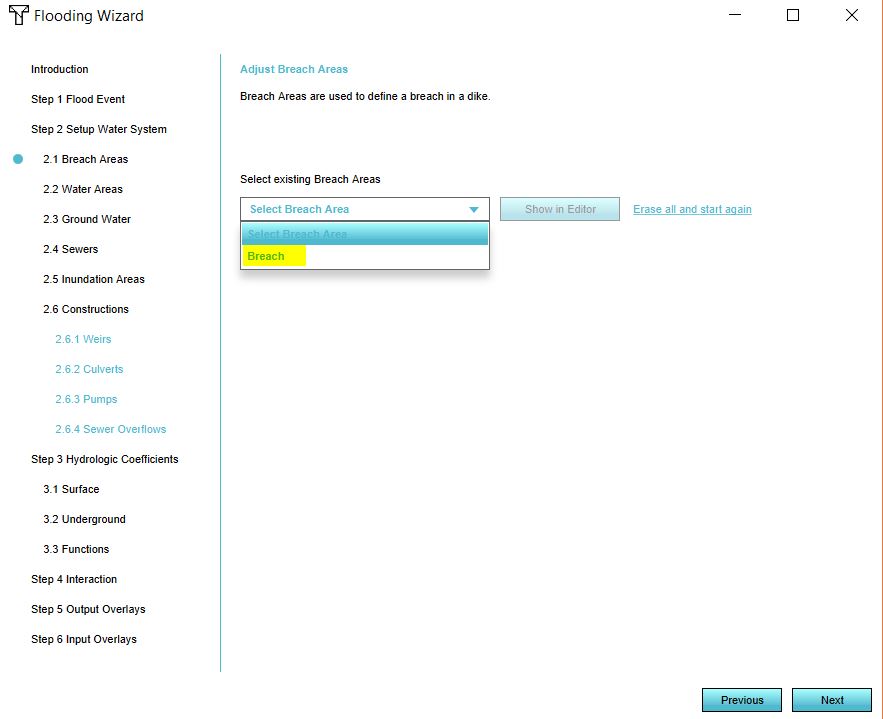
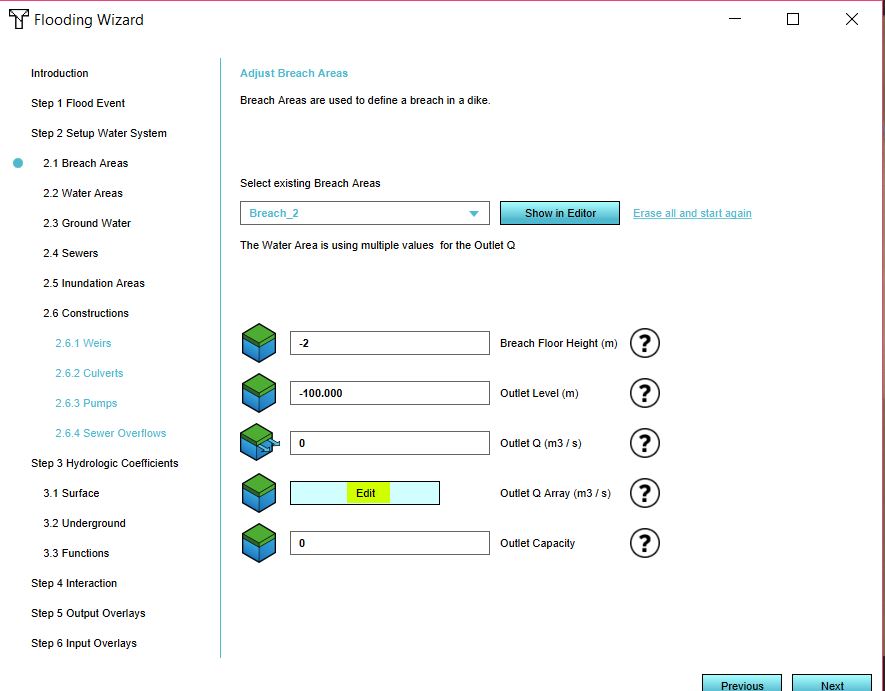
- In the dropdown menu, select your breach area. Now click on Edit.
- Import your CSV file by selecting the CSV file.
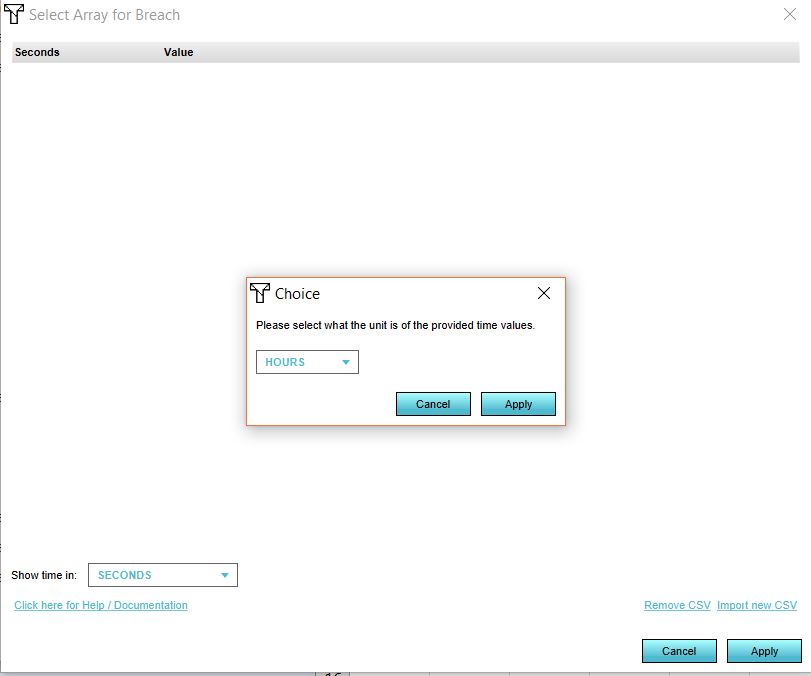
- Select the time units in your file.
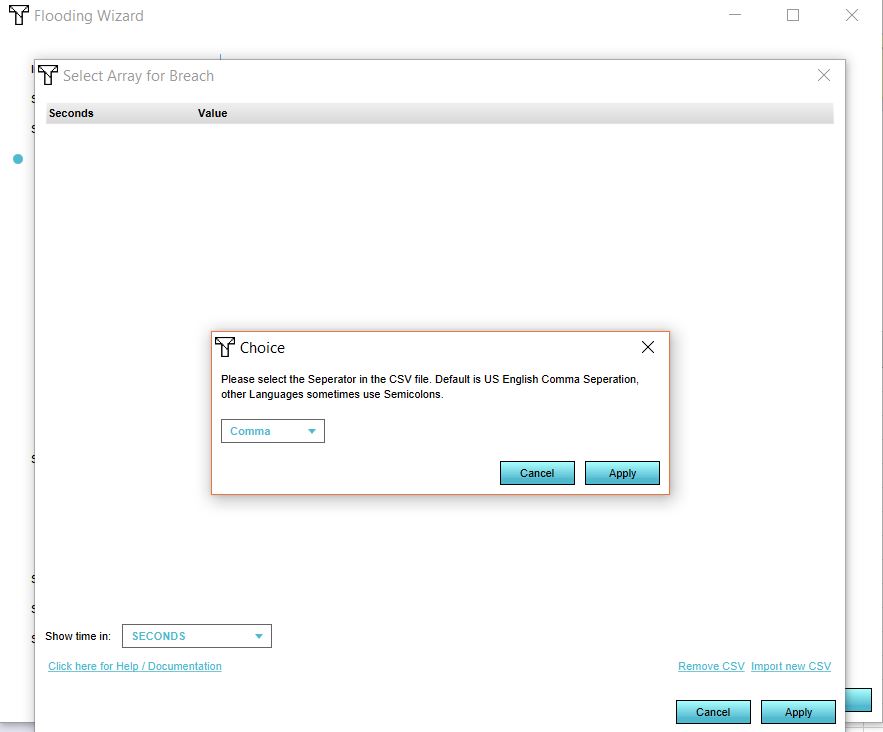
- Select the seperator for your file.
- Click on Apply.
Multi breach simulation
It is also possible to simulate a situation in where there is first one levee breach, following by another (or multiple). Therefore we also make use of the variable Outlet Q and a CSV file as mentioned above in the previous use case. In the steps below, two breaches are demonstrated, but the same steps apply to multiple breaches.
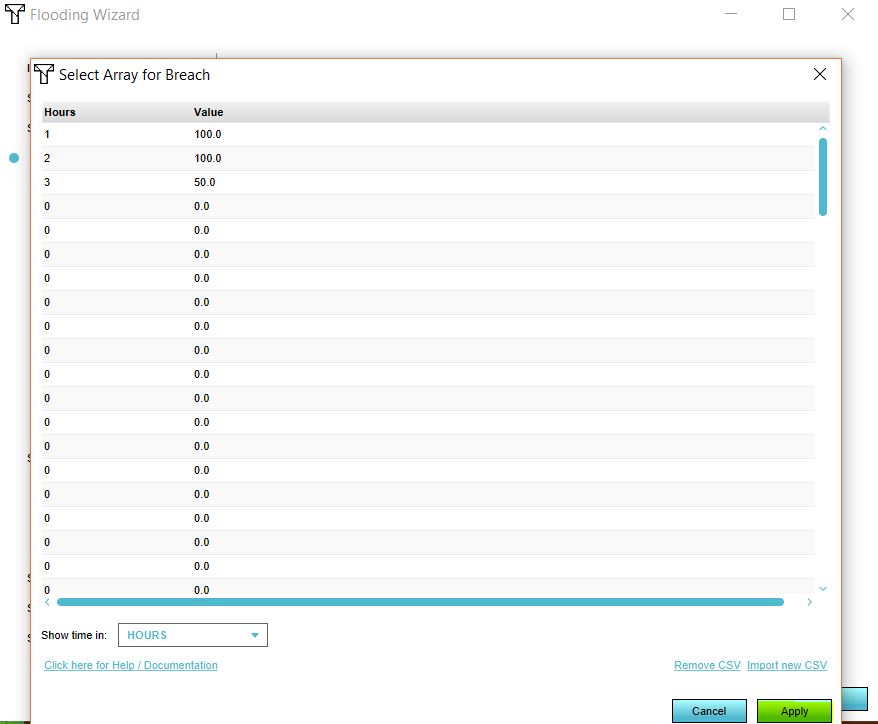
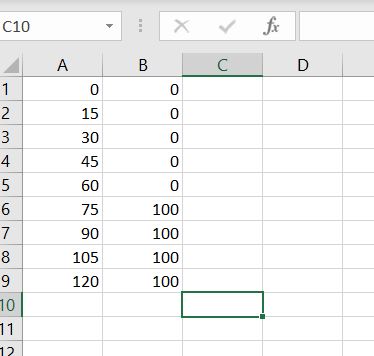
- First create a CSV file in where you structure the data in a way that at the start of the simulation, the outlet is 0. See for an example the image below.
- Either add two breach areas or have your GeoJSON file with your breach areas ready. The areas should have at least a breach floor attribute.
- Add a Flooding Overlay.
- Go to the Configuration Wizard of the Flooding Overlay.
- In step 2.1 either select the attribute that specifies your breach floor or import your GeoJSON file.
- Click on Next.
- In the dropdown menu, select the breach area that breaks second.
- Click on Edit and import the CSV file.
- Finish the Wizard and refresh the Overlay.
Import waterdepth data
For modelling the correct volume of a waterbody, it is important that the depth of a waterbody is accurately modelled. If you have data of your waterbodies and the depth of the soil, for example sections of water bodies, it is possible to import this data as part of the DEM (Digital Elevation Model). Together with importing your water level areas, the volume of the waterbody can then be more accurately calculated. Below the steps on how to import the data.
The steps below assume you have already a digital dataset of your waterdepth data available (no PDF's with sections). Either a vector dataset of the waterbodies with an attribute value for the depth or a raster dataset is sufficient to use. In this example we use a vector (shapefile) polygon dataset and make use of a GIS (QGIS) to transform the vector data to a raster dataset to import in the Tygron Platform.
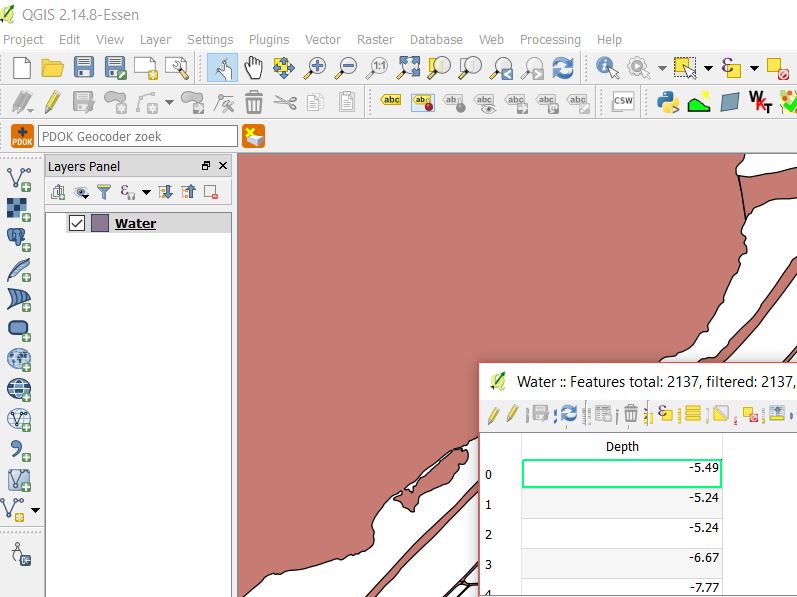
- Open the vector dataset in a GIS.
- Now we want to create the raster by making use of the rasterize menu. This menu can be found in the tab Raster > conversion > rasterize (vector to raster)
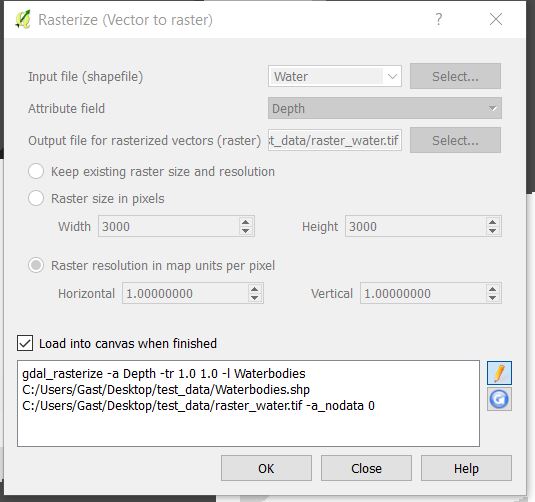
- Define in the panel the shapefile, the attribute containing the depth values, the name and location of the output raster and either the raster size or resolution. In this case we recommend to set the resolution. Choose the same resolution as chosen for the DEM when generating the project.
- When these settings have been set, click on the pencil icon to edit the text. It is important to also add a nodata value to create a partial raster. On the places where there is a nodata value, the Tygron Platform will use the values from the default DEM. Add the following statement to the text box to create the nodata value: -a_nodata <number to replace with nodata>, for example: -a_nodata 0 (see also the image below). This means that where there is a value of 0 in the vector dataset, it is replaced with a nodata value in the raster dataset.
- Click on OK and wait till the raster data is created. Now you can close the GIS program.
The next step is to import the created raster to replace the DEM only on the locations of waterbodies with the new raster values.
- (See for more explanation and images on the following steps this Wiki page). Go to the tab Terrain > Select Elevation Geotiff
- Click on import new Geotiffs in the bottom right corner and choose the created raster. Depending on the file size and the internet speed, it make take some time to upload the file to the server.
- When the file is uploaded, select it and click on Apply
- Refresh the Heightmap overlay and click on the location of a waterbody to check the new height.
Simulate a flood wave with in- and outlet areas
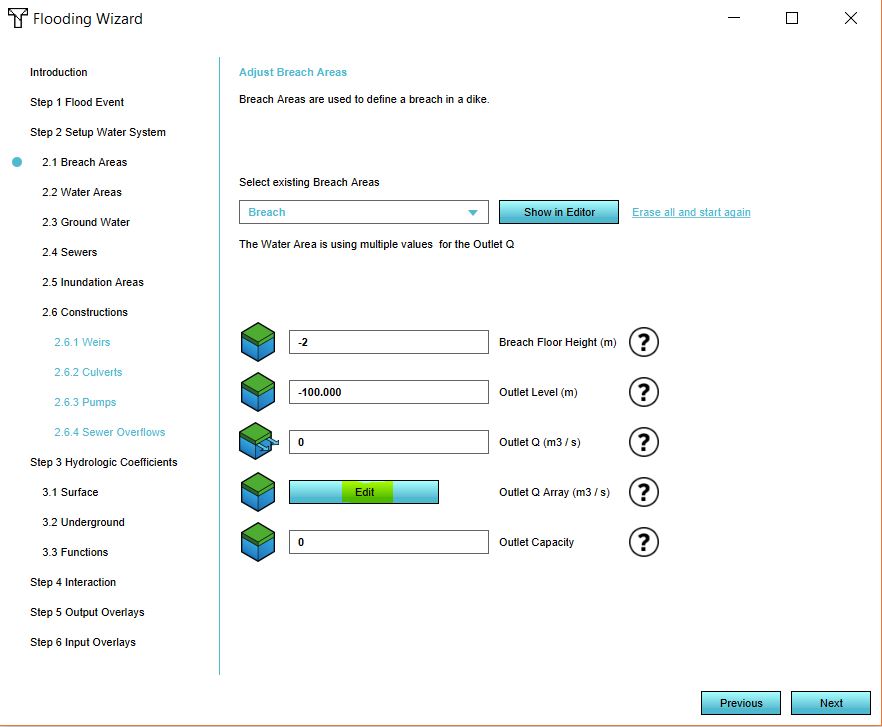
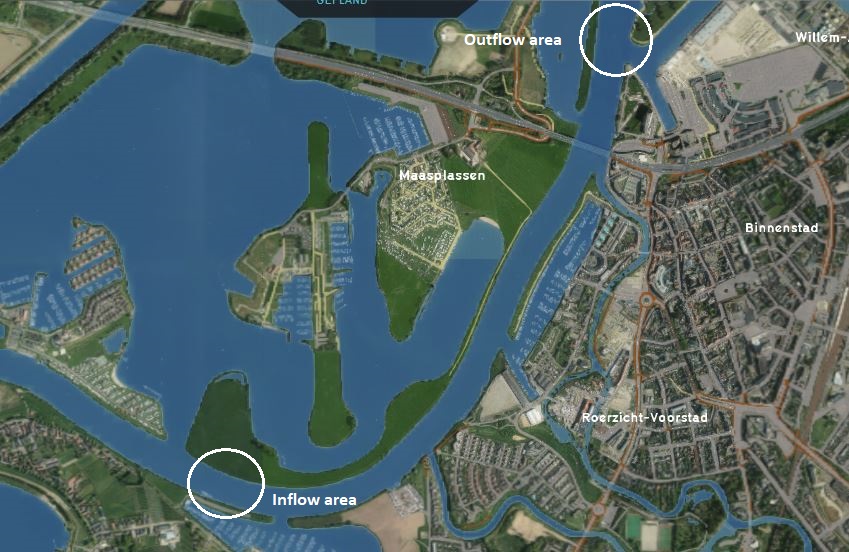
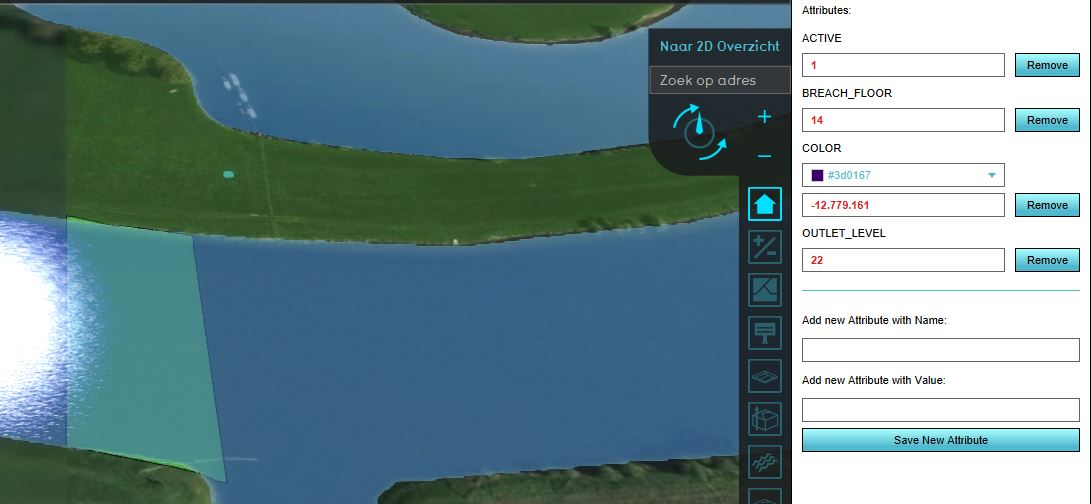
To simulate a scenario of for example a flood wave in a river, you can create in- and outlet areas. These are basically breach areas. The inlet area demonstrates the inflow of water, the outlet area demonstrates the outflow of water. The images show an example with invented values for the attributes.
- Draw two areas at the one side of the river where water will flow in and at the other side of the river where the water flows out. It is also possible to import a GeoJSON file with these areas.
- The areas should have a breach floor attribute. Give the inlet area an outlet level and/or outlet Q. This depends on the data you have of the scenario. If you know for example the water level of a flood wave, use the outlet level. If you know the flow rate, use the outlet Q. Both is also possible, then the outlet level has precedence over the outlet Q. For the outlet area, enter, a negative outlet Q value and/or an outlet level.
- Add a Flooding Overlay and go to the Configuration Wizard of the Flooding Overlay.
- In step 2.1 either select the attribute that specifies your breach floor or import your GeoJSON file.
- Click on Next.
- In the dropdown menu, check if the attributes of the areas correspond with what you have set as attributes.
- In step 2.2 import your water level areas with at least a water level attribute.
- Finish the Wizard and refresh the Overlay.
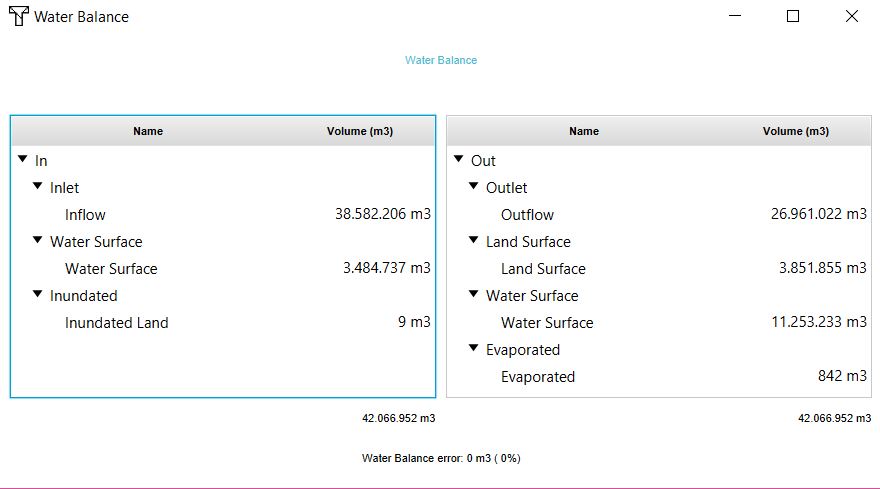
- After the flooding is calculated, check Water Balance to get more insight in the scenario.
Track flow in a hydrological system over time
To track water in a hydrological system, i.e. find where water from a specific point flows to, it is possible to artificially add a chemical emitter in the water system. Any water passing through that construction will pick up the chemical. By having a result type added which highlights that chemical, the flow of the water can be tracked quite accurately.
For the purposes of this scenario, a simple hydrological model will be assumed, although the same technique can be used for breaches and other calamitous scenarios. We will also assume we can use the CHLORIDE particle as our "tracker". We will track any water flowing in from outside the system through a specific inlet.
- Configure a base hydrological system. For the specified scenario, use the groundwater overlay.
- Ensure the simulation is set up to output a reasonable amount of timeframes. For most simulation durations, 25 to 50 timeframes will suffice.
- Also ensure the hydrological system has at least one inlet configured to simulate flow into the hydrological system.
- Also ensure the hydrological system has a CHLORIDE result type, either as main result or as a child result type.
- Find the inlet, the water of which you want to track, in the 3D world.
- Add the "CHLORIDE" attribute to the inlet, with a value of "1".
- Ensure the overlay is recalculated.
- Inspect the "Chloride" result overlay. The greater the concentration of chloride in any given location, the more water from the inlet has flowed there.
- Select the "play" option in the overlay's legend. The animation will show the flow of the water from the inlet.
To track water from different sources (different inlets, or other hydrological constructons), add the chemical attribute to the construction of which you wish to track the water.
To track water from different sources collectively, each source can be configured with the same chemical attribute. (In the specified example, multiple sources can be provided with the CHLORIDE attribute.)
To track water from different sources with the ability to differentiate between what water came from which specific source, each source can be given a different chemical to produce.
