How to upload an Indicator Excel: Difference between revisions
Jump to navigation
Jump to search
Created page with "==Upload an Excel file== To upload an Excel xlsx-file for the Excel Indicator, have the file ready on an easy to remember location (desktop for instance), and add in the Editor an Excel indicator to the project. Select Excel File Name on the left panel and select the Upload button on the right panel. In the newly opened panel, select the file to upload and confirm. Now the file has been uploaded to the project, and the new indicator has appeared on the top bar. If there..." |
No edit summary |
||
| (One intermediate revision by the same user not shown) | |||
| Line 1: | Line 1: | ||
To upload an Excel xlsx-file for the [[Indicator]], have the file ready on an easy to remember location (desktop for instance), and add in the Editor an indicator to the project. Select Excel File Name on the left panel and select the Upload button on the right panel. In the newly opened panel, select the file to upload and confirm. Now the file has been uploaded to the project, and the new indicator has appeared on the top bar. If there was already a previous version of the file present, please select the [[calculation_panel|Recalculate Indicators]] option from the Indicators drop down menu, to ensure the newly uploaded spreadsheet has an actual impact on the project. | |||
To upload an Excel xlsx-file for the | |||
<br> | <br> | ||
<br> | <br> | ||
Latest revision as of 10:58, 13 July 2026
To upload an Excel xlsx-file for the Indicator, have the file ready on an easy to remember location (desktop for instance), and add in the Editor an indicator to the project. Select Excel File Name on the left panel and select the Upload button on the right panel. In the newly opened panel, select the file to upload and confirm. Now the file has been uploaded to the project, and the new indicator has appeared on the top bar. If there was already a previous version of the file present, please select the Recalculate Indicators option from the Indicators drop down menu, to ensure the newly uploaded spreadsheet has an actual impact on the project.
How to upload an Excel Indicator:
- Select Indicators > Add Excel Indicator
- Rename the newly added indicator in the 'Name' and Short Name' fields on the right panel
- Select the color to be used in the progression panel
- Select to activate the indicator, if desired
- Add a proper description
- Highlight 'Excel File Name' on the left panel panel
- Select the 'Upload' button
- Select the file to upload in the 'Choose your file' panel
- Select Indicators > recalculate Indicators
-
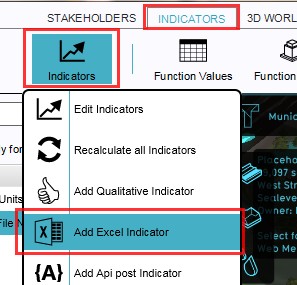 1. Select Indicators > Indicators > Add Excel Indicator
 -
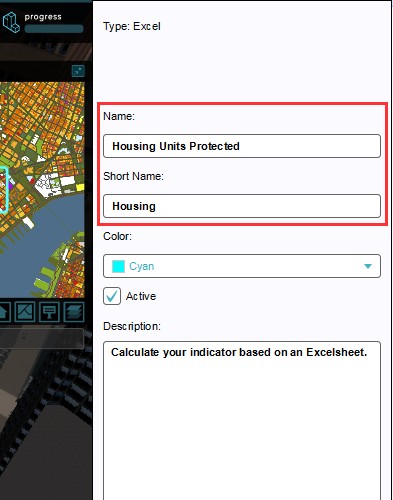 2. Enter new Name and Short Name
 -
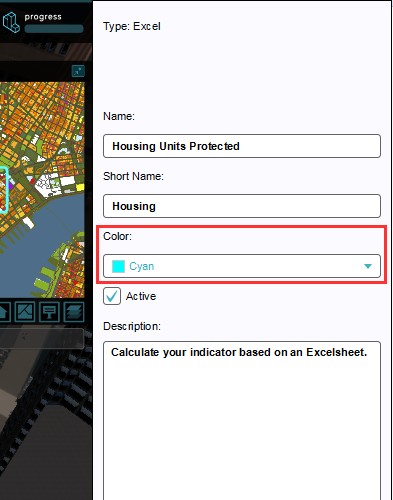 3. Change color of the indicator
 -
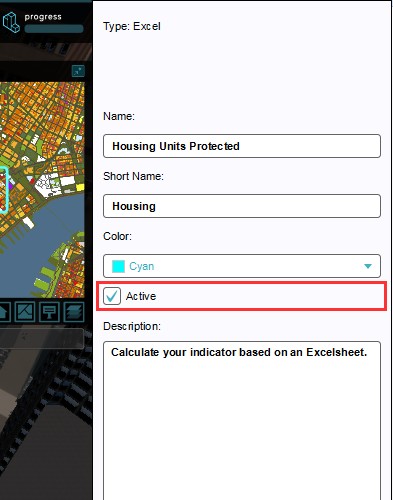 4. Activate the indicator
 -
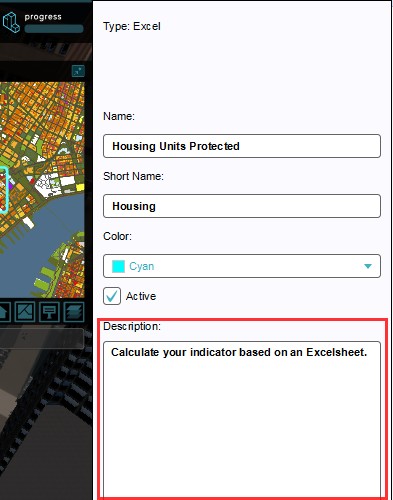 5. Add a description
 -
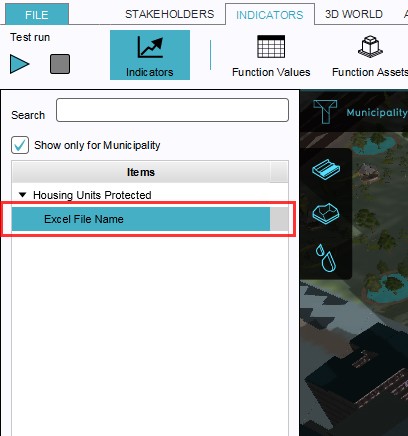 6. Highlight 'Excel File Name' on the left panel
 -
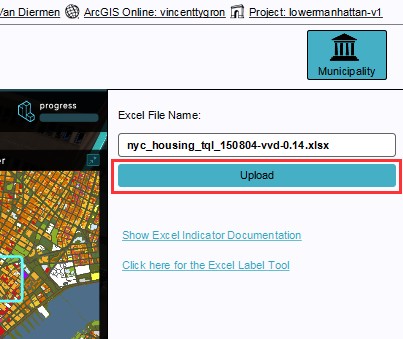 7. Select the 'Upload' button
 -
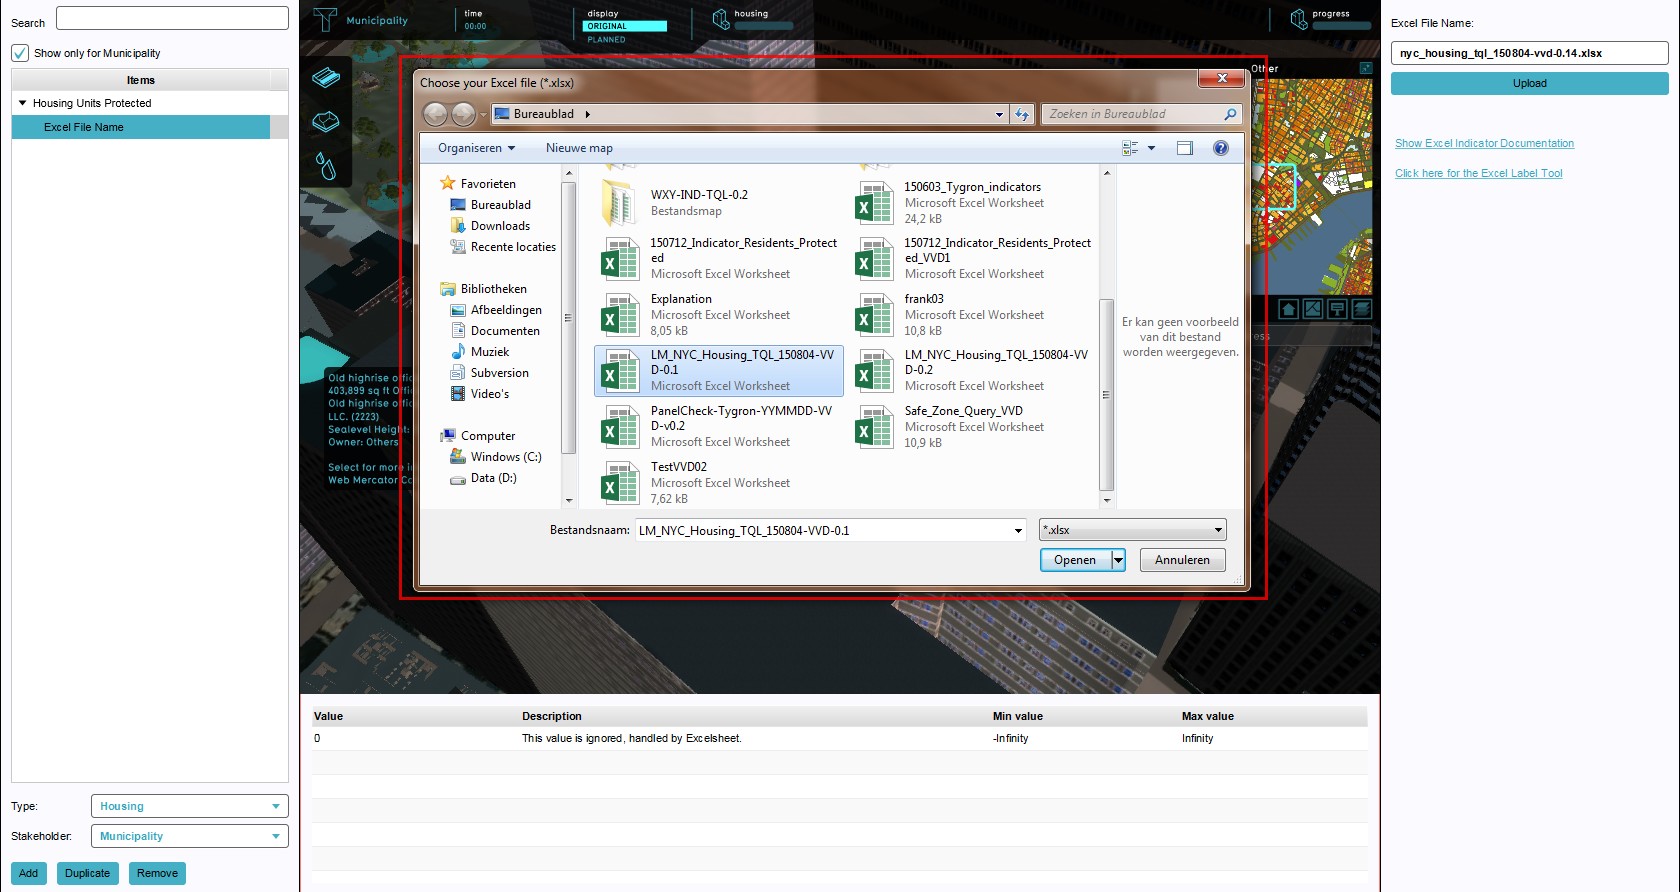 8. Select the file to upload in the 'Choose your file' panel
 -
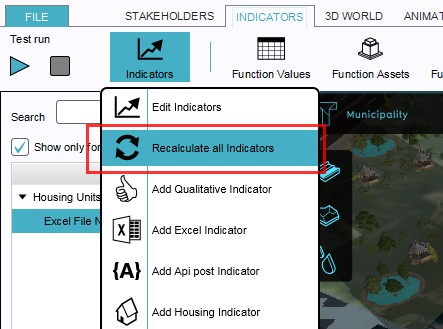 9. Recalculate the newly added Excel indicator


