Area Overlay: Difference between revisions
Jump to navigation
Jump to search

| Line 9: | Line 9: | ||
'''Name''' | '''Name''' | ||
The Name of the Overlay | :''The Name of the Overlay'' | ||
'''Selected / Unselected Terrains''' | '''Selected / Unselected Terrains''' | ||
Terrains to be displayed. An empty checkbox means that terrain won't be displayed, checked means the terrain is displayed on this overlay.<br clear=all> | :''Terrains to be displayed. An empty checkbox means that terrain won't be displayed, checked means the terrain is displayed on this overlay.''<br clear=all> | ||
==Configuring the overlay== | ==Configuring the overlay== | ||
Revision as of 13:53, 28 August 2015
What is the terrains overlay
File:Editor overlay terrains.jpg
Active terrains overlay, named "Special Terrain", configured to highlight one of the active Flooding Terrains.
The terrains overlay is an overlay which is used for displaying multiple terrains in one overlay. When this overlay is added to a project, it can be activated by selecting the corresponding icon on the minimap. When activated, it displays the active terrains as selected in the terrains list. The terrains appear in the color as selected in the Terrains properties.
It has 2 properties which can be adjusted.
Name
- The Name of the Overlay
Selected / Unselected Terrains
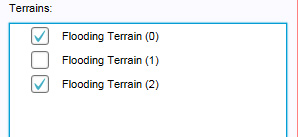
- Terrains to be displayed. An empty checkbox means that terrain won't be displayed, checked means the terrain is displayed on this overlay.
Configuring the overlay

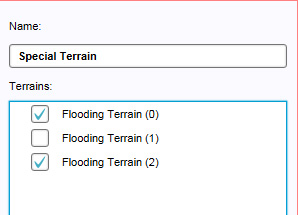
The Right Panel when the terrains overlay is selected.
By default, the overlay does not display anything. The terrains to be displayed must be configured first, by selecting or deselecting terrains.
Name
File:Editor overlay terrains name.jpg
The field for the "name".
- The name of the overlay. This is the name that will appear as the title overlay, when hovering over the related icon in the minimap. It is also the text in the legend of the overlay as description for the "Function Color". You can change this by altering the text in the "Name" field.
Selecting terrains
- A list of available terrains in the current project. Activating a terrain for display on the terrains overlay is done by selecting the checkbox. Deactivating the terrain is done by deselecting the checkbox.
