Rainfall Overlay tutorial
Revision as of 13:14, 6 June 2018 by Daniel2@tygron.com (talk | contribs)
Getting Started
- Contact Tygron Support to request the Kockengen Tutorial project
- Open the Tygron Engine, logon with your user name and password and open the project Kockengen Tutorial
- Download and unpack the content of this zip-file on your desktop: [1]
Open the Tygron Engine and start the project Kockengen Tutorial. The project will appear:

Adding a Rainfall Overlay
In this step you will add a Rainfall Overlay. Follow these steps:
- Go to Overlays, in the Geo Data ribbon and select Add Rainfall. The rainfall overlay appears on the left-side-panel. And in the overlay bar on the right side of the map:
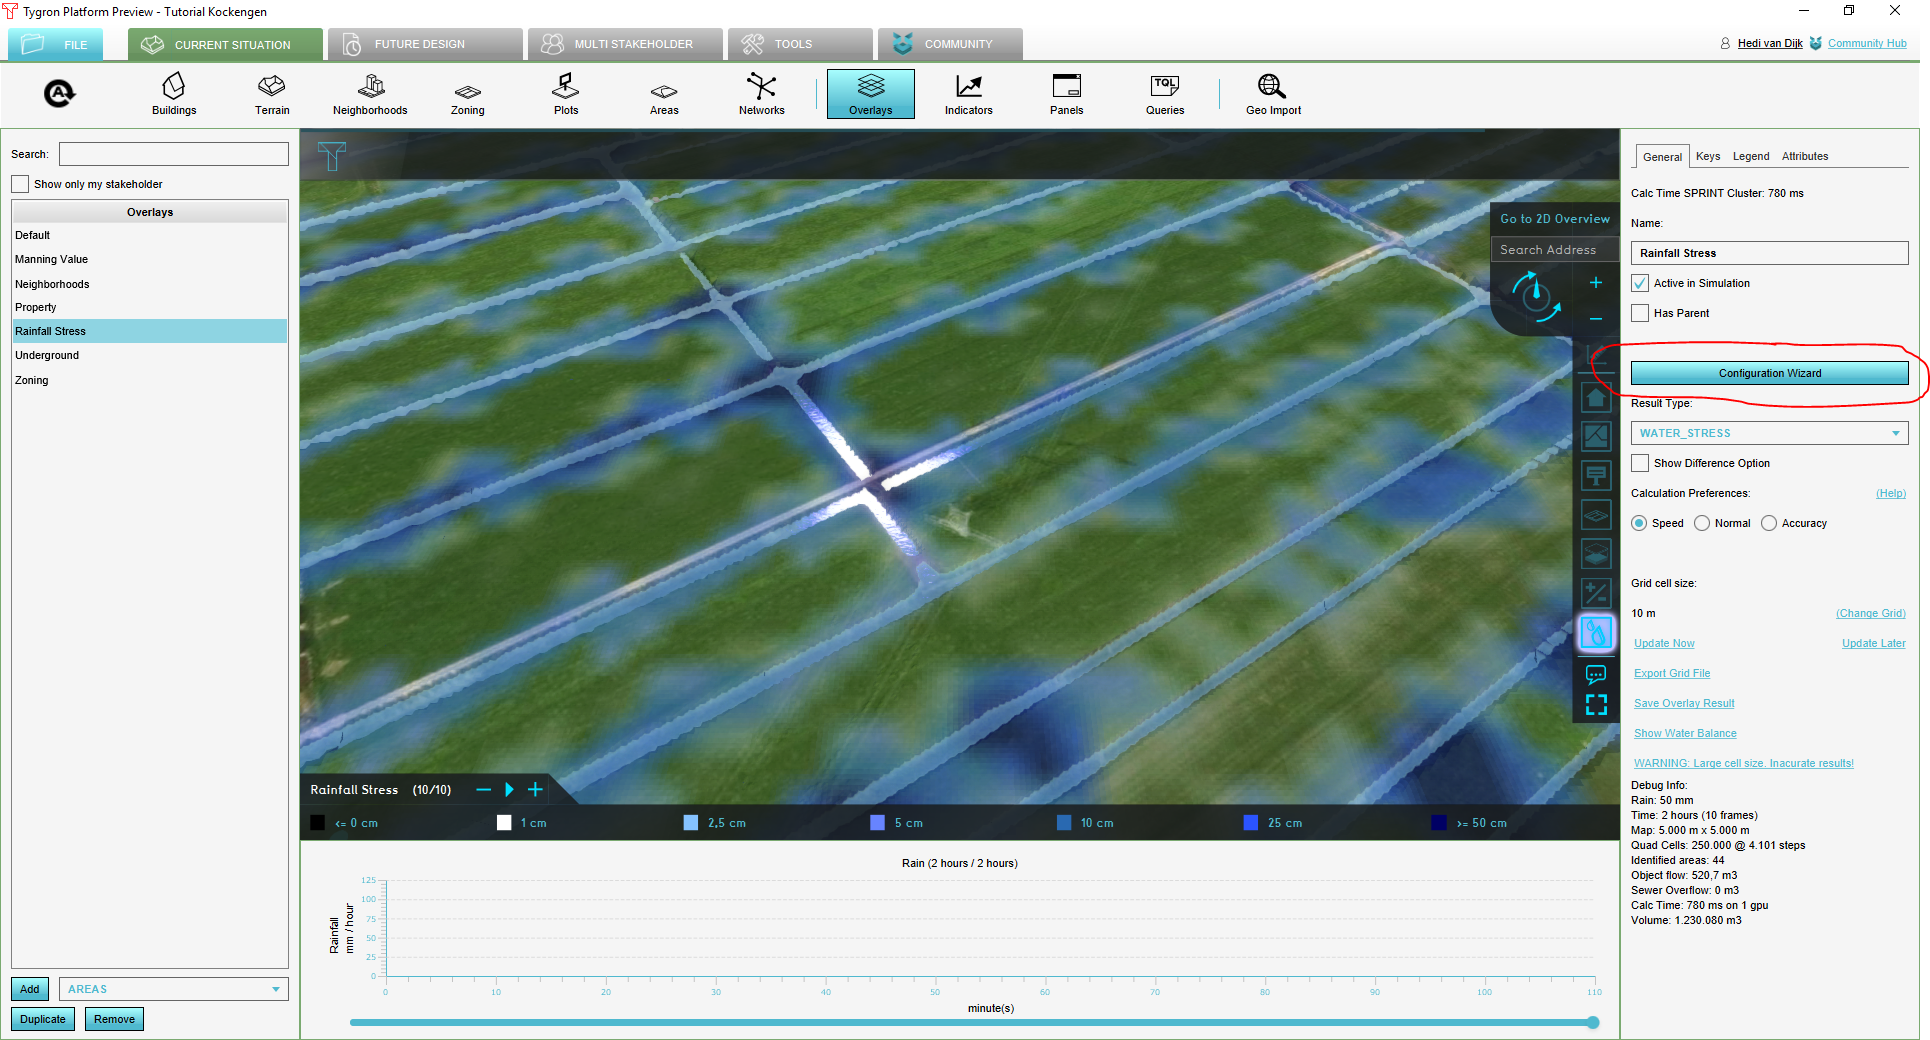
- On the right side panel, you find four tabs: General, Keys, Legend and Attributes. Take a moment to familiarize yourself with these tabs.
- General contains the most common information necessary to interpret the rainfall overlay.
- In Keys you can relate 'Keys' of the rainfall overlays to attribute information stored in the 3D world.
- Legend allows you to customize your legend
- Attributes contains the settings of your overlay.
- Click on the Configuration Wizard button. With the Rainfall Overlay Wizard, you can configure your water system, this includes:
- The setup of the weather boundary condition
- Definition of the water system, including water level areas (peilgebieden) and sewer districts
- Setting of hydrological parameters

The Rainfall Overlay Wizard
 With the Rainfall Overlay Wizard you can configure your water system, including surface water and sewer districts. In this part of the tutorial you need to have prepared the following GeoJSON-files:
- waterlevelareas.geojson
- sewerdistricts.geojson
- weirs.geojson
- overflows.geojson
Some tips in preparing the required vector-files:
- All files need to have a coordinate reference system (CRS) defined. The Tygron Engine will automatically reproject the vectors to its internal local mercator projection.
- Hydraulic structures (weirs, culverts, pumps and overflows) need to overlap the two areas (water level areas or sewer areas) they connect. Only structures which connect two areas will be interpreted as being part of the water system.

Step 1: defining the weather
Press Next to proceed to the Weather panel, here the user can define rainfall and evaporation input. Change all numbers and the according to this picture:

By this setting you have defined a rainfall event:
- Uniform rainfall in 120 minutes
- With a total rainfall amount of 50mm
- With a dry period after rainfall of 120 minutes, so a total simulation time of 4 hours
- Reference evapotranspiration will be assumed on 1.5mm/day