Rainfall Overlay tutorial: Difference between revisions
| Line 115: | Line 115: | ||
Take some time to review the attribute values. What is the meaning? | Take some time to review the attribute values. What is the meaning? | ||
[[File:Kockengen_figure11.PNG|600px]] | |||
Revision as of 09:05, 7 June 2018
Getting Started
- Contact Tygron Support to request the Kockengen Tutorial project
- Open the Tygron Engine, logon with your user name and password and open the project Kockengen Tutorial
- Download and unpack the content of this zip-file on your desktop: [1]
Open the Tygron Engine and start the project Kockengen Tutorial. The project will appear:

Adding a Rainfall Overlay
In this step you will add a Rainfall Overlay. Follow these steps:
- Go to Overlays, in the Geo Data ribbon and select Add Rainfall. The rainfall overlay appears on the left-side-panel. And in the overlay bar on the right side of the map:
- On the right side panel, you find four tabs: General, Keys, Legend and Attributes. Take a moment to familiarize yourself with these tabs.
- General contains the most common information necessary to interpret the rainfall overlay.
- In Keys you can relate 'Keys' of the rainfall overlays to attribute information stored in the 3D world.
- Legend allows you to customize your legend
- Attributes contains the settings of your overlay.
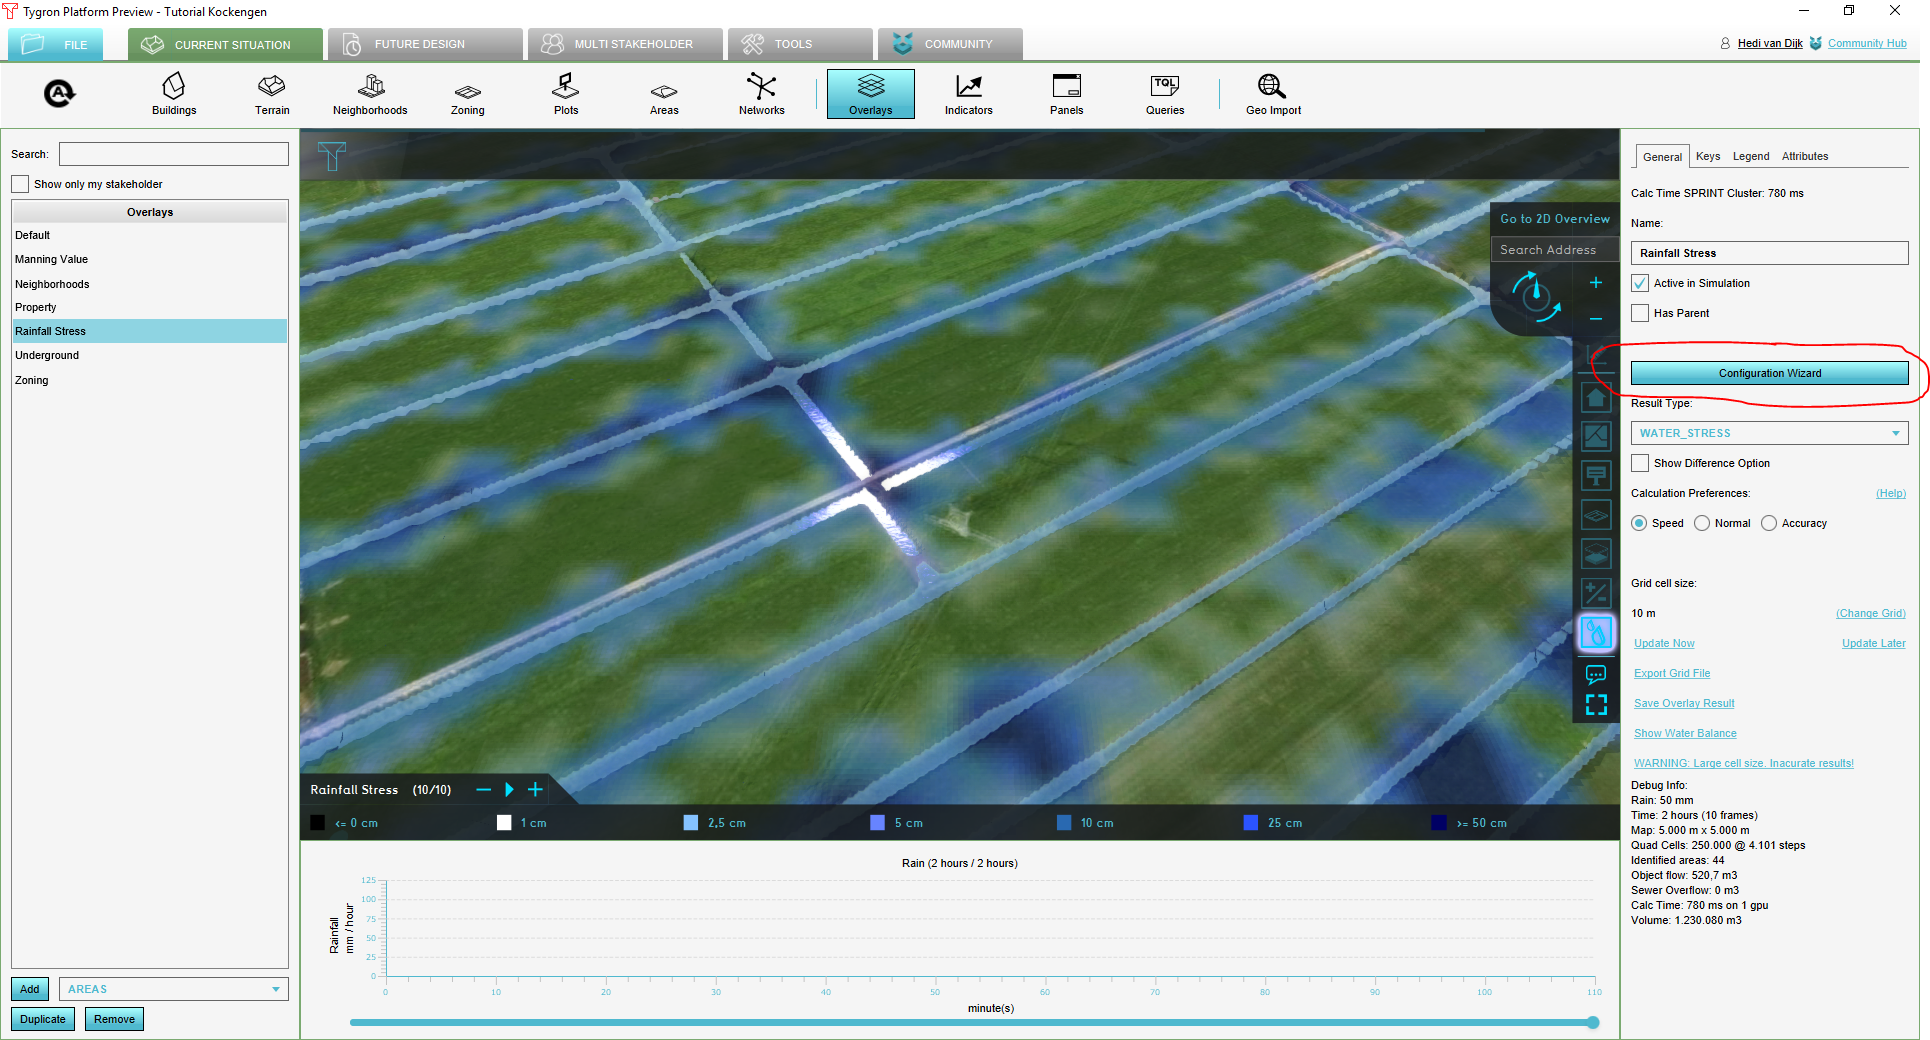
- Click on the Configuration Wizard button. With the Rainfall Overlay Wizard, you can configure your water system, this includes:
- The setup of the weather boundary condition
- Definition of the water system, including water level areas (peilgebieden) and sewer districts
- Setting of hydrological parameters

The Rainfall Overlay Wizard

With the Rainfall Overlay Wizard you can configure your water system, including surface water and sewer districts. In this part of the tutorial you need to have prepared the following GeoJSON-files:
- waterlevelareas.geojson
- sewerdistricts.geojson
- weirs.geojson
- overflows.geojson
Some tips in preparing the required vector-files:
- All files need to have a coordinate reference system (CRS) defined. The Tygron Engine will automatically reproject the vectors to its internal local mercator projection.
- Hydraulic structures (weirs, culverts, pumps and overflows) need to overlap the two areas (water level areas or sewer areas) they connect. Only structures which connect two areas will be interpreted as being part of the water system.

Step 1: defining the weather
Press Next to proceed to the Weather panel, here the user can define rainfall and evaporation input. Change all numbers and the according to this picture:

By this setting you have defined a rainfall event:
- Uniform rainfall in 120 minutes
- With a total rainfall amount of 50mm
- With a dry period after rainfall of 120 minutes, so a total simulation time of 4 hours
- Reference evapotranspiration will be assumed on 1.5mm/day
Step 2: setup of the water system
Press next to proceed to the introduction screen: Setup Water System. Here you can define your water system using the prepared GeoJSONS.

Step 2.1: adding water level areas
Press next to the screen for importing water areas. A water level area is an area with a spatially uniform water level varying in time. Variation is caused by rainfall + evaporation on the surface water, inflow from sewer areas, inflow from the surface and groundwater inflow.

There are three options to define your water system:
- Import Water Areas: allows you to import a set of water level areas from an external dataset
- Generate Water Areas: allows you to define 1 water level area for your project area
- Do Nothing: the surface water system effectively has infinite storage
Select Import Water Level Areas and press Import Water Level Areas. The Geo Data Wizard will open. We will import waterlevelareas.geojson. Use the following attributes in the GeoJSON file as attributes for the Rainfall Overlay:
- WATERLEVEL: the initial Water Level in the water level area (m + datum)
- OUTLET: the outlet capacity of the Water Level (m3/s)
- ID: the identification of the water level area
- NAME: the name of the water level area
Steps in the Geo Data Wizard:
- Select Import a GeoJSON file and press Next. Press Select File and locate the waterlevelareas.geojson. Press Open and press Next.
- An overview of your areas is generated; see right-side pictures. Press Next
- In the next step you can filter features based on attribute filtering. We skip this step by pressing Next
- We assign names to the water level areas using the NAME attribute from the geojson; ; see right-side pictures. Press Next
- We select all attributes, importing all attribute data from the geojson, and press Next
- We assign the WATERLEVEL attribute of the GeoJSON to the WATER_LEVEL key of the overlay and the OUTLET attribute of the GeoJSON to the OUTLET key of the rainfall overlay; see right-side pictures
- At Finalize we press Finish to upload the areas to the server
After importing your water level areas you can review all parameters by opening the selection menu. Take some time to review the attribute values. What is the meaning?
Step 2.2: initial groundwater level
In step 2.2, you can specify ground water levels. By default, ground water levels are assumed to be the same as the water level in the water level area (see previous section). Alternatively, the user can specify pre-defined initial groundwater levels (GHG,GLG and GVG for the Netherlands) or a GeoTiff with ground water levels in m below surface; see right-side pictures.
Step 2.3: adding sewer areas
Sewer districts are represented by areas which have one storage value [m], uniform in space. Sewer storage will vary in time by sewer inflow from connected buildings (buildings, roads, etc), pumped outflow to a WWTP and sewer overflow to surface water. Press import sewer districts and import the file sewerareas.geojson via the GIS wizard. Assign the following attributes:
- ID: identification of the sewer district
- NAME: name of the sewer district
- POC: pump capacity assigned to the sewer district [m3/s]
- STORAGE: storage of the sewer district. [mm]

Follow the steps in the Geo Wizard according to the steps described in the water level areas section:
- At step 5, multiply the attribute value in the GeoJSON (mm) by 0,001 (conversion to m); see right-side pictures.
- At step 6, assign the the STORAGE attribute to the SEWER_STORAGE key and the POC attribute to the SEWER_PUP_SPEED key
Take some time to review the attribute values in the imported area Kockengen. What is the meaning?
Step 2.4: adding hydraulic structures
You can import the following hydraulic structures:
- Weirs, connecting different water areas. Flow between two water areas is computed with the weir formula, using the water level of the connected water areas(1).
- Culverts, connecting two water areas. Flow between two water areas is assumed to be equal to a fixed flow capacity(1).
- Pumps, connecting two water areas. Flow between two water areas is assumed to be equal to the pump capacity(2).
(1) In cases in the Netherlands: deze kunstwerken zijn typisch peilscheidende duikers en stuwen. (2) In cases in the Netherlands: deze pompen zijn typisch voor onderbemalingen en zoetwatervoorziening in droge tijden.
2.4.1 Adding Weirs
You can upload weirs.geojson by selecting Import Weirs in the Weirs screen and pressing Import Weirs. We will import weirs.geojson, using the following attributes:

- NAME: the name of the weir
- ID: identification of the weir
- WEIR_HEIGHT: the crest height [m + datum]; to be assigned to the WEIR_HEIGHT key
- WEIR_WIDTH: the width of the crest [m]; to be assigned to the WEIR_WIDTH key
- WEIR_COEFF: the weir coefficient, accommodating all losses; to be assigned to the WEIR_COEFFICIENT key
In the Geo Wizard follow the steps:
- Select Import a GeoJSON file and press Next. Press Select File and locate the wiers.geojson. Press Open and press Next.
- An overview of your areas is generated as below. Press Next
- In the next step you can filter features based on attribute filtering. We skip this step by pressing Next
- We assign names to the water level areas using the NAME attribute from the geojson and press Next
- We select all attributes, importing all attribute data from the geojson, and press Next
- We assign the WEIR_HEIGHT attribute of the GeoJSON to the WEIR_HEIGHT key of the overlay, the WEIR_WIDTH attribute of the GeoJSON to the WEIR_WIDTH key of the rainfall overlay and the WEIR_COEFF attribute of the GeoJSON to the WEIR_COEFFICIENT attribute of the rainfall overlay.
- At Finalize we press Finish to upload the areas to the server
Take some time to review the attribute values. What is the meaning?