How to add your project's WMS in QGIS: Difference between revisions
Jump to navigation
Jump to search
No edit summary |
No edit summary |
||
| Line 14: | Line 14: | ||
File:Buurten_wms.JPG|A {{software}} Overlay added to QGIS | File:Buurten_wms.JPG|A {{software}} Overlay added to QGIS | ||
</gallery> | </gallery> | ||
{{article end | |||
| seealso= | |||
* [[GeoShare]] | |||
* [[GeoShare Viewer]] | |||
* [[Grid Overlay]] | |||
* [[WMS Overlay]] | |||
* [[WMS]] | |||
| howtos= | |||
* [[How to add your project's WMS in ArcMap]] | |||
* [[How to add your project's WMS in ArcGIS Pro]] | |||
}} | |||
[[Category:How-to's]][[Category:WMS]] | [[Category:How-to's]][[Category:WMS]] | ||
Revision as of 16:17, 31 January 2023
For the steps on how to use a WMS in QGIS, please see 'Loading a WMS Layer', which is part of the QGIS documentation.
https://docs.qgis.org/3.4/en/docs/training_manual/online_resources/wms.html?highlight=wms
The steps about the Coordinate Reference System may be skipped.
Also notice that you can select multiple layers to add at once to your QGIS Project.
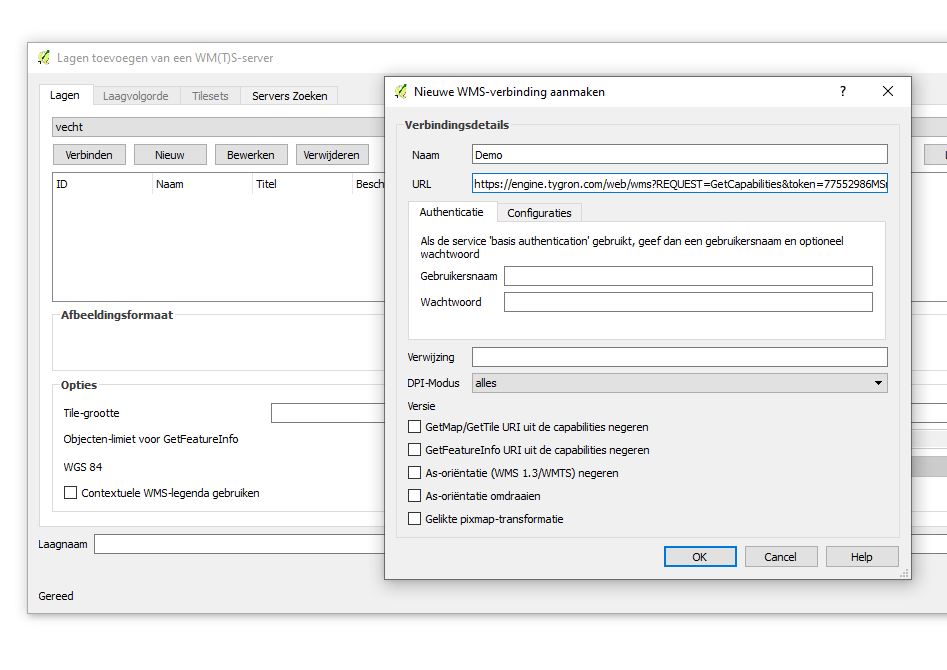
Add the name and WMS URL
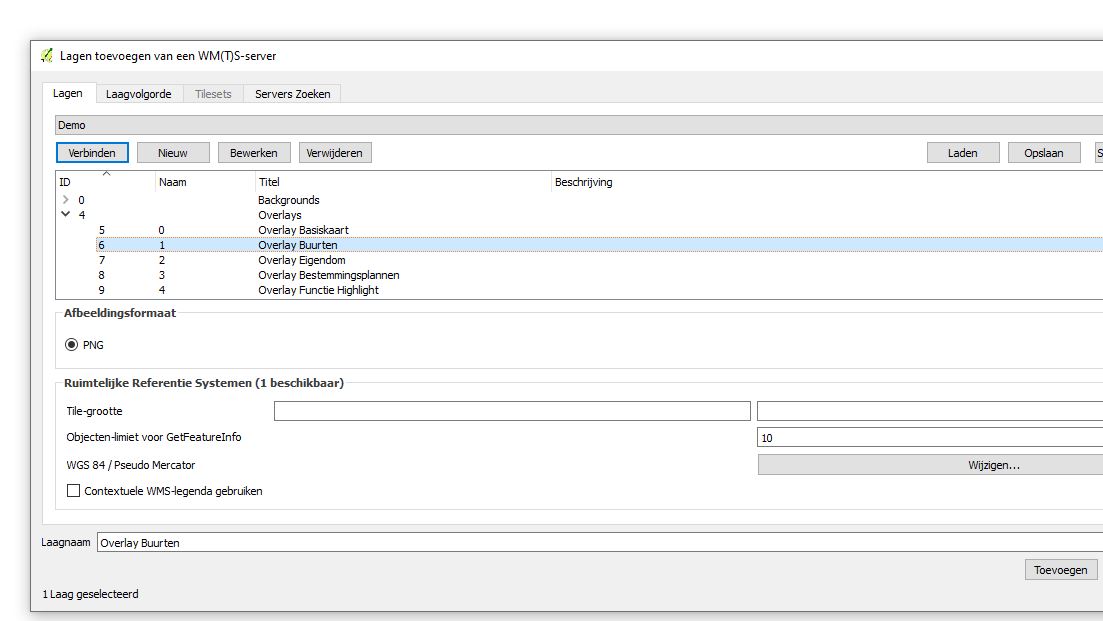
Select the layers you want to add to your QGIS Project
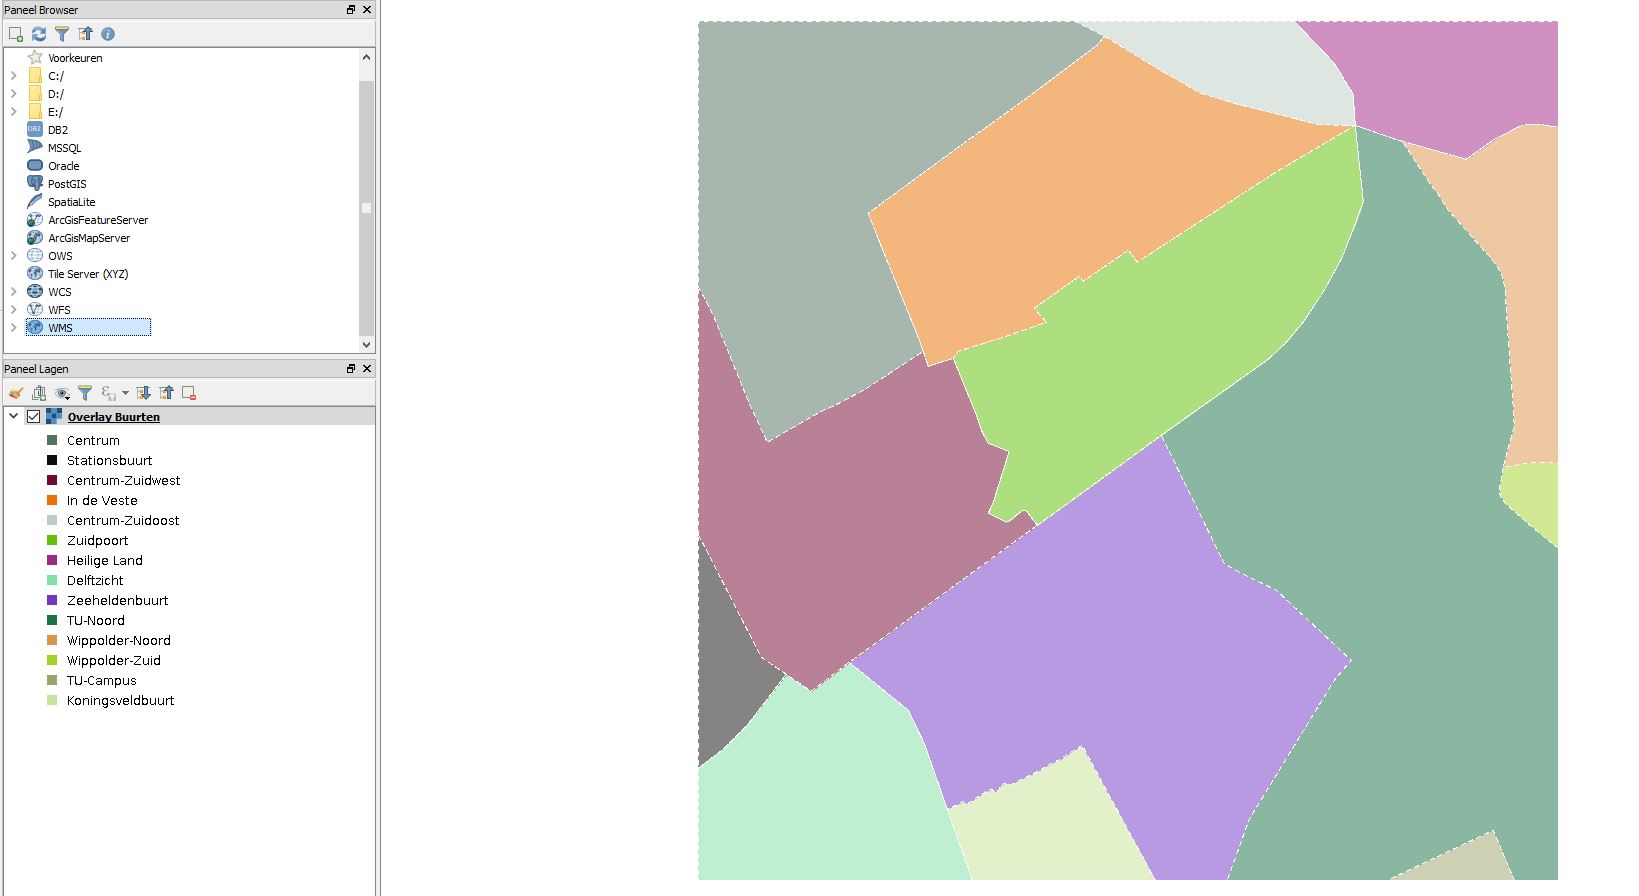
A Tygron Platform Overlay added to QGIS


