Handout Watershed Module
Revision as of 14:16, 9 June 2021 by Godelief@tygron.com (talk | contribs)
This handout can be used for an advanced water training course.
How to use: Advise is to print this handout and use it during a training to take notes on. Afterwards, you will have an overview of what you have learned during the training.
Note: This handout is not a complete standalone tutorial but provides an overview of what you have learned during a training. To learn more about the Watershed Module, see the Demo Watershed Project.
The subjects in this hand out are:
- Add and configure a Rainfall Overlay
- Setup the Watershed Overlay
- Export results
Open project
- Log in wih your username and password on the LTS
- Click on Edit project and choose the Demo Watershed project. Choose your preferred language.
Remove overlays
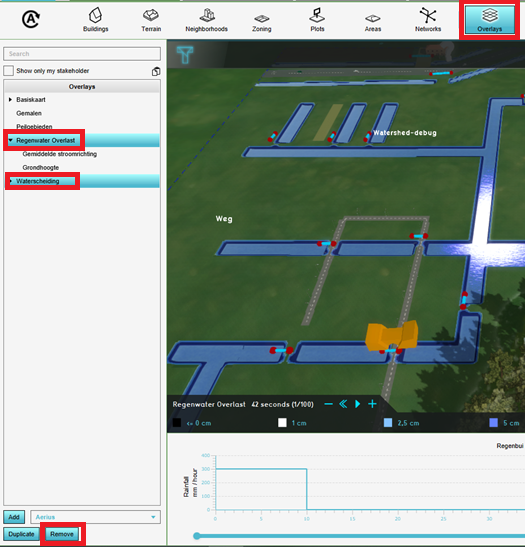
- In the Current Situation tab, click on the button Overlays
- From the left panel, select the Rainfall overlay and click on the Remove button in the bottom left corner.
- Also remove the Watershed Overlay.
Add the Rainfall Overlay
- In the Current Situation tab, hover over the Overlay button and add from the Water category the Rainfall Overlay.
- In the left panel, notice that the Rainfall Overlay is added to the project.
- Select in the left panel the Rainfall Overlay and click in the right panel on the Configuration wizard. In the following steps this Water Overlay Wizard will be completed to configure settings.
Configure Rainfall Overlay
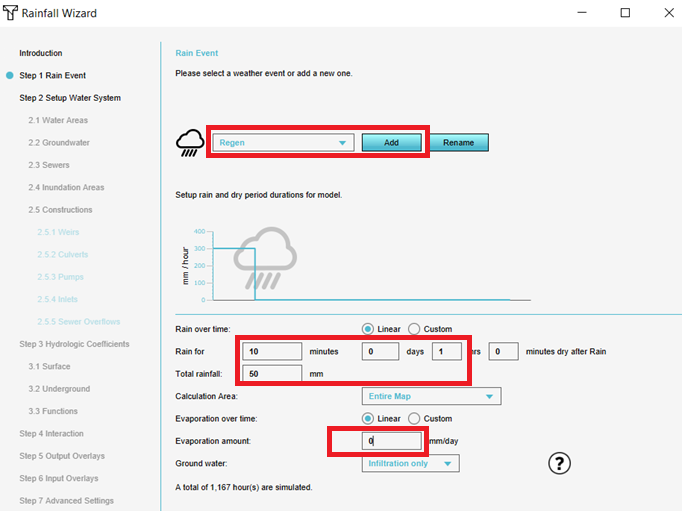
- In step 1 of the Rainfall Wizard, click on Add to add a new rainfall.
- Configure the Rainfall as can be seen in the image below:
- Click on Next until you are at step 5. Notice that the culverts are already imported (in step 2).
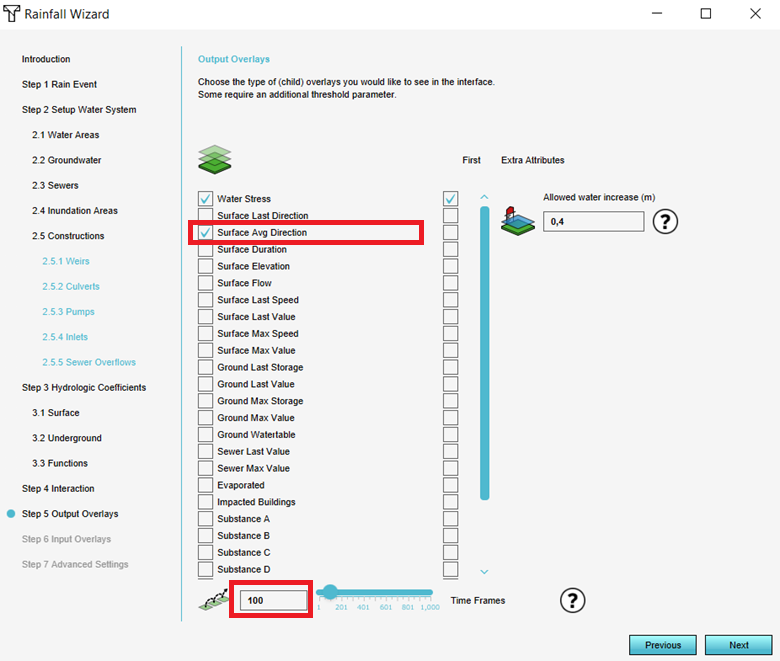
- In step 5, check the Surface AVG Direction type (the average direction result type).
- In step 5.1 set the number of timeframes to 100.
- Click on Next until the wizard is Finished. The Rainfall Overlay is now being calculated.
- Play the Rainfall overlay by clicking on the play button in the legend bar, you will see the water on the surface. Also take a look at the average direction result type. Remember from which timeframe the flow direction remains approximately the same.
Add the Watershed Overlay
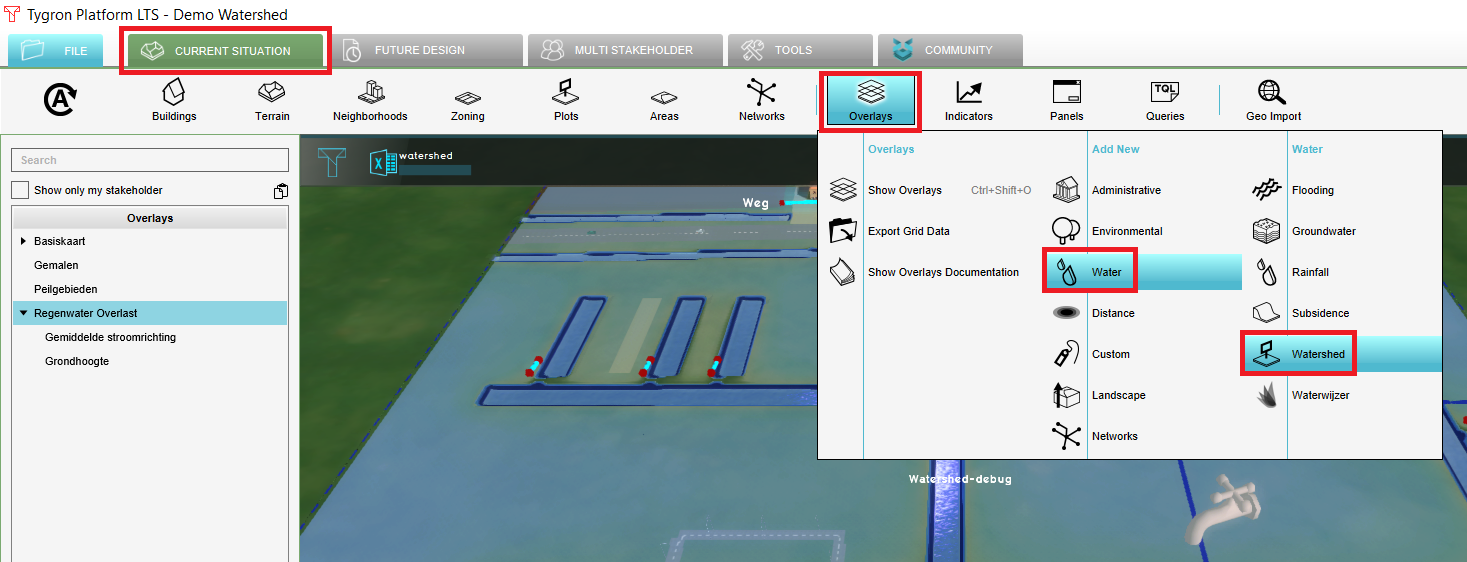
- In the Current Situation tab, hover over the Overlay button and add from the Water category the Watershed Overlay.
- In the left panel, notice that the Watershed Overlay is added to the project.
- Select the Watershed Overlay and click in the right panel on Configuration Wizard. In the following steps the Watershed Overlay will be configured.


