Basic Mode: Difference between revisions
Jump to navigation
Jump to search
mNo edit summary |
No edit summary |
||
| Line 22: | Line 22: | ||
{{article end | {{article end | ||
|howtos= | |||
* [[How to create a Basic Mode Project]] | |||
|seealso= | |seealso= | ||
*[[New Project Wizard]] | * [[New Project Wizard]] | ||
}} | }} | ||
[[Category:Project Metadata]] | [[Category:Project Metadata]] | ||
Revision as of 13:44, 2 October 2023
This functionality is currently in BETA and only available with a Strategic Partnership.
Read more about Beta features.
Read more about Beta features.
The Basic Mode can be useful for very large areas such as for regional analyses.
- Basic Mode is selected during project creation, and enables very large projects with a medium (5m grid) map.
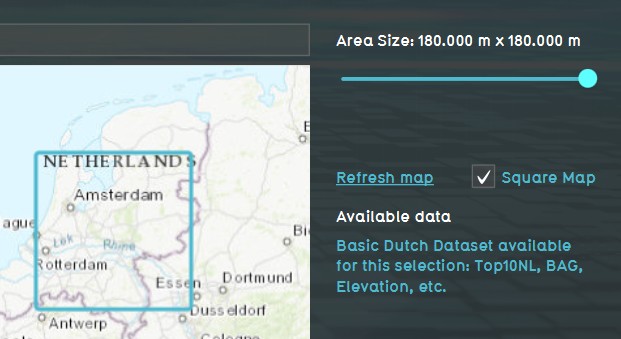
- The maximum size of the basic mode is pending on your license agreement and hardware. If you can normally create 30x30 km projects, you can create a 180x180km project in Basic Mode.
- The size (km2) of a Basic Mode project counts for 1/25 in your license.
- Calculation grid size is set to 5x5m minimum, but larger grid sizes (10x10m, 20x20m, etc) can be selected.
- The Digital Elevation Model (DTM) is set to 10x10m in Basic Mode.
- To limit the high amount of polygons present in a Basic Mode project, BGT data and custom 3D models (such as 3DBAG and CityGML/i3s) will not be available when creating a new project.
- All buildings starting from 10m2 are included in Basic Mode
How to use Basic Mode?
How to use Basic Mode:
- Log in to client.
- Select new project in the Main Menu.
- After naming your project, select Basic for Detail Level.
- Use the Map Wizard to select the Basic Mode map size and location of your project.


