Attribute: Difference between revisions
No edit summary |
No edit summary |
||
| Line 11: | Line 11: | ||
When you want to make use of an attribute in an [[Excel (Indicator)|Excel indicator]] you need to specify in the spreadsheet if the attribute is included int the calculation or not. This is done by the ACTIVE attribute. For the ACTIVE attribute the input is always 1 for active and 0 for not active. | When you want to make use of an attribute in an [[Excel (Indicator)|Excel indicator]] you need to specify in the spreadsheet if the attribute is included int the calculation or not. This is done by the ACTIVE attribute. For the ACTIVE attribute the input is always 1 for active and 0 for not active. | ||
==How to | ==How to create and edit attributes== | ||
Attributes can be added for [[Neighborhoods|neighborhoods]], [[Areas|areas]], [[Constructions|constructions]] and [[Zones|zones]]. In order to add an attribute for one of these Engine assets you need to first open the panel of the particular asset. | |||
[[File:Attribute_add.png|framed|left|The left panel allows you to add, remove and select zones]] | |||
[[File: | |||
: To add new zones to the 3D world, open the Zoning panel in the editor. In the left panel, select "Add". A new zone will appear in the list of zones. Please note that this is still an "empty" zone, since no actual area is assigned yet. | : To add new zones to the 3D world, open the Zoning panel in the editor. In the left panel, select "Add". A new zone will appear in the list of zones. Please note that this is still an "empty" zone, since no actual area is assigned yet. | ||
: To remove a zone from the list, select the zone that you wish to remove, and select "Remove". | : To remove a zone from the list, select the zone that you wish to remove, and select "Remove". | ||
Revision as of 12:40, 3 August 2016
What is an Attribute?
An attribute is a characteristic of a particular component in the 3D world like an areas or a construction. An attribute is always a number and can have a positive or a negative value.
Attributes in relation to the Tygron Engine
Attributes contain information about a particular component which can be used in Excel calculations. When used in a calculation or as part of an event, the value of the attribute can be changed. The attributes and the value at the starting point of the project are added by default and can be added manually as well. It is also possible that some attributes are imported as a GeoJSON file as part of data about areas. The Engine assets where attributes are applied to are: neighborhoods, areas, constructions and zones.
The attribute is always described as number value. When the attribute is not given as a number the outcome of a calculation will be zero. But it is also possible that the legit outcome of a calculation is zero. Therefor, when the outcome is zero it can be wise to check the spreadsheet for errors.
When you want to make use of an attribute in an Excel indicator you need to specify in the spreadsheet if the attribute is included int the calculation or not. This is done by the ACTIVE attribute. For the ACTIVE attribute the input is always 1 for active and 0 for not active.
How to create and edit attributes
Attributes can be added for neighborhoods, areas, constructions and zones. In order to add an attribute for one of these Engine assets you need to first open the panel of the particular asset.
- To add new zones to the 3D world, open the Zoning panel in the editor. In the left panel, select "Add". A new zone will appear in the list of zones. Please note that this is still an "empty" zone, since no actual area is assigned yet.
- To remove a zone from the list, select the zone that you wish to remove, and select "Remove".
- Open the Zoning panel
- Select "Add".
- Open the Zoning panel
- Select the zone you wish to remove.
- Select "Remove"
Editing attributes
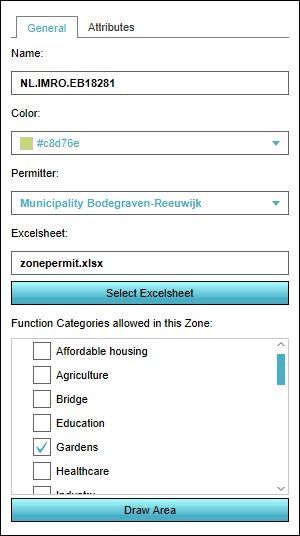
When a zone has been selected in the left panel, the properties of that zone can be edited in the right panel.
Name
- The "Name" field is where the name of a zone can be changed. The name of a zone can be seen on the zoning overlay. By entering a new name in the "Name" field, the zone can be given a more identifying name.
Color
- The color selector allows the zone color to be edited. The zone Color can be seen in the zoning overlay. The zone color is used for assigning different colors to different zones, to help users to distinguish the defined zones. By selecting the "Color" field, a new panel opens, in which a new identification color for the highlighted zone can be selected.
Add new Attribute with Name
- The description field is for describing the selected zone. Here a short text describing the zone can be entered.
Add new Attribute with Value
- The floors field allows the maximum amount of floors to be set for the zone. This is commonly used to influence the skyline, population density and other urban planning issues. In a densely populated big city, having higher buildings helps creating living and working spaces for the inhabitants. In rural areas or outskirts, preservation of a more natural skyline might be desired.
Reset variables
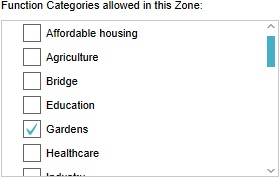
- Adding an allowed function category to a zone enables stakeholders to plan constructions of that category function inside the zone. To add a function category to a zone, check the checkbox next to the desired category. To disallow a function category, make sure the checkbox next to the desired category is unchecked.

