How to import discharge areas: Difference between revisions
Jump to navigation
Jump to search
No edit summary |
No edit summary |
||
| Line 1: | Line 1: | ||
{{ | {{howto|title= | ||
|Add the [[Watershed Overlay]] and open the Configuration wizard from the right panel. | |Add the [[Watershed Overlay]] and open the Configuration wizard from the right panel. | ||
|In step 2, choose the option Specified [[Discharge_area_(Watershed_Overlay)|Discharge areas]] | |In step 2, choose the option Specified [[Discharge_area_(Watershed_Overlay)|Discharge areas]] | ||
Latest revision as of 09:52, 18 November 2026
How to import discharge areas:
- Add the Watershed Overlay and open the Configuration wizard from the right panel.
- In step 2, choose the option Specified Discharge areas
- In step 2.1, select the first option to Import discharge areas and click on the blue Import button
- Proceed by following the steps as stated on the Geo Data Wizard page.
- In the last step, select the attribute name that represents the Overlay key for the Discharge areas.
-
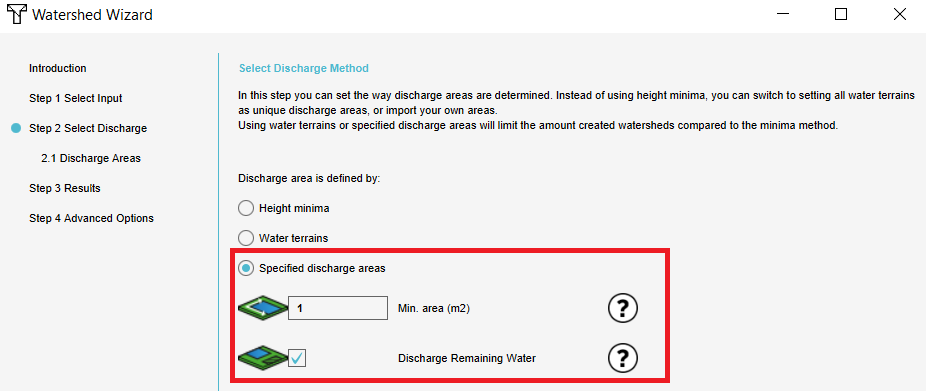 Select the third option and fill in the parameters.
-
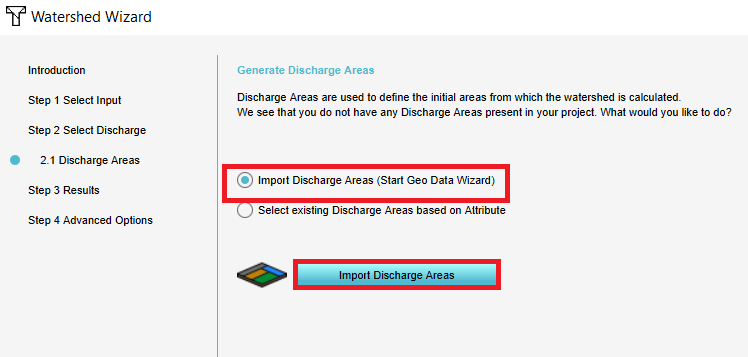 3. Select the first option and click on Import.
-
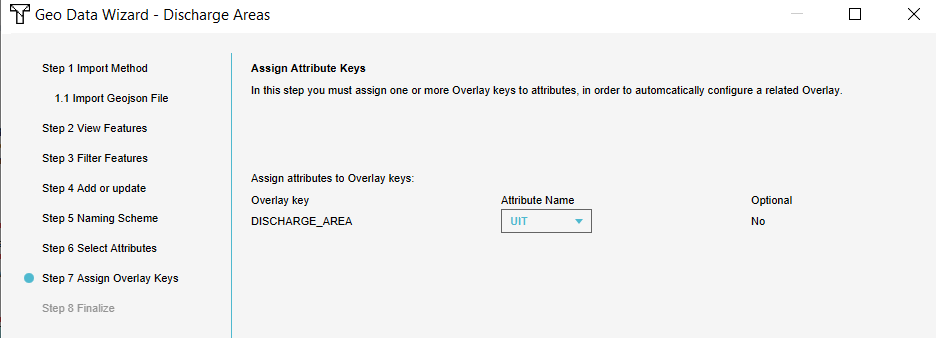 5. Connect the attribute to the Overlay key.


