How to import discharge areas: Difference between revisions
Jump to navigation
Jump to search
(Created page with "{{Editor steps|title= |Add the Watershed Overlay and open the Configuration wizard from the right panel. |In step 2, choose the option Specified Discharge_area_(Watershe...") |
No edit summary |
||
| (One intermediate revision by one other user not shown) | |||
| Line 12: | Line 12: | ||
</gallery> | </gallery> | ||
{{article end | |||
|seealso= | |||
* [[Discharge_area_(Watershed_Overlay)|Discharge areas]] | * [[Discharge_area_(Watershed_Overlay)|Discharge areas]] | ||
* [[Watershed Module overview]] | * [[Watershed Module overview]] | ||
}} | |||
[[Category:How-to's]] | |||
Latest revision as of 15:26, 30 January 2024
How to import discharge areas:
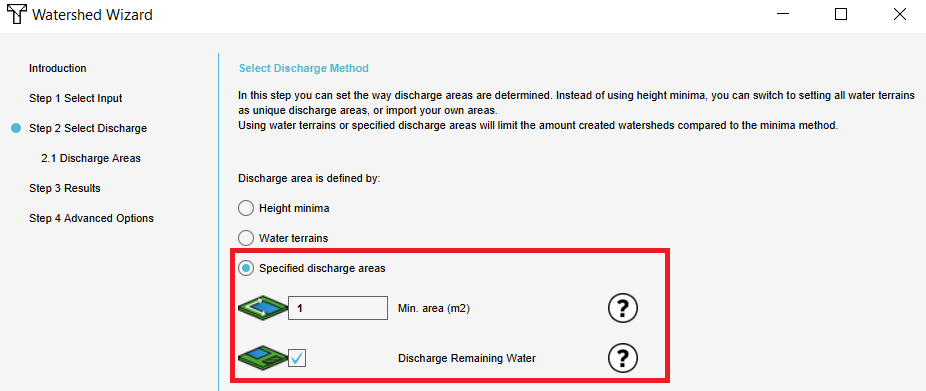
- Add the Watershed Overlay and open the Configuration wizard from the right panel.
- In step 2, choose the option Specified Discharge areas
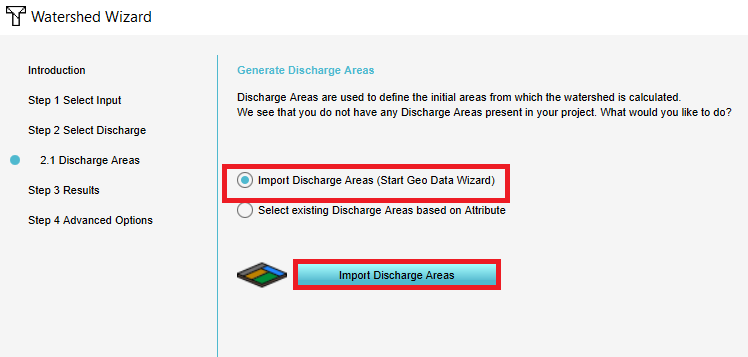
- In step 2.1, select the first option to Import discharge areas and click on the blue Import button
- Proceed by following the steps as stated on the Geo Data Wizard page.
- In the last stap, select the attribute name that represent the Overlay key for the Dischare areas.
5. Connect the attribute to the Overlay key.

