How to update an existing GeoTIFF: Difference between revisions
Jump to navigation
Jump to search
No edit summary |
No edit summary |
||
| Line 3: | Line 3: | ||
{{editor steps|title=update an existing GeoTIFF | {{editor steps|title=update an existing GeoTIFF | ||
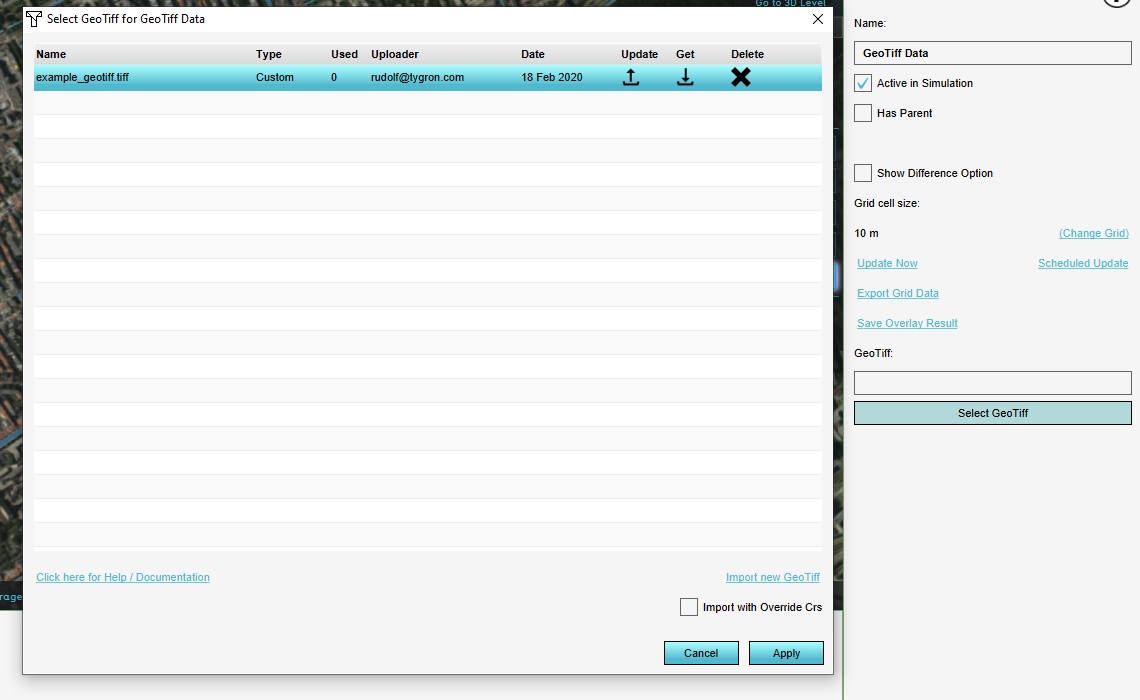
|Select any component with a GeoTIFF, and opt to select a GeoTIFF to open the [[ | |Select any component with a GeoTIFF, and opt to select a GeoTIFF to open the [[GeoTIFF Manager]]. | ||
|For the GeoTIFF you wish to update, select the "update" icon, and select the GeoTiff file you wish to update the existing file with. | |For the GeoTIFF you wish to update, select the "update" icon, and select the GeoTiff file you wish to update the existing file with. | ||
|The GeoTIFF file is now updated. Close the GeoTIFF Manager by selecting "Cancel". | |The GeoTIFF file is now updated. Close the GeoTIFF Manager by selecting "Cancel". | ||
Revision as of 12:09, 17 January 2022
For some components in the Tygron Platform a GeoTIFF can be selected as data. All components referencing that data will keep a link to the selected GeoTIFF. The GeoTIFF can be updated in-place, which will cause all components with a link to it to use the new data.
How to update an existing GeoTIFF:
- Select any component with a GeoTIFF, and opt to select a GeoTIFF to open the GeoTIFF Manager.
- For the GeoTIFF you wish to update, select the "update" icon, and select the GeoTiff file you wish to update the existing file with.
- The GeoTIFF file is now updated. Close the GeoTIFF Manager by selecting "Cancel".
Notes
- Using "Cancel" when updating data is recommended, to prevent accidentally applying a GeoTIFF to the component used to open the GeoTIFF Manager.
