How to import a 3D model in ArcGIS Pro: Difference between revisions
Jump to navigation
Jump to search
No edit summary |
No edit summary |
||
| Line 5: | Line 5: | ||
*FLT (OpenFlight) Used in MultiGen Creator. | *FLT (OpenFlight) Used in MultiGen Creator. | ||
*WRL (Virtual Reality Modeling Language File) A VRML file format for representing 3D vector graphics. | *WRL (Virtual Reality Modeling Language File) A VRML file format for representing 3D vector graphics. | ||
See | See the steps below: | ||
{{editor steps|title=import 3D files in ArcGIS Pro|In ArcGIS Pro go to the "Analysis" Tab and select "Tools".|On the right pane select the "Import 3D Files" tool or type it in the search bar to find it.|In the "Input files" field click on the folder icon next to the field and browse to the 3D file you want to import|A name will be automatically generated in the "Output Multipatch Feature Class" field.|Select a Coordinate system from the dropdown menu or select an other system by clicking on the grid sphere icon next to the field.|Select "Y is Up" only if your 3d model was exported from a package wich uses Z is up.|Click on "Run" at the lower right of the pane.|After it is finished ArcGIS Pro will have created a Multipatch feature which can be located on the Contents Pane on the left. Note that your original 3D imported file is also present, but if you want to create a [[I3S|SLPK file]] use the multipatch layer for further conversion to SLPK.}} | {{editor steps|title=import 3D files in ArcGIS Pro|In ArcGIS Pro go to the "Analysis" Tab and select "Tools".|On the right pane select the "Import 3D Files" tool or type it in the search bar to find it.|In the "Input files" field click on the folder icon next to the field and browse to the 3D file you want to import|A name will be automatically generated in the "Output Multipatch Feature Class" field.|Select a Coordinate system from the dropdown menu or select an other system by clicking on the grid sphere icon next to the field.|Select "Y is Up" only if your 3d model was exported from a package wich uses Z is up.|Click on "Run" at the lower right of the pane.|After it is finished ArcGIS Pro will have created a Multipatch feature which can be located on the Contents Pane on the left. Note that your original 3D imported file is also present, but if you want to create a [[I3S|SLPK file]] use the multipatch layer for further conversion to SLPK.}} | ||
Revision as of 13:11, 25 February 2020
With the Import 3D Files tool in ArcGIS Pro, the following file formats can be imported:
- OBJ (Wavefront object) Used in most 3D animation packages like Autodesk 3dsmax and Maya.
- DAE (Collada) Used in most 3D animation packages like Autodesk 3dsmax and Maya.
- 3DS (3D studio) Used as an exported file from Autodesk 3dsmax.
- FLT (OpenFlight) Used in MultiGen Creator.
- WRL (Virtual Reality Modeling Language File) A VRML file format for representing 3D vector graphics.
See the steps below:
How to import 3D files in ArcGIS Pro:
- In ArcGIS Pro go to the "Analysis" Tab and select "Tools".
- On the right pane select the "Import 3D Files" tool or type it in the search bar to find it.
- In the "Input files" field click on the folder icon next to the field and browse to the 3D file you want to import
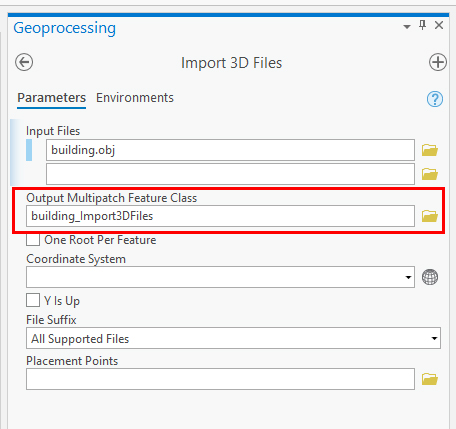
- A name will be automatically generated in the "Output Multipatch Feature Class" field.
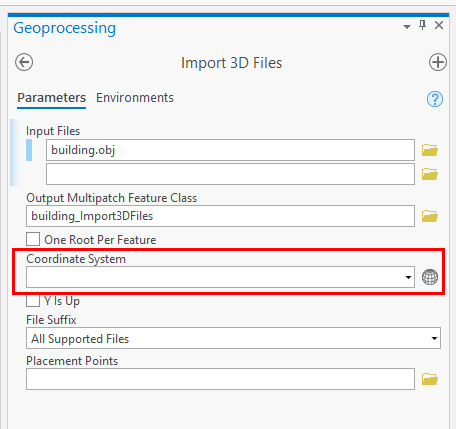
- Select a Coordinate system from the dropdown menu or select an other system by clicking on the grid sphere icon next to the field.
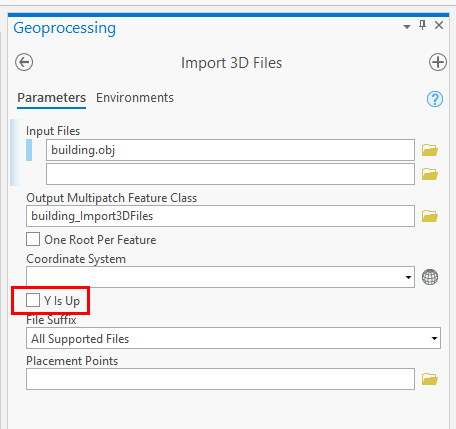
- Select "Y is Up" only if your 3d model was exported from a package wich uses Z is up.
- Click on "Run" at the lower right of the pane.
- After it is finished ArcGIS Pro will have created a Multipatch feature which can be located on the Contents Pane on the left. Note that your original 3D imported file is also present, but if you want to create a SLPK file use the multipatch layer for further conversion to SLPK.
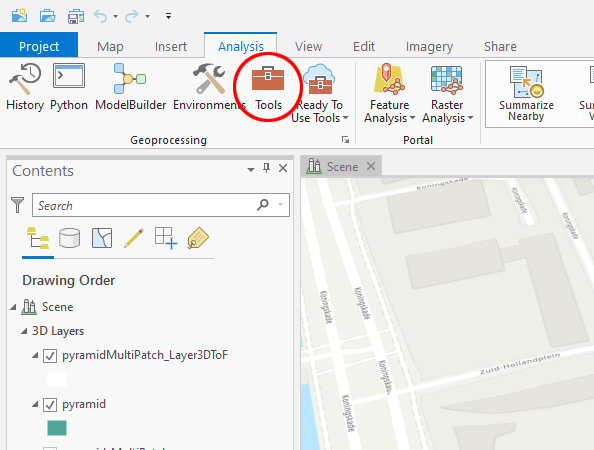
Step 1
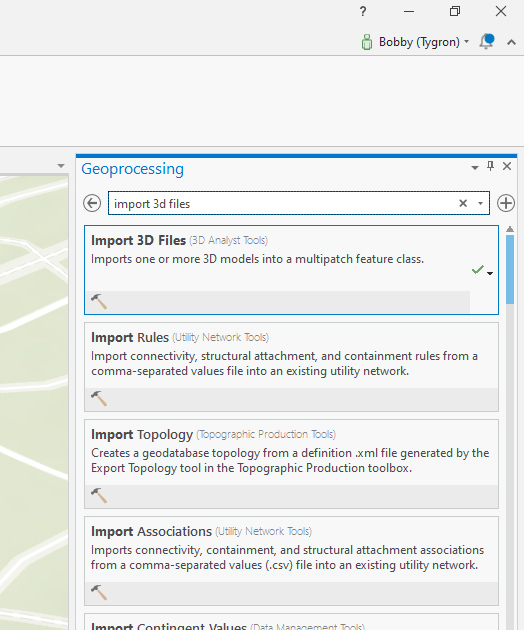
Step 2
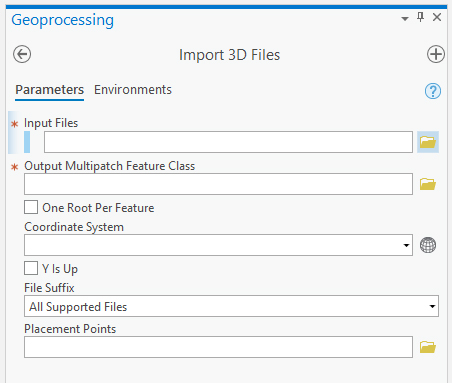
Step 3a
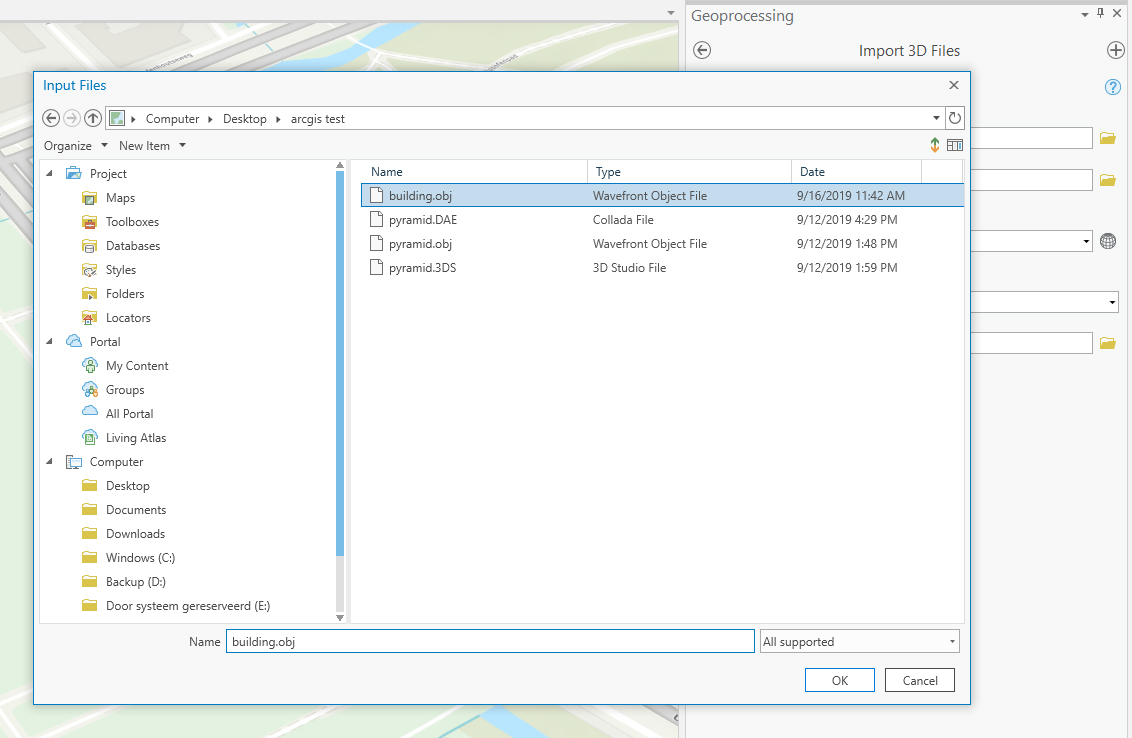
Step 3b
Step 4
Step 5
Step 6


